RON HAZELTON:
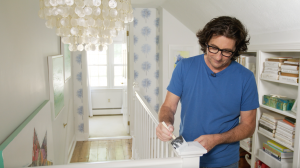
You know when it comes to home improvement priorities, it seems to me sometimes that men are from earth and women are from, well some place else in the universe. Okay, I know I'm stereotyping but I have to say my personal experience with our own home does bear this out. Now we haven't even moved into this house yet and while I'm concerned about getting up the child gates, my wife Lynn is already deep into remodeling plans. So deep in fact that she's called in local architect Pat Miller who's done several remodeling projects around here.
Pat's mission? To hear Lynn out on her feelings about our yet to be lived in home.
LYNN:
When you turn here, this is the sneaky thing. You turn, you turn, you turn -
RON HAZELTON:
It's a hallway.
LYNN:
And then you're turning again and the - it's just like, it needs to be more spacious.
PAT:
I think this is a small doorway. If this was open to your dining room, just a bigger opening -
LYNN:
We just need this bigger.
PAT:
Yeah. To here. You would feel like the room extends from one, one space -
[BOTH SPEAK AT ONCE]
PAT:
Right. You don't need this.
LYNN:
Can we do that Ron?
RON HAZELTON:
What?
[LAUGHTER]
LYNN:
He's numb, he's numb.
RON HAZELTON:
Now Pat the architect has said I can create a whole new spacious feeling in this hallway here if I'll just widen this doorway, this entry to the dining room. Now she's also said I can create a spacious new feeling in the kitchen by knocking out the rear wall of the house. And given those two choices, I think I'm gonna choose widening this doorway. I'm gonna start by taking off this door casing right here. And because it was just painted, regrettably so and caulked, I want to cut through the caulk and paint right here where the casing meets the door jamb.
Cut down this side. Next, I drive in a wide putty knife to protect the drywalls as i loosen the trim with a curved pry bar. Now I'm about to deface my home by cutting a great big hole in my wallboard here. But I haVe a couple of concerns.
One is I'm almost certain that there's a water pipe in here that's supplying this fire sprinkler head up here. And then if you look around here on the other side of the doorway, you'll see that there's a switch right here. So I've probably got both pipes and electrical wires in here. So before I do anything drastic, I'm gonna cut a little inspection hole. Using a small piece of wood as a template, I outline the inspection hole and cut it out using a drywall saw held at an angle. IN a moment I'll explain why I'm making the angled cut.
Well from here, this hole looks pretty clear. But I don't trust what I can't see. So I'm gonna kind of play dentist here for a second and put this mirror in. And look around. And aha, you see that orange pipe over there. That's the sprinkler pipe.
There's the electrical box and the armored conduit. So at least I know where these are now and I can be careful as I cut out a bigger hole. Now remember I cut that bevel on the edge of the inspection hole. That's because if I had decided after looking in here, I didn't want to go forward, I could use this as a patch. And the bevel would keep this from falling through inside the wall. I could simply cement it in place with some joint compound. NOw partly because I've got some wires and some pipe in here and partly because I just love tools, I'm gonna use this rotary cutting tool to actually cut out the wallboard.
Now this orange pipe is the fire sprinkler system for the house. I deactivated it and I'm gonna cut it and take it out. Well we've got this side of the wall pretty well opened up right now. So let's move into the dining room and do some work in here.
Before I can take down the wallboard on this side, I have to remove the chair rail. Again the putty knife, prybar combination allows me to take off the wood trim without damage.
With the trim off, I can begin removing the wallboard from this side of the wall. Well there's no turning back now. Now the demolition can move on to the framing. The first step is to cut the nails attaching the doorframe, using a reciprocating saw.
I've decided to remove this overhead light switch since there's a duplicate just a few feet away. To remove the studs, I cut through the nails at the bottom, then pull the stud free. Next, I detach the old llight switch box.
The power has already been turned off. Now I can deactivate the circuit. My Japanese hand saw allows me to cut through the base plate without damaging the floor. Then it's just a matter of prying it up.
Well now I'm beginning to wonder if maybe this opening isn't too large. So I'm gonna come up with some way to kind of adjust the size of it so Lynn and I can take a look at it to decide if we in fact want it this wide or maybe something in between this and what we had.
So then what I've done is made up a full sized mockup of the wall all right. Let's put it here in place about where we started which was something like this.
LYNN:
Now I think - I think definitely that's too close. That's better. Just a little bit more over to - towards the kitchen.
PAT:
No, I think a little bit wider than that. A little bit more wider. You know I think that looks good Ron. I think you should come take a look though, just to get your impression as well.
RON HAZELTON:
Well it kind of is on the same plane as this wall right here.
PAT:
Yeah.
RON HAZELTON:
Yeah. I think that's gonna work.
PAT:
Yeah I think - you know you have that open feeling but it still has definition to the room where the entryway is.
RON HAZELTON:
Okay. Well like Pat said - okay, let's do it. A quick trip for some lumber and we're all set to start building. Get to work - come on.
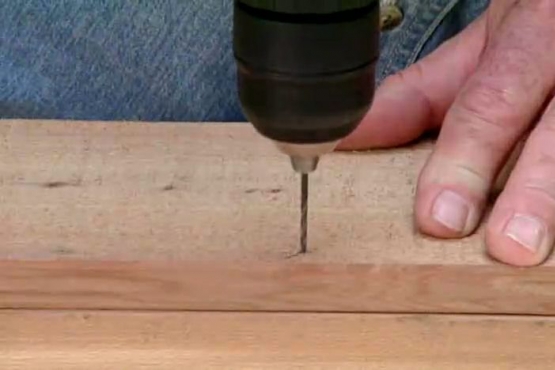
I've taken some wall studs out. Now I need to put a couple back. This shorter one called a jack stud will support the end of the new header that I'm making up by nailing two by fours together. The ends of the header are attached in place with screws driven in at an angle.
A process called toe nailing. These short stud pieces known as cripple studs distribute weight over the header and provide a nailing surface for the wallboard. Well that takes care of the framing. I'd say it's time to button things up.
I cut the drywall to size, fit it into place and attach it with screws. Well our wallboard is up. Now I'm gonna turn my attention to covering these studs right here with solid pieces of wooden jamb. The top jamb piece goes up first.
Then the sides. To make the side jambs perfectly straight and vertical, I insert pairs of shims every couple of feet. Then nail through the shims and into the two by four framing. With everything nailed in place, I cut off the protruding shims with a small Japanese hand saw.
Now in the same way that I used the door jamb to cover up the side of the two by four framing, I'm now gonna use this casing to cover up the edge of the wallboard here. And conceal that joint. The [ ? ] miter saw cuts 45 degree angles on the ends.
Then the trim is set in position and nailed in place. We're pretty much finished with our wood trim except we're putting back the trim that I took off earlier. Do still have to deal with this joint right here where we put in this piece of wallboard.
So let's take care of that right now. This is -
First I apply what I call a bedding coat of joint compound. Then I wet the paper tape, la it across the joint where the pieces of wallboard meet. And finally press the tape firmly into the compound. The trick here is to hold the knife at a low angle.
Well about all I have left to do is finish filling these nail holes, put on a coat of paint, put back on that molding that I took off earlier and of course get my wife's approval. What do you think?
LYNN:
I think it looks great. I think we really achieved what we were trying to. We definitely have that much more open feeling in this hallway. Where we don't feel like we're hitting a wall. And yet the dining room still has its own entry way.
I think you did a great job.


