RON HAZELTON:
Our basement was partially finished when we moved into the house several years ago and quite honestly, well, there's nothing wrong with it except that several times a year, it gets wet. The carpet gets soaked and I've been concerned that there could be some mold behind these wall panels.
So the time has come to do something about it. Last year, Larry Jenesky, the founder of Basement Systems, helped me solve a similar problem on the unfinished side of my basement. His company installed a perimeter drain system, a sump equipped with multiple pumps and a drain line to carry the recovered water outside.
Now when it rains, any water coming through the basement walls is collected and pumped outdoors. I've called Larry back because in addition to being an expert in keeping basements dry, he's also an authority on what it takes to build living spaces below ground.
LARRY JENESKY:
Clearly, you know, you can't even think about finishing or refinishing a basement without taking care of the basement water problem. And basement space is different than upstairs space. We have moisture from water vapor coming through the walls, or water vapor coming through the floors.
And you know, even if we fix a ground water problem 100 percent, a basement is like, it's like a pit underneath the house and the house has a plumbing system. If there's ever a leak in any of the piping system in this house —second floor or first floor, that water's gonna wind up on this basement floor.
Mold grows on wet organic material. People see mold these days and you know, it's, it's a big deal. So what we need to do is use no organic materials.
RON HAZELTON:
Okay, rule number one, avoid organic materials. Next, our discussion turns to the ceiling.
I mean it, it's typical with what probably was done again, 20 years ago but what's really bothered me about this ceiling is that these tiles seem to sag in the center. The whole thing looks like it's kind of fallen apart.
RON HAZELTON:
Well, Larry's got a plan and I like the sound of it. He also has an idea for upgrading our basement windows.
LARRY JENESKY:
You won't have the mud and the weeds and the leaves and it will bounce a lot more light into the basement because it has a, a white colored bottom. So as the sunlight comes down, it bounces off the bottom and bounces into the basement off the ceiling.
RON HAZELTON:
Ah, and finally that floor that's always getting soggy.
LARRY JENESKY:
I don't recommend carpet in a basement because it's a sponge. When it gets wet from a plumbing leak, you know, mold can grow underneath it. The floor is a very important surface in, in the basement because it's the one you're in contact with most.
So you feel the cold and if you do have any kind of leak, of course the water settles on the floor, it doesn't settle on the ceiling or the walls, it settles on the floor.
RON HAZELTON:
Now, if somebody else in my position who's thinking about finishing or refinishing their basement, you know, what kind of bottom line advice would you give?
LARRY JENESKY:
You need to use all inorganic materials so that if your basement floods, nothing gets ruined and you never have to do it again. This basement was finished about oh, 20 years ago and here we are, doing it over because we're not happy with it.
RON HAZELTON:
Walls, windows, floor and ceiling. They've all got to go if I want a finished room down here that will be every bit as comfortable and nice looking as the rest of the house. The first thing to come down is the suspended ceiling. The bowed and sagging panels just lift out of the framework, although some are more stubborn than others.
The cross pieces on the grid are next to go, then the wires holding the long rails are clipped, and the rails themselves taken down. The final step is prying loose the edge support that's nailed around the perimeter of the room.
Now I can start on the wall, beginning with the baseboard, then moving on to the paneling. Since the panels are only an eighth inch thick and nailed to small brads, they come away fairly easily, revealing the framing behind.
The bottom edge of this panel reveals the telltale signs of my often damp, occasionally flooded, basement. Part of the makeover down here will involve new wiring. So out comes the old. As for the framing itself, I knock out some of it with a two-pound sledge.
But for the most part, I prefer using a reciprocating saw fitted with a bimetal blade designed for cutting through embedded nails.
The last thing to remove from the walls is polyethylene sheeting that has served as a moisture barrier between the concrete walls and the wood panels. Finally, I turn my attention to the floor. The carpeting has been glued down and I'm surprised at how well it still holds, considering the number of times it's been soaked. Well, this is it, my basement's stripped back to bare concrete. A blank canvas of sorts, full of possibilities.
[SOUND CUT]
Now it's time to turn things over to the experts who will begin by solving my water intrusion problem. The crew from Basement Systems wastes no time in jackhammering away the concrete floor to create a shallow trench around the edge of the basement. [JACKHAMMER SOUNDS] Of course all that jackhammering produces a whole lot of debris which has to be carried out, bucket by bucket.
With the trench complete and the debris cleared, the next step is to cover the walls with a heavy duty pliable moisture barrier held in place with plastic anchors. Any water coming through the basement walls will be contained behind the barrier and directed downward.
A pressure-sensitive waterproof tape seals the seams. Now, plastic drain sections or collectors are set into the trench and attached together. A trench is backed through with crushed rock, topped off with concrete, leveled and troweled smooth.
Now here's how the system will keep my basement dry. Any water coming through the basement walls will be contained behind the moisture barrier and directed downward where it will enter the collector through holes in the back and bottom.
The water will then drain to an existing sump in the unfinished side of my basement, where it will be pumped outside and discharged through a surface drain. Now that the water problem has been solved, the basement finishing team can go to work in earnest.
Rather than studs and drywall, the new walls will be assembled from these three-and-a-half-inch thick prefabricated panels. The room side surface is a tough, scrubbable vinyl laminated to a ceramic concrete board which is in turn, bonded to high-density foam insulation.
All of these materials are non-organic and completely waterproof. Now I was curious just how strong these panels might be so I devised this impromptu strength test using my pickup. The results were pretty impressive.
The panels are mounted in place using a metal track system. Because most basement walls are neither flat nor vertical, a chalk line and laser level are used to lay out what amounts to a perfectly square and plumb room within a room.
Once the position lines have been established, the upper metal track is installed then a strip of fire blocking. Then the bottom track is positioned directly below it and attached with concrete screws. The prefabricated wall panels come in four by eight foot sections.
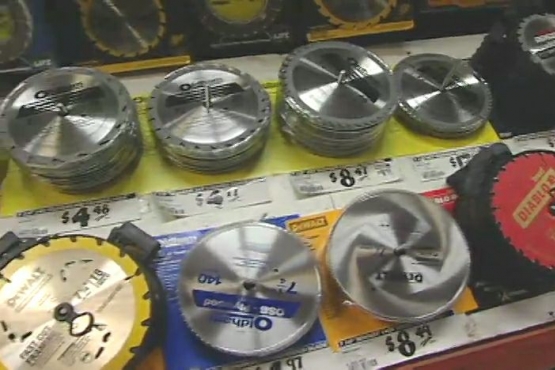
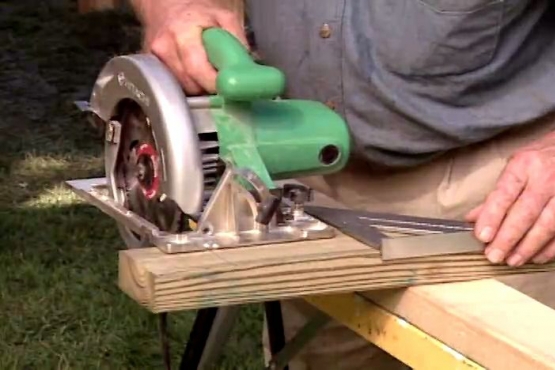
They're cut by first scoring the ceramic concrete face with a circular saw and carbide blade. Then the edge of a wide putty knife is used to cut through the rigid foam insulation. Each panel is installed by setting it on the U-shaped bottom track, sliding it into position, tilting it up until it contacts the upper L-shaped track, then screwing it into place using drywall fasteners designed for metal studs.
Next, a sheet metal brace or biscuit is driven into the edge of the panel and attached to the concrete wall. Then the edge of the next panel is forced onto the protruding flange, anchoring the panels to each other. This process is repeated at each joint, eliminating any flex and making the wall quite rigid.
While the wall work continues, a second team moves outside to tackle those problem windows. First, the soil is removed. Then the corrugated window well liner is lifted out and the hole is enlarged and reshaped. From inside, the old window is removed but the outer frame is left in place. The new vinyl frame is slipped into position, leveled, shimmed and insulated.
Back outside, a bit of patchwork is performed on the basement wall. Then the new well liner is set into place, pilot holes drilled and concrete fasteners driven in. Finally, the liner flange is caulked and the liner is backfilled.
Inside, the windows are installed. A trim frame is set into position, leveled, shimmed and attached with screws. Finally, the shims are trimmed flush.
Well, the basement's dry, the new wall panels are up and the new windows are in. Now, we still have to do the ceiling and the floor.
