How to Use a Gel Stain to Finish a Cabinet
Remove marks and blemishes before re-finishing to make an old cabinet look like new.
Use some simple wood working tricks to bring an old wood surface back to life. With great products like Minwax Gel Stain on the market, it is easier than you'd think to have old pieces of furniture, looking like new. The old towel cabinet in this project is a great example.
Read More
Clean Old Water Damage
In many cases, the black marks that you see on old or antique furniture are a result of the old steel hardware getting wet and oxidizing in the wood. These marks can be cleaned using oxalic acid. Mix the powdered compound with hot water and brush the solution on the drawer fronts until the wood is saturated. No scrubbing is required. Simply set the drawers aside to dry, and as the mixture evaporates, the marks will slowly disappear.

Sanding - The First Pass
Start the sanding process with 120 grit paper. Divide a full sheet into quarters, and then fold the quarter sheet into thirds. This is a perfect size to fit in your hand and will work well for sanding small pieces. Always make sure that you run the sandpaper with the grain of the wood and never across it. After you've sanded the entire piece, wipe it down with a clean, soft cloth to remove the dust.

Repair and Remove Scratches
Compression scratches are caused when the wood is crushed by a direct blow, rather than gouged away. To remove these types of blemishes, soak a cloth in water and then wring it out as much as you can. Place the wet cloth over the compression, and then iron it with a common household clothes iron. The steam that is created from the wet cloth will gradually reconstitute the fibers of the wood that was crushed. Repeat this process until the blemish is gone.

Sanding - The Second Pass
Now that the wood is clean and the surface has been restored, you can make the final sanding pass before applying the finish. Use 220 grit paper for this step, as it will leave a smoother surface for finishing than the 120 would. You can also use a palm or an orbital power sander for this step. For this project, Ron also decided to add some additional trim to the existing cabinet. Apply that trim before the final sanding, so that you can sand off any nail hole filler that you may add during that installation.

Use a Gel Stain for the Cabinet's Color
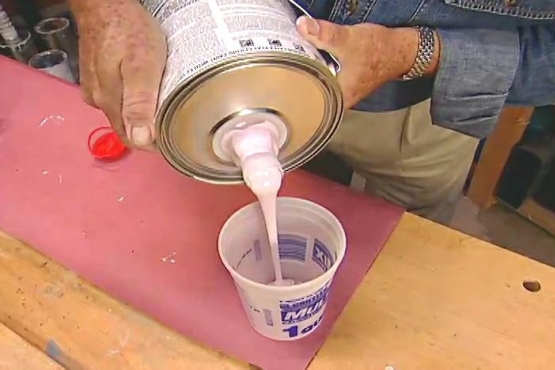
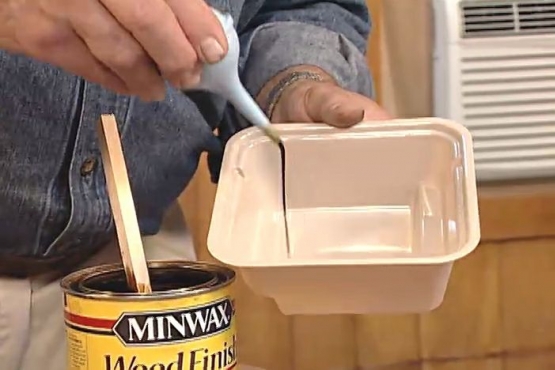
For this cabinet, Ron has chosen to use a gel stain made by Minwax. He begins by stirring the product to ensure that the color pigments are distributed evenly throughout. Next, pour the product into a plastic container, as this is easier to dip out of than the can that the product came in. Apply the stain in the direction of the wood grain. The Gel Stain is ideal for vertical surfaces like these because it won't run or drip like traditional stains.

Wipe Away the Excess Gel Stain
After a few minutes, come back with a clean cloth and wipe away the excess stain. You can control color of your final product by varying the pressure on the rag as you wipe. Obviously, the more stain you leave behind, the darker the final product will be.

Finish with an Appropriate Varnish
Since this cabinet is going to be used in the bathroom, Ron has chosen to use a spar urethane varnish that is designed for marine applications. This product will ensure that the cabinet holds up well in the humidity of the bathroom. Apply the varnish using long straight strokes in one direction. You will also want to make sure that the brush you are using is appropriate for the product.

Sand Between Coats
After about 4 hrs, lightly sand the first coat of varnish. This will help eliminate any bumps or rough patches, and will also create a good surface for the 2nd coat to grip on to. Wipe away any excess dust with a tack cloth. Most projects like this require several coats of varnish to create the quality finish that you are looking for.
Related Tips


Blog Articles

Have You Heard of Landscape Glue?
You love the rustic charm of a gravel walkway, but the constant scattering of stones across your lawn and patio can be a real headache. Whether it’s from pets, lawn mowers, or just foot traffic, it seems impossible to keep those stones in place. Sound familiar? Well, Brian shows us a simple DIY method using landscape glue to keep your gravel path looking pristine and, more importantly, in place.

How to Remove Candle Wax Drips: Two Effective Methods
Candles create a warm and inviting atmosphere, but those pesky wax drips can be a real headache. Luckily, Brian shows us a couple of effective methods to tackle this issue, and they involve two very different temperatures: hot and cold. Here, we'll explore two effective methods: one using cold and the other using heat.

Guide to Hanging on Masonry Walls
Ever wondered how to hang that picture frame or shelf on a brick or concrete wall? It can seem daunting, but with the right tools and techniques, it's a straightforward DIY project. This guide breaks down two common methods: using concrete screws and using anchors, making it easy for you to tackle your next hanging project.


