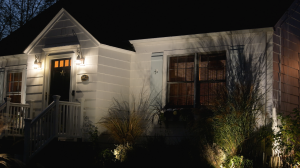
RON: Today the road to remodeling leads to Jacksonville, Florida. Home to NASJAX the US naval air station at Jacksonville and the Mayport Naval Base. Now we’ve been dispatched to the Williams family home. They’ve requested a HouseCall to fix their ailing deck on their classic Victorian style house.
RENE: Ron! Hi! What a pleasure to meet you! How are you?
RON: You must be Rene.
RENE: I am.
RON: How are you?
RENE: I’m just great. This is my daughter Scarlett.
RON: Hi Scarlett.
RENE: This is Johnny.
RON: Johnny.
JONNY: Glad to meet you Ron. Our home and our family has been waiting to see you.
RON: I’ve been waiting to get here. I understand we have an outside project. We sure do. We’re so glad you make HouseCalls. Show me the way.
RENE: It’s out back.
RENE: Ron you’ll notice the verandah is going to be flowing right out into the deck here. And we come to our first trouble spot.
RON: Oy.
SCARLETT: This is our problem area.
RON: Oy. This is pretty bad. Huh?
JONNY: It may be because of the gutter up there.
RON: Yeah. You don’t have much in the way of gutters here. That whole upper roof is just coming right down here. You see that?
JONNY: Mmmhmm.
RON: Boom. OK.
RON: The absence of gutters is certainly contributing to this problem…but we need to continue our detective work by removing the rotten deck boards.
RON: These first three rows of boards were originally put down with screws, and getting those out means getting the screws out where we could, where we couldn’t using a variety of pry bars and just rip them out.
JONNY: Alright.
RON: This board over-here is put down with nails so that’s going to require a slightly different sort of tool. Ah, and this is a nail remover and this is one of my favorites right here. If you notice the claws, they come to a very sharp point right here. And if you look at it from the side, it’s sort of wedge shaped. And here’s how you use this. Take the tip of those claws and place it right at the edge of the nail head. And then strike the back of the nail puller with a hammer (hammer taps) ...then we can just rock this back and just pull that nail right out.
RON: As soon as we pull up the first few deck boards we spot the culprit. Leaves and dirt from the overhanging canopy of oak trees have washed down and plugged the downspout. Since the rain water can’t flow down it, the water backs up, the gutters overflow onto the deck, and mold and fungus quickly rot the boards.
RON: Trimming back the trees and putting screens on the gutters will keep the leaves from clogging the down spout. But, allowing a free flowing downspout to deposit all its water underneath the deck could still spawn more mold and fungus.
RON: So to keep that from happening again, we want to raise this up, kinda create an incline so the water can drain out of here easily. We’ll do that by shortening this piece of downspout . Then adding a section here to carry the water underneath the deck and discharge it out there in the lawn.
RON: This problem has gone undetected for so long that the leaves and dirt have piled up at the base of the down spout, so deep they’re touching the deck joists providing a bridge for termites to reach the deck and even the framing of the house. A shovel and a little elbow grease from Johnny make quick work of removing it.
RON: We remove the downspout and clean out the dirt, roots and debris that have been collecting for years. Then I use my hacksaw to cut about six inches off, this will allow clearance for the elbow and for a new piece of downspout to be installed under the deck.
RON: OK, now let me just hook this right onto the end here. I reattach the downspout to the house using a sheet metal screw, and the original strapping.
Before we cover the joists with new deck boards it’s a good idea to check for rot.
RON: This is an example of some pretty bad rot right here. You see I can run the entire shaft of the screw driver into the end of this board. We’ll have to replace that. But the good news is, except for some superficial rot right here, most of these joists are in good shape and we can reuse them.
RON: Now that we’ve cleaned up the drainage problem, we can start to repair the deck. Rene takes charge by putting her family through their paces.
RENE: Perfect, good job.
RON: Using a square, Scarlett draws a line on the decking where the board will be cut.
RENE: Ok you ready? You gonna hold it for me?
SCARLETT: Yah I got it. Be careful.
RENE: Here we go.
SCARLETT: Very good!
RENE: Piece of cake!
RON: Some of the boards require a mitered end… to get the exact angle we simply trace the old board onto the new one. After I offer a few tips Rene feels confident using the sliding compound miter saw.
RON: Rene and Scarlett continue measuring and making straight cuts in the deck boards, while Johnny uses a saber saw to make curved and angled cuts to fit the boards around obstacles like conduits and rail posts.
RENE: Let’s see how good this fits.
RON: Rene and Scarlett wisely check the fit of each board before moving onto the next.
RENE: Daddy will be proud of us.
SCARLETT: Oh I bet.
RENE: Got it? Perfect!
SCARLETT: Great!
RON: Johnny also takes the time to make sure the notches he cut fit perfectly around the obstacles.
JOHNNY: That’s a good fit.
RENE: We’ve been learning as we go for the most part, you know, since we’ve always rented. The perspective is entirely different. Umm, when you’re there, suddenly you’re in charge of repairs instead of rather than maintenance man.
JOHNNY: We’ve enjoyed every minute of it and want to learn more.
SCARLETT: Almost done.
RENE: This is easier than you thought it would be huh?
SCARLETT: Yeah.
RENE: I want you to remember honey, a man may work from sun to sun, but a woman’s job is never done.
RON: Now when you’re building a new deck you usually use a consistent gap between each board. I like to use a 16 penny nail for that. But when you’re matching boards into an existing deck, like we are right here, the important thing is to match the existing gap. So, frankly, in this deck they’re all a little bit different. So we’re using shims to match the new boards with the old boards. Once we get these locked into place with shims we’ll go ahead and screw them down.
RON: With the boards shimmed, we use a pilot bit to pre-drill holes for the deck screws. Now this helps prevent the boards from splitting and recesses the screw heads.
RON: Finally… we use three inch galvanized deck screws to attach the boards to the joists below.
RON: You see how the screw moves? If the screw moves you go with it. Oh. So that this is always in alignment here. Follow the screw. Push down, lean over, lean over a bit more, bend your elbows a little bit more. That’s it. Nice. That’s it. You’ve got it. Just like that. Good. OK. Very nice. You’ve got two more here and that’s it.
RENE: Looks great Ron!
SCRARLETT: Fantastic!
JOHNNY: Yeah, thanks for your HouseCall.
RENE: This will really get us rolling.
RON: You’re welcome. Can I make a couple of suggestions?
RENE: Sure.
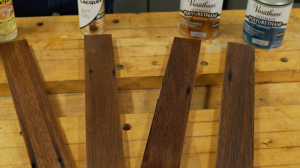
RON: Now this is a good time to use a deck wash, a deck brightener on the rest of the deck, so it will lighten it up to kind of match this. And then you’re going to have to seal this. Products like this will work great. Couple times a year, you’ve got a lot of moisture back here. But I had a lot of fun.
RENE: Please come back and see us.
RON: I’d love to. Maybe I’ll come back and we’ll have a barbie out here on this deck.
SCARLETT: Thank you so much. I learned so much.
RENE: We’ll fry a turkey or something.


