How to Install a Wire-Type Closet Organizing System
Gain Custom Designed Closet Space to Fit You and Your Belongings with a Completely Adjustable Wire Closet Organizing System
Reclaim closet space lost to disorganization and transform it into storage where you need it with a completely adjustable wire closet organizing system. First, light demolition will be required to remove the existing wooden shelves and supports and restore the wallboard to pristine condition with spackling and paint. After that, installation requires a bore, a snap, and a nip.
Read More
Empty the Closet to Receive the Wire Closet Organizing System
Remove all clothes and contents from the closet, including existing shelves and rods, to make room for the wire closet organizing system. Use a hammer and pry bar to remove supporting trim and ledgers.

Smooth Wallboard for the Wire Closet Organizing System
Use a paint scraper to knock down ridges of paint and torn wallboard paper left by the demolition of the old shelf system. The imperfections on the wall will impede the level installation of the new wire closet organizing system.

Spackle in Preparation for the Wire Closet Organizing System
Apply interior-grade spackling compound, pressing it into holes and crevices with a putty knife while keeping the blade flat. Hold blade at a 45-degree angle and scrape off the excess. Sand and paint before attaching the wire closet organizing system.

Mount the Hanging Bar for the Wire Closet Organizing System
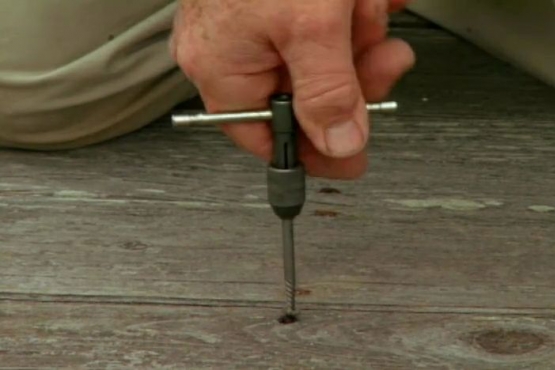
Pre-drill holes every eight inches into the wallboard and underlying two-by-four at the top of the closet wall where it meets the ceiling. Mount the hanging bar for the wire closet organizing system and secure it with screws.

Install Shelf Standards for the Wire Closet Organizing System
Fit the special adapter into the top of the shelf standards for the wire closet organizing system. Slip the adapter and standard assembly over the bottom lip or rail of the hanging bar, where it will slide to any location.

Plumb the Shelf Standards for the Wire Closet Organizing System
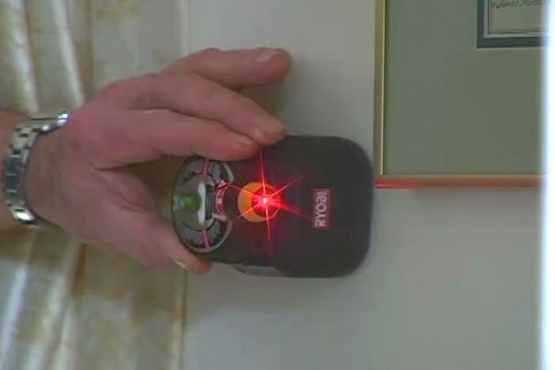
Position and plumb each wire closet organizing system standard using a bar level. Pre-drill a hole, tap in a plastic anchor, and secure the standard with a screw at the bottom to stop it from swinging from side to side.

Position Shelves and Brackets for the Wire Closet Organizing System
Fit two shelf brackets at level elevations in two adjacent wire closet organizing system standards. Adjust shelf length where necessary with a bolt cutter, set the shelves on top of the brackets, and snap them into position.

Add Plastic Caps to Rough Ends of Wire Closet Organizing System
Slip ready-made plastic caps over rough ends of the shelves that were cut to fit the wire closet organizing system. The smooth caps will stop clothing and people from snagging on the wire ends left sharp by the bolt cutter.

Add Brackets to Support Wire Closet Organizing System for Shoes
Add triangular plastic brackets and wall clips to support inverted shelves as shoe racks for the wire closet organizing system. The upward-facing lip stops the shoes from sliding off the angled shelf components.

Finish the Wire Closet Organizing System with Rods and Baskets
Snap rods for hangers in place beneath the storage shelves anywhere space was left for dresses, shirts, and pants. Roll in sliding basket storage units for special storage in the wire closet organizing system.
Related Tips


Blog Articles

Have You Heard of Landscape Glue?
You love the rustic charm of a gravel walkway, but the constant scattering of stones across your lawn and patio can be a real headache. Whether it’s from pets, lawn mowers, or just foot traffic, it seems impossible to keep those stones in place. Sound familiar? Well, Brian shows us a simple DIY method using landscape glue to keep your gravel path looking pristine and, more importantly, in place.

How to Remove Candle Wax Drips: Two Effective Methods
Candles create a warm and inviting atmosphere, but those pesky wax drips can be a real headache. Luckily, Brian shows us a couple of effective methods to tackle this issue, and they involve two very different temperatures: hot and cold. Here, we'll explore two effective methods: one using cold and the other using heat.

Guide to Hanging on Masonry Walls
Ever wondered how to hang that picture frame or shelf on a brick or concrete wall? It can seem daunting, but with the right tools and techniques, it's a straightforward DIY project. This guide breaks down two common methods: using concrete screws and using anchors, making it easy for you to tackle your next hanging project.


