FIONA LANG:
Hi, Ron, my name's Fiona Lang. This is my husband Richard.
RICHARD LANG:
Hey,Ron.
FIONA LANG:
We need your help desperately. We have a kitchen project here, we have ceiling tiles that need to be replaced. When we started redoing the kitchen, we had problems with water and as you can see, those tiles look plain nasty. Ron, please come help us decide exactly what we want to do with this kitchen ceiling.
RICHARD LANG:
I need your help, Ron. I can't do this myself. Please.
FIONA LANG:
He -- he sure does.
RICHARD LANG:
I need help.
RON HAZELTON:
[LAUGHS] Well, I just couldn't refuse an appeal like that. So I hopped in my truck and drove over to visit the Langs at their home in Danbury, Connecticut.
[MUSIC]
Hey, folks.
FIONA LANG:
Hi, how are you.
FIONA LANG:
Good morning, how are you?
RICHARD LANG:
Hello, Ron, how are you, nice to see you. Absolutely.
[OVERTALK]
FIONA LANG:
Absolutely. Why don't you come on inside and see what we've got.
RON HAZELTON:
Great.
RICHARD LANG:
Absolutely.
RON HAZELTON:
You got fresh muffins?
RICHARD LANG:
And coffee.
FIONA LANG:
Oh, yeah, fresh muffins. Well, Ron, here it is.
RON HAZELTON:
Oh, wow, that's bad. What happened up there?
RICHARD LANG:
Yeah. Well, it's just a major plumbing leak, you know. This is what water does to -- to ceilings.
RON HAZELTON:
Little, little repair over here you tried, huh?
RICHARD LANG:
Yeah, I tried to patch it up and it -- it just didn't take [LAUGHS].
RON HAZELTON:
So what are you thinking for a replacement?
FIONA LANG:
Something that's a little more in keeping with the character of the house. Something -- not drywall. I'm not really interested in that. But I'm really not sure where we're going to go with this.
RON HAZELTON:
Something with a pattern or a texture, something like that?
FIONA LANG:
Yeah, yeah. I think, I think that would look good.
RON HAZELTON:
Have you guys thought about a stamped metal ceiling? You know, they actually still make them.
RICHARD LANG:
Really.
FIONA LANG:
That -- that sounds very nice.
RON HAZELTON:
Have you got a computer?
RICHARD LANG:
Absolutely.
RON HAZELTON:
Okay, I want to show you something online.
FIONA LANG:
Okay.
RON HAZELTON:
Now this is a company that still makes those stamped metal ceilings and they've been doing this for a hundred years.
RICHARD LANG:
Wow, look at all those.
RON HAZELTON:
Yeah.
RICHARD LANG:
That's incredible and these are all metal, huh?
RON HAZELTON:
These are all metal, all stamped metal. So why don't you look through there, do you see --anything catch your eye here?
RICHARD LANG:
I like this one right there.
FIONA LANG:
I do like this number 209 right there.
RON HAZELTON:
This one right here? There you go, there's the pattern.
RICHARD LANG:
That's fantastic.
RON HAZELTON:
Just spend some time, look through here. When you've picked out the one you want, why don't you go ahead and order it.
RICHARD LANG:
Okay.
RON HAZELTON:
And when the material gets here, I'll come back and we'll put it up.
RICHARD LANG:
Sounds like a plan.
FIONA LANG:
That sounds great.
RICHARD LANG:
Oh, wow.
FIONA LANG:
Oh, that looks great.
RON HAZELTON:
Takes you back to the old days, doesn't it?
RICHARD LANG:
Absolutely.
FIONA LANG:
Yeah.
RICHARD LANG:
Absolutely. Wow.
FIONA LANG:
That's, that's going to look really good.
RON HAZELTON:
And I have a feeling because it's what, 2-by-4-foot panels, this is going to go up fairly quickly.
FIONA LANG:
I hope so. I really do.
RICHARD LANG:
Yeah.
RON HAZELTON:
Before we start on this though, we've got to take the old ceiling down.
RICHARD LANG:
Okay.
RON HAZELTON:
And that's going to get a little bit messy. So rather than clear everything out of the kitchen, I'm going to suggest we just protect everything.
Some plastic sheeting takes care of that. We begin demolition by dismantling the overhead light. Fiona has plans for a replacement that will be much more in keeping with the character of the new metal ceiling.
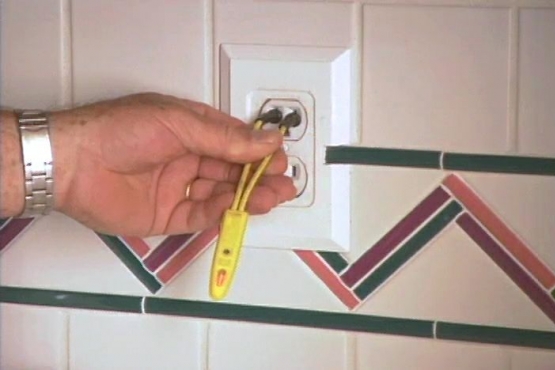
Richard turns off the power at the circuit breaker, then Fiona makes a final check with the voltage tester before the two of them disconnect the wiring and remove the fixture.
[MUSIC]
So these first -- these are the ones that you took down before, right?
RICHARD LANG:
Yeah.
RON HAZELTON:
The first tiles to come down are the ones Richard put up with screws when he repaired the water damage. The remaining tiles are nailed in place and all that's required to bring them down is a good tug.
[MUSIC]
Within minutes, the tiles are off, exposing the furring strips and ceiling joists.
[SOT]
Next, we begin removing the crown molding. First, we score along the edge to keep from chipping the paint, then tap in wide putty knives to protect the wall. Finally, we use pry bars to work the trim loose.
[SOT]
The last part of our demolition has us taking down the old furring strips to which the original tiles were attached. Now we thought about trying to reuse these. They weren't located in the right places for our new panels.
[MUSIC]
Well, I'd say you've got the lodge look now, huh?
FIONA LANG:
Yeah.
RON HAZELTON:
Maybe we should just leave it this way. You know, you gain a little ceiling height.
RICHARD LANG:
It's just a little too rustic for me.
FIONA LANG:
Yeah, it's a little too open, I think.
RON HAZELTON:
These are the panels that are going to go up there that we saw earlier. Now in order for the seams to really work out nicely on this, to stay straight and flat, we've got to put it on a flat surface. So the next thing I want to do is just check the bottom of these ceiling joists to see if, in fact, there's any kind of bow in them.
So Rich, here's my 4-foot level but If you'll yank on the end, turns into my 8-foot level.
RICHARD LANG:
Very nice.
RON HAZELTON:
Okay. In this case we're going to use it not so much as a level, but a straight edge.
RICHARD LANG:
Okay.
RON HAZELTON:
So put it on the bottom of this joist right here.
RICHARD LANG:
Mm-hmm [AFFIRMATIVE].
RON HAZELTON:
And you see we've got a gap down there at the end?
RICHARD LANG:
Oh I -- yeah, I do see it.
RON HAZELTON:
Yeah? How much is it -- like 3/4s of an inch?
RICHARD LANG:
About that, yeah.
RON HAZELTON:
We'll compensate for this variation later on when we put up the new furring strips. Our first furring strips will be set around the perimeter of the room, a couple of inches from the wall. A chalk line gives us our reference point.
Lock it in. On your mark --
FIONA LANG:
We all set?
RON HAZELTON:
Okay, pull it down.
[MUSIC]
[SAWING, VOICES]
All right, well the perimeter's done. Now we can start to put these furring strips in the center. [NAILGUN?] Now we've got our furring strips up. The next thing is to make sure that they're perfectly flat. So to do that, we're going to use, believe it or not, a piece of string.
If you would go down to that corner down there, you'll find a nail down there and just slip the loop over the nail and you'll see right here, the board and the string are even. But if you come down this way, there's a gap that opens up between the string and the board.
The board is actually almost a quarter-of-an-inch higher right here. So what we have to do is bring the furring strip down so that it's at the same level with the string.
FIONA LANG:
How are we going to do that, Ron?
RON HAZELTON:
We're going to do that using shims or wedge-shaped pieces of wood.
Wherever we need to lower the furring strips, we loosen the screw and tap in the shim. The further the shim goes in, the more the furring strip moves downward.
[MUSIC]
Our furring strips are up and flat. Now we'll need to add some blocking at the ends of the strips and at 4-foot intervals, to provide a nailing surface on all four sides of each panel. [NAILGUN SOUNDS]
Okay, panel number one.
We've constructed a simple T-brace so that one person can hold the panel in place while the other does the nailing. We're using these decorative cone-head nails. Now here's a nailing tip for you -- hold the nail with the pads of your fingers facing the hammer. A missed hammer blow is a whole lot less painful this way.
Each panel is aligned with its neighbor and the edges overlapped. The decorative nails are driven in every 12 inches and become part of the overall pattern. [BANGING SOUNDS]
When it comes to cutting and shaping stamped metal ceiling panels, about the only tool that's needed is a pair of tin snips. These are designed to cut curves and they're just the ticket for cutting around the overhead light-box. Well, we've got the basics under our belt, so it's clear sailing from here on.
[MUSIC][LOUD BANGING SOUNDS]
Terrific, huh?
FIONA LANG:
Fabulous.
RICHARD LANG:
Ah, that is breathtaking.
RON HAZELTON:
We have done well, we really have.
RICHARD LANG:
We have.
RON HAZELTON:
Got a little work to do along the edges here.
RICHARD LANG:
Okay.
RON HAZELTON:
We're going to cover that and finish it off with something called metal cornice. It's a kind of molding.
FIONA LANG:
Okay.
RON HAZELTON:
Ready for that?
RICHARD LANG:
I'm absolutely ready. Let's do this.
RON HAZELTON:
Okay. Now this is just a piece of flat lattice molding.
The cornice is nailed to the wall and the furring strip in the ceiling, using the same cone-head decorate nails. To save time, we ordered pre-cut outside corner sections from the manufacturer that we simply nail in place. To blend the cut ends, we tap them first with a hammer and then with the head of a nail.
The inside corners we'll cut ourselves, so I head out to the truck for my favorite pair of snips. The first piece is trimmed to length with a straight cut and slipped into place. The second section is cut on an angle. The angled section simply slips over the first. This is often called a coping joint.
Each straight corner section is overlapped with the next and then nailed in place. Remember that old light fixture we took down earlier? Well, we couldn't put that back up now, could we?
[MUSIC]
You know, one of the things I like best about this ceiling besides the fact it looks really cool?
FIONA LANG:
Yeah.
RON HAZELTON:
This is made in the same way by the same company that it was made a hundred years ago. This is not a reproduction. This is the kind of ceiling you would have gotten if you'd purchased one last century.
RICHARD LANG:
Really?
RON HAZELTON:
So what do you think? Are you going to leave it like this -- metal or paint it or what?
RICHARD LANG:
No, I think we're actually going to paint this.
RON HAZELTON:
Are you?
RICHARD LANG:
I real -- I think we really would like to have this a nice white. Whether we want to have it in a satin finish or a gloss, we're not sure just yet. That's something we have to discuss.
RON HAZELTON:
Just be sure to use an oil-base paint 'cause it is steel and it would rust with water-base, all right?
RICHARD LANG:
Okay, very good.
RON HAZELTON:
Well, I had a good time, guys.
RICHARD LANG:
Oh, me too.
FIONA LANG:
We did too. Thank you so much. Cheers.
RON HAZELTON:
Cheers, happy nails.


