How to Put Together a Gazebo from a Kit
A pre-manufactured gazebo kit is a simple upgrade to outdoor living space
Maximize your outdoor living space by utilizing a pre-made gazebo kit. Assembly is quick, and as we see in this project, can be easily customized to fit the space that you have. These pre-manufactured gazebo kits are available through most home improvement retailers. Create an outdoor place to read, entertain, or simply sit back and relax out of the sun and away from the bugs.
Read More
Determine the best location
Determining the best place for your gazebo may seem like an afterthought, but as you'll see in this project, the proper location requires some consideration, as the property owners need room to work around the front of the gazebo. While not everyone will be building right next to the water, you may want to ensure that you have room for landscaping, weeding, or mowing if you plan to build your gazebo near your house or another outbuilding.

Secure the floor joists
When using a kit, it is important to ensure that the joists are spaced properly, because the floor panels are pre-assembled, and you want to make sure they fit. Using heavy deck screws, secure the joists to the outside rim, and to the support block at the center. This will ensure a sturdy floor system that won't move or shift.

Install the pre-assembled floor panels
Since the floor panels of this kit came pre-assembled, setting them into place should be similar to putting together a large jigsaw puzzle. Simply set them into place and secure the panels into place per the manufacturer's instructions. If you do need to add some additional support to one area of the gazebo floor, make sure you bolt those support posts to the joists, so the floor is sturdy, and stands up to weather and seasonal changes. This will need to be done before the floor panels are set into place in that specific area.

Set up the walls
Just like the floor panels, the walls in this system are pre-assembled. When you are ready to put them up, each panel needs to be set into place and screwed into the one next to it, as well as to the floor. Put some thought into where the doors will best be located and leave the openings there. The doors will be installed when we add the finishing touches at the end.

Use Gussets to solidify the walls
Even after the walls are up and screwed together, they still may feel a bit rickety. Use a gusset to secure them. A gusset it nothing more than an additional piece of wood that overlaps to section of wall and gets screwed into both from the top. This helps tie them together and makes the walls more rigid. The gussets should be included with any pre-manufactured gazebo kit that you buy.

Rafters must form the foundation for the roof
The best way to begin assembling the rafters is actually on the ground. Use the block that is provided for the peak and fasten a rafter on each side. Once this initial framework is secure, it can be set into place on top of the walls. The additional rafters can now be installed to the tops of the walls, and the center block at the peak. Make sure that there are secured tightly, as the rafters will bear the weight of the roof sheeting and whatever elements the weather may throw at it.

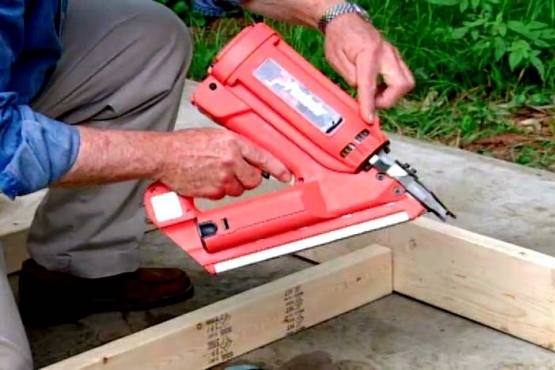
Install the roof sheeting
Like the flooring, the sheeting for the roof is already cut to the correct size for the kit. These pieces simply need to be lifted into place, and then secured with 6 penny galvanized nails.

Install the roofing materials
Begin the roofing process by covering the sheeting panels with 15 pound roofing felt. Start at the bottom and add overlapping layers until you get to the top. Once the felt is in place, then an aluminum drip edge should be nailed all the way around the bottom edge of the roof. When the drop edge is secured, you are ready to start shingling. Begin at the bottom with a starter row, and then work your way to the top.

Add the finishing touches
Once the roofing materials are applied, it's time to add the finishing touches. This kit includes some fascia board and windowsills, as well as the screen panels and screen doors that will keep the bugs out. You may or may not have these with your kit, or you may decide to remove the screen material seasonally. You are now ready to sit back, relax, and enjoy your hard work in your new, pre-manufactured gazebo.
Related Tips

Blog Articles

Have You Heard of Landscape Glue?
You love the rustic charm of a gravel walkway, but the constant scattering of stones across your lawn and patio can be a real headache. Whether it’s from pets, lawn mowers, or just foot traffic, it seems impossible to keep those stones in place. Sound familiar? Well, Brian shows us a simple DIY method using landscape glue to keep your gravel path looking pristine and, more importantly, in place.

How to Remove Candle Wax Drips: Two Effective Methods
Candles create a warm and inviting atmosphere, but those pesky wax drips can be a real headache. Luckily, Brian shows us a couple of effective methods to tackle this issue, and they involve two very different temperatures: hot and cold. Here, we'll explore two effective methods: one using cold and the other using heat.

Guide to Hanging on Masonry Walls
Ever wondered how to hang that picture frame or shelf on a brick or concrete wall? It can seem daunting, but with the right tools and techniques, it's a straightforward DIY project. This guide breaks down two common methods: using concrete screws and using anchors, making it easy for you to tackle your next hanging project.


