RON-VO:
TODAY’S HOUSECALL BRINGS ME TO ONE OF THE SOUTH’S OLDEST CITIES… COLUMBIA, SOUTH CAROLINA. COLUMBIA IS THE CAPITOL OF SOUTH CAROLINA, BUT, AS A MOTORHOME DRIVER, WHAT I APPRECIATE ABOUT THIS CITY IS ITS WIDE STREETS.
WAY BACK IN THE 1700’S LAWMAKERS RULED STREETS HAD TO BE AT LEAST 100 FEET WIDE BASED ON THE BELIEF THAT DISEASE-SPREADING MOSQUITOES WOULD DIE OF STARVATION AT 60 FEET. NOW THAT’S A HECK OF A THEORY. I’M NOT SURE IF IT WORKED, BUT THE WIDE STREETS AND SMALL TOWN CHARM HAVE SURVIVED EVER SINCE.
TODAY, THOSE STREETS ARE LEADING ME TO THE HOME OF DAVID AND KENNY WILSON.
THE COUPLE HAS DONE A LOT OF WALLPAPERING AND PAINTING ON THEIR OWN. BUT THEY’VE ASKED FOR A HAND AS THEY PUT DOWN A NEW KITCHEN FLOOR.
THEY’D LIKE TO REPLACE THIS DIFFICULT-TO-CLEAN, TEXTURED VINYL WITH A NEW LAMINATE FLOOR A THAT LOOKS LIKE TILE. I’M HAPPY TO PITCH IN AND HELP, BUT I’M GUESSING THIS JOB MIGHT TURN OUT TO BE EASIER THAN THEY IMAGINED.
Ron:
I see the flooring got here.
Dave:
It sure did. It arrived Saturday. In fact, we’ve had it in here in the kitchen, because we found out that you’re supposed to let it adapt to the house for about a twenty-four hour time period prior to working on the project.
Ron:
Right. Sort of get it into the humidity and temperature environment that we’re going to be putting it down.
Dave:
Correct, that’s what we heard.
Ron:
And, this is a plastic laminate, very durable, but it’s quite convincing. It really does look like tile. And part of it is that they put a nice surface texture in here.
All right, so, we’ll get started on this. We’re going to have to clear out the room.
Dave:
Okay.
Ron:
Now some real good news here. We’re not going to have to take up this existing vinyl flooring. The new floor’s going to go right on top of that. We are, though going to have to take out this piece of shoe molding down here. And the reason is that the new floor is going to go up close to the wall, but not touch it. Because it expands and contracts we want to leave a margin around the edge for that to happen.
RON – VO:
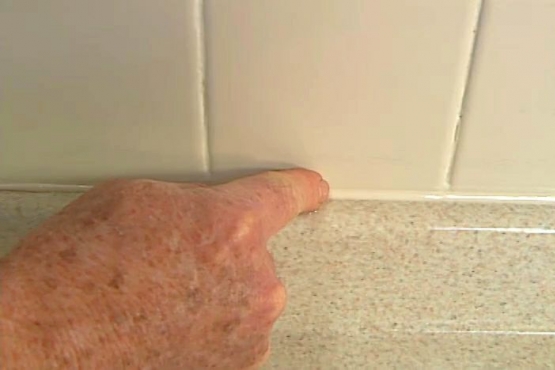
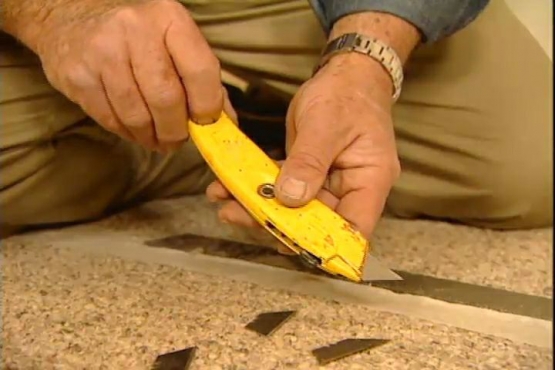
TO REMOVE THE SHOE MOLDING, WE FIRST USE A UTILITY KNIFE TO CUT THROUGH THE PAINT OR CAULKING NEXT TO THE BASEBOARD. THEN, WE PRY THE MOLDING OFF.
Ron:
Now that we’ve removed our shoe molding, the next thing we need to do to get this room ready for the new floor is something called under-cutting. Now this is the reason we’re going to do this. If we didn’t do the under-cutting, every place the flooring met up with a piece of casing like this, we’d have to cut that figure or that design out of the floor. We’d never get an exact match. And besides which, we don’t want this to actually touch up here.
Ron:
So what we’re going to do is cut away a slice right down here near the bottom. And to do that we’ll take a piece of this pad. This is what’s going to go underneath the floor when we finally install it. A piece of the flooring. That’s going to give us our proper height or thickness. Just like that. This is going to serve as a sawing guide. Then I’m going to use my Japanese hand saw here. Place it right on top. Make a cut.
(SOT: SAW)
RON-VO:
AFTER CUTTING THROUGH TO THE FRONT OF THE CASING, I MOVE AROUND TO THE SIDE AND REPEAT THE PROCESS. NEXT, I CUT THROUGH THE CAULK… THEN USE A SCREWDRIVER TO POP OUT THE LOOSE SECTIONS.
THE FLOORING CAN NOW SLIP RIGHT UNDERNEATH THE CASING, WITH ANY CUT EDGES CONCEALED.
USING THE SAME METHOD, DAVE AND KENNY UNDERCUT THE OTHER DOOR CASINGS.
Kenny:
Look at you.
Dave:
It’s coming right out.
RON – VO:
OUR NEXT STEP IS TO INSTALL THIS METAL TRIM TRACK, WHERE OUR NEW FLOOR WILL MEET FLOORS IN ADJACENT ROOMS. WE SECURE IT IN THE CENTER OF THE DOORWAY WITH RING SHANK NAILS. LATER, WE’LL INSTALL A PIECE OF FINISHED WOOD TRIM ON TOP.
Ron:
All right. There you go, Kenny. Just pull some of that out.
RON-VO:
OUR FLOORING WILL REST ON THIS MATERIAL CALLED UNDERLAYMENT. IT CONSISTS OF TINY FOAM PELLETS SANDWICHED BETWEEN TWO PIECES OF PLASTIC SHEETING. WE TRIM IT TO SIZE LEAVING A TWO-INCH MARGIN BETWEEN THE EDGE OF THE UNDERLAYMENT AND THE WALL.
Ron:
All right. Kenny, now put yours about two inches from the wall over there.
Kenny:
All right.
Ron:
Now, before we begin putting these down for real, you guys are going to have make a design decision. This is made to look like twelve inch Saltillo tiles, which are often laid with the joints in straight lines like this. However, sometimes they’re laid with the joints offset like that. One here, one here, and one here. So, which do you guys prefer?
Kenny:
Mmm, off set-
Dave:
Ron, I think we definitely like the offset pattern better.
Ron:
You do?
Dave:
Definitely.
Kenny:
Yeah, I really do.
RON:
WELL … SINCE THE VOTE IS UNANIMOUS WE CAN MOVE RIGHT ALONG.
Ron:
Now remember, we have to leave a margin around the edge of this flooring, because it does expand and contract.
RON-VO:
THESE PLASTIC SPACERS, INSERTED BETWEEN THE EDGE OF THE FLOORING AND THE WALL HELP US KEEP A CONSISTENT MARGIN AS WE LAY THE FLOOR.
THESE FLOORING PANELS HAVE INTERLOCKING EDGES THAT ELIMINATE THE NEED FOR GLUE, MAKING INSTALLATION SIMPLE AND FAST.
Ron:
And here is board number two. We’ll lay that right down here. Okay, like that. Now, here, though, we have a little bit of an issue, because we have your air-conditioning duct right here.
MUSIC
RON-VO:
TO FIT THE FLOORING AROUND THE DUCT, WE FIRST TRIM AWAY THE UNDERLAYMENT…
…..THEN USE A CARPENTER’S SQUARE TO TRANSFER THE SIDES OF THE DUCT OPENING TO THE PANEL. NEXT, I MEASURE THE DISTANCE BETWEEN THE SPACER AND THE FRONT AND REAR EDGES OF THE DUCT, AND TRANSFER THOSE DIMENSIONS TO THE PLANK.
(SOT: DRILL)
RON-VO:
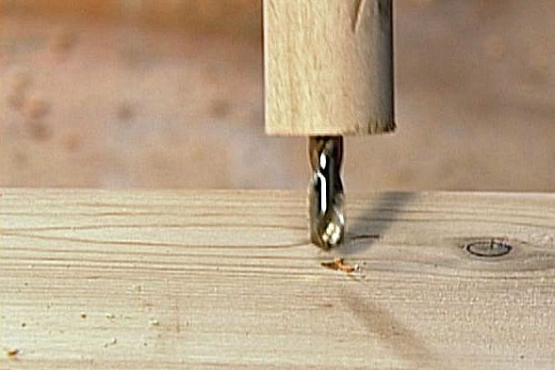
KENNY DRILLS HOLES AT ALL FOUR CORNERS, THEN DAVE USES A JIGSAW TO CUT OUT THE OPENING.
(SOT: SAW)
Kenny:
Hey.
Dave:
There we go.
RON-VO:
I LOWER THE PANEL INTO PLACE… AND, BY GOLLY, OUR DUCT OPENING IS RIGHT WHERE IT SHOULD BE.
Kenny:
Wow.
Ron:
I tell you that’s what teamwork will do.
Dave:
That is a good cut.
Ron:
Now we’ve got this piece to put in. This is going to be the first piece that we have to cut to length.
RON-VO:
REMEMBERING TO INSERT THE SPACER FIRST, WE MEASURE FROM IT TO THE INNER EDGE OF THE PANEL. WE TRANSFER THAT MEASUREMENT TO A NEW PANEL AND DRAW A CUT LINE. THEN KENNY CUTS THE FLOORING WITH A CIRCULAR SAW.
Ron:
Voila.
Kenny:
Did it work?
Ron:
We have completed our first row.
Kenny:
It worked yay.
Dave:
Good deal.
Ron:
So that is the, that is the basic process to laying this down. We’ve dealt with about everything. We’ve made a cut out. We’ve cut the end to length. There’s going to be one small change as we start on row number two.
Kenny:
What’s that?
Ron:
I’ll show you when we get there.
RON:
Clay and horse hair.
RON-VO:
TODAY’S HOUSECALL HAS BROUGHT ME TO COLUMBIA, SOUTH CAROLINA TO HELP DAVID AND KENNY WILSON INSTALL A NEW LAMINATE FLOOR IN THEIR KITCHEN. WE’VE JUST FINISHED LAYING OUR FIRST ROW.
Ron:
So guys we’re about to start our second row here but remember something. You said that you wanted to stagger the joints. So we need to move this joint down to the center of this tile and to do that we’re just going to make a cut right down through here.
Ron:
So you want to make this cut?
Dave:
I’m ready to go.
Ron:
Are you a good cutter?
Dave:
We’ll give it a try.
Ron:
Are you as good as your wife?
Dave:
Well I don’t know. I’m not going to say anything right now.
RON-VO:
DAVID MAKES THE CUT AND I LOCK THE PANEL INTO PLACE UP AGAINST THE FIRST ROW.
Kenny:
Wow. Oh that looks great.
Dave:
That really does look good.
Ron:
Now that’s going to set up your, your alternate joint spacing all the way down the line here.
RON-VO:
NEXT, I STICK A COUPLE OF PIECES OF DUCT TAPE OVER THE JOINT TO CREATE A HINGE.
Ron:
And the reason I’m doing this is that you notice that all of these panels kind of snap together but because of the way the edges are shaped they have to be lifted up first and then dropped into position.
RON-VO:
THE DUCT TAPE HINGE PREVENTS THE SECTIONS FROM COMING APART WHEN WE TIP THE ROW UP TO INSTALL EACH NEW PANEL. ANY SMALL GAPS IN THE JOINTS ARE CLOSED USING A HAMMER AND THIS TAPPING BLOCK.
Dave:
Oh perfect. The seam disappears.
.
RON-VO:
DAVE, KENNY AND I SIMPLY REPEAT THE PROCESS FOR THE NEXT FEW ROWS. UNTIL WE REACH THE DOOR CASING…
Ron:
All right it’s in?
Dave:
It’s in.
Ron:
Okay drop it down. Now this row we’re having to deal with a little bit differently. We’ve treated it the same up to this point except that we’ve left this a little bit long. You see how it’s sticking out right here? That’s because now, let’s take the tape off guys. We’re going to drive this entire row down in that direction and up underneath the door casing down there. All set?
Dave:
All set.
RON-VO:
DAVE APPLIES SOME DOWNWARD PRESSURE AS I USE THE TAPPING BLOCK TO SLOWLY DRIVE THIS ROW OF FLOORING UNDERNEATH THE DOOR CASING WHICH WE UNDERCUT EARLIER.
(SOT: TAPPING)
RON-VO:
AS WE MOVE FURTHER INTO THE KITCHEN WE’VE HAD TO CUT SOME OF OUR PANELS TO FIT AROUND CABINETRY.
Ron:
One of the beauties of this system is this interlocking edge right here that requires us to use no glue. That’s why you’ve been able to make so much progress here. But there are a couple of places where you do have to use glue.
RON – VO:
ONE SUCH AREA IS HERE, WHERE THE END OF THE PANEL GOES UNDERNEATH THE OVERHANG AT THE BASE OF THE CABINET. THE OVERHANG PREVENTS US FROM TILTING THE PANEL UP. SO, I MODIFY THE JOINT A BIT BY CUTTING AWAY A PORTION OF IT.
DAVID APPLIES GLUE TO THE MODIFIED JOINT, THEN SIMPLY LAYS THE END OF ONE PANEL OVER THE OTHER.
MUSIC
RON-VO:
I’M ALSO GLUING THE PLANKS TOGETHER HERE IN THE REFRIGERATOR ALCOVE. SHOULD THE ICEMAKER EVER LEAK OVER THE EVAPORATOR PAN OVERFLOW, THE GLUE WILL MAKE THE JOINTS WATERTIGHT.
THIS TOOL, CALLED A PULL BAR, IS USED IN PLACE OF THE TAPPING BLOCK WHEN THE SPACE IS TIGHT.
THE GAP BETWEEN THE EDGE OF THE FLOORING AND THE WALL IS SEALED WITH FLEXIBLE CAULK.
NEXT, DAVE CUTS THE PRE-FINISHED WOOD TRANSITION STRIPS FOR EACH OF THE KITCHEN DOORWAYS.
Ron:
This floor is higher than this floor right here. That’s where the transition strip comes in. Remember we put the trim track down earlier.
This side over here will go on the high part of the floor and this side over here goes on the low part.
And if you’ll give that a tap with the rubber mallet it’ll drive it right down in the trim track. There you go.
MUSIC
Dave:
Let’s go ahead and lay this down.
RON-VO:
DAVE AND KENNY INSTALL TRANSITION STRIPS AT THE OTHER DOORWAYS… AND NOW WE’RE DOWN TO OUR FINAL STEP.
Ron:
Well folks, here’s your new shoe molding. It’s going to go right down here.
Kenny:
Great.
Ron:
And cover up that gap which is intentional that allows the floor to expand and contract. It sits right there in the corner
RON-VO:
THE SHOE MOLDING IS PREFINISHED SO TO AVOID ANY POTENTIAL DAMAGE FROM MISSED HAMMER BLOWS, WE USE A NAIL GUN.
RON-VO:
TO CONCEAL THE NAIL HOLES, WE RUN A COLOR-MATCHED WAX PENCIL OVER EACH ONE, THEN WIPE AWAY THE EXCESS
Ron:
So is this going to work for you?
Kenny:
Oh, absolutely. I’m just thrilled with the floor. Um, it’s already working for me. I love the colors. They’re warm, um, I especially love how it blends with my gray counter tops. And I love the fact that I’m not going to have to wipe up little doggy prints every single day.
Ron:
A couple of things you may not be aware of uh, that we can’t see but that pad that we put down underneath uh, it gives the floor a little bit of resilience just makes it more comfortable to stand and walk on.
Ron:
And a lot quieter, it absorbs the sound of your foot-falls.
Ron:
But probably one of its biggest benefits is it’s really tough. You know, I wouldn’t do this to your new floor but here’s piece of scrap right here, watch this….
Ron:
There’s hardly any material you could do that with.
Kenny:
Oh, that’s perfect for us then.
Ron:
Great for children and dogs. Dogs!
Kenny:
We’re going to test it out right now!
Ron:
Hey! Speaking of which, who’s this?
Kenny:
Well that’s our Brutus. He’s our puppy.
Ron:
Hey, Brutus!
RON-VO:
WELL BRUTUS CAN BE AS BRUTAL TO THIS FLOOR AS HE LIKES … IT CAN TAKE IT. YOU KNOW, ONE OF THE TERRIFIC THINGS ABOUT TODAY’S HOME IMPROVEMENT MATERIALS IS THAT THEY ARE SO VERSATILE AND EASY TO USE. THIS IS A GOOD CASE IN POINT … A WAY TO GET THE LOOK OF TILE WITHOUT THE WORK OF TILE.


