RON HAZELTON:
Today, I'm heading to St. Augustine, Florida. Now that's the nation's oldest city. I'll be visiting Ed and Jessie Gail Atkins. Now their dining room may not be the country's oldest but it sure is out of date.
Now besides looking after their three children while Ed's at work, Jessie Gail has developed a reputation for being a real do-it-yourselfer. She oversaw the addition of their home's den and has invited me to town to help her and Ed tackle their unfinished dining room.
How are you.
ED ATKINS:
Fine, thank you.
JESSIE GAIL ATKINS:
Glad to have you here.
RON HAZELTON:
So this is the dining room right?
[BOTH SPEAK AT ONCE]
JESSIE GAIL ATKINS:
-- the dining room. We use that term very loosely.
[LAUGHTER]
We don't like the color, we don't like the floor, we don't like the light fixtures, it's dark. It's just very drab and boring.
RON HAZELTON:
Well, let's start with the floor. You've got concrete floor down here.
ED ATKINS:
Well, we had a nice wavy avocado carpet when we first moved in and I took that up. We didn't have money to put down, so I just keep the lights low and I painted it and nobody ever knew.
RON HAZELTON:
It worked fine for a while, yeah.
[BOTH SPEAK AT ONCE]
JESSIE GAIL ATKINS:
When you have company and a few glasses of wine, nobody notices.
RON HAZELTON:
What about the paint? You want to do with just one color in here?
JESSIE GAIL ATKINS:
We'd like to do a two color thing. Maybe something darker on the bottom and lighter on the top. A little contrast. It is a pretty big room.
RON HAZELTON:
Well, I have a few ideas that should make a big difference here. So we waste no time in clearing out the room.
ED ATKINS:
All right, Jess --
RON HAZELTON:
What about the chandelier, guys? You gonna keep this?
JESSIE GAIL ATKINS:
No.
RON HAZELTON:
Okay, there we go.
JESSIE GAIL ATKINS:
It's great.
RON HAZELTON:
Bye bye.
JESSIE GAIL ATKINS:
And it's out of here.
RON HAZELTON:
Now, Ed and Jessie are considering a couple of colors for the walls and an online paint visualizer allows us to test different color combinations.
And what it allows you to do is take a look at a room, this is a bedroom in this case, but nonetheless -- and then actually paint the walls and paint the accents so you can see what the colors that you're considering might actually look like in a room. So right now, the walls are all white.
After experimenting with several colors, we settle on a specific shade of red for the bottom half of the walls and off white for the top half and a light gold accent for the color of the chair rail and baseboards. With a decision on color, we begin cleaning the walls with warm water and detergent, an important step before any paint job.
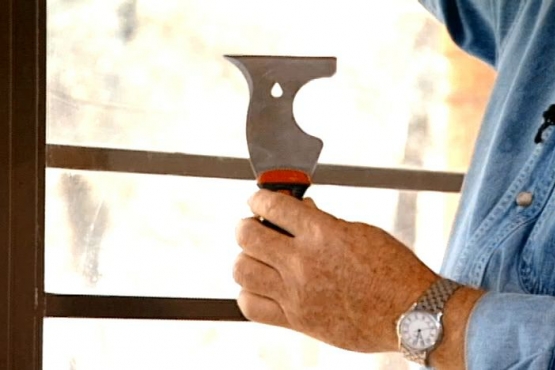
Next, we turn our attention to all the holes and cracks in the walls, giving me the opportunity to use one of my favorite tools. There comes a time in just about any painting job when you have to do some wall patching and repair. And here's a tool that's gonna make that a whole lot easier. It's called a five in one tool.
Now I found at least six uses for this tool. Let me show you what they are. This edge right here is ideal for scraping out loose material and removing high spots like this. This point right here is used for cleaning out and widening cracks before you patch them.
The long edge right here is also a putty knife. This hole right here served as a nail puller. The side right here is ideal for opening paint cans, and the end has sort of a built in hammer for closing them. And finally, this curved surface can be used to squeegee excess paint out of rollers before you rinse them.
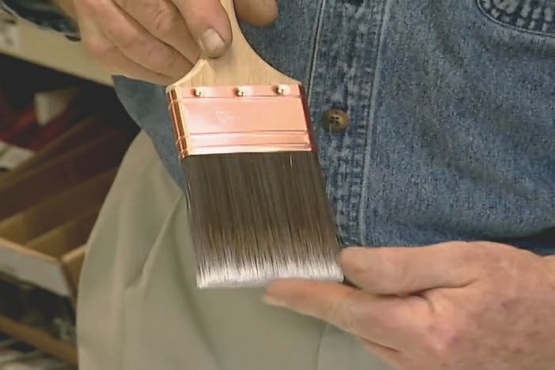
With all the holes and cracks spackled and sanded, we're ready to apply our primer coat,. after a quick lesson in loading the paintbrush.
Here's what you don't want to do. You don't want to drag it over the rim like this.
JESSIE GAIL ATKINS:
That's what I always do.
RON HAZELTON:
Because you see what happens? You've taken all the paint out of the bristles right now, so your brush is too dry. So instead, dip it in like this and just slap it on the side. So you, you've taken out the excess paint but you've still got your brush fully loaded.
[BOTH SPEAK AT ONCE]
Having graduated from brush loading 101, we start by painting the corners, the upper edge of the wall near the ceiling and the edges around the door and window casings. We'll prime the baseboards too since they will also be painted.
What I like to do is to put my paint in a five gallon bucket and then hang a roller screen on the side like here.
ED ATKINS:
Great.
RON HAZELTON:
A couple reasons for this. You, you can put enough paint in a bucket like this to practically do an entire room. You can actually load your roller a lot better on that screen.
I always keep the bucket nearby. It saves a lot of steps when reloading and avoids dripping on the floor. It's best to roll the paint in long strokes from top to bottom.
[MUSIC]
Right, guys, there are your paint chips. Base color, top color and the color of your chair rail. And the chair rail is going to separate those two just like that. Now they don't call this a chair rail for nothing 'cause originally this was designed actually to keep the back of a chair from damaging the walls. So traditionally, the chair rail is about at the height of the chair back.
We first measure the height of the chair, then transfer that mark to the wall.
Then I'm going to add about half an inch because I want the top of the chair rail to be a little bit above this, so we'll go half an inch for that. And then, remember, we're putting a new floor in the room down here. That's gonna be about a half an inch thick, so another half an inch for that.
And that puts the top of our chair rail right there at 37 inches, okay.
JESSIE GAIL ATKINS:
Okay.
RON HAZELTON:
Now we want to break our paint though, kind of in the center of the rail, about right here. Let's make a mark right there. That's where we want to break the two colors.
We'll extend this mark across the wall using a laser level.
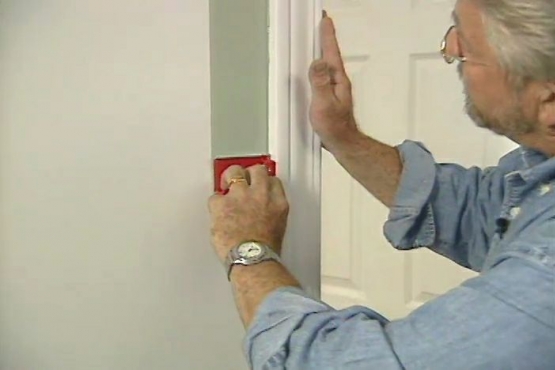
I'm gonna put this notch right here on the mark, okay and then there's a built in level right here. I'm gonna keep moving this until I get the bubble right in the center.
Once we're Level, Jessie makes marks directly on the laser line, about every 12 inches.
Go right into the corner and into go around the wall there. You see how this is designed to go right around the corner? And there's one more little mark out there.
[BOTH SPEAK AT ONCE]
JESSIE GAIL ATKINS:
-- little mark here.
RON HAZELTON:
Mm-hmm [AFFIRMATIVE]. Now what we'll do, we'll take this, bring it over to this wall --
JESSIE GAIL ATKINS:
And that's your starting mark.
RON HAZELTON:
We repeat this process around the rest of the room until all four walls are marked with paint break lines.
Painters, dip your brushes. All right, this is our top color here, guys. I'm gonna strike the line down here where we drew our laser line. This doesn't have to be perfect because we're -- it's gonna be concealed behind the chair rail.
Once again, we paint the edges and corners first. Then we'll cover the rest of the wall with the rollers. Now there is a technique to rolling. After loading the roller, we unload it in one stroke from up near the ceiling down to the cut line.
Go back up and back down like that, okay?
JESSIE GAIL ATKINS:
Okay.
RON HAZELTON:
Back over, dip your roller in again, submerge it. I'm going to move over one roller width. You see I've left a strip there unpainted, the width of my roller. Now once I've unloaded this one, I'm gonna connect these two now by rolling from one over to the other.
And what this does, it puts an even coat of paint on the wall.
[MUSIC]
All right now, here's where this room is gonna really start coming to light.
ED ATKINS:
I almost need sunglasses with this color.
JESSIE GAIL ATKINS:
I like it.
ED ATKINS:
Ron, why do painters always wear white clothes?
RON HAZELTON:
So you can see the spilled paint.
ED ATKINS:
Ah, I always wondered that.
RON HAZELTON:
Well, guys, I'd say we're finished for today. So tomorrow, we'll come back, put our chair rail on, put your new floor down here and do some decorating. Really finish up this -- this room makeover.
[MUSIC]
ANNOUNCER:
Ron Hazelton's HouseCalls is being brought to you by the Home Depot. And by GMC.
[SOUND CUT]
ED ATKINS:
Whoa, nice.
JESSIE GAIL ATKINS:
Looking good.
ED ATKINS:
Yeah, that really dried down kind of matte finish right now.
JESSIE GAIL ATKINS:
I think it looks phenomenal.
RON HAZELTON:
Since her husband Ed, has to work, day two of our dining room makeover here in St. Augustine, Florida is left to Jessie Gail and me. We start by painting the baseboard our third color, light gold. Once we're finished with the baseboard, we move outside to paint the chair rail which we primed earlier. Painting the chair rail before it's put up saves the trouble of having to mask the wall later on.
The laminate flooring that we'll be installing today will lie on top of this foam underlayment that will act both as a moisture barrier and a cushion.
Now, when the floor's all down, it will expand and contract a little bit, so we're gonna use these spacers to create about a quarter of an inch gap all the way around. Want to grab the next plank?
Each laminate plank has interlocking joints on the ends and on the sides, eliminating the need for any adhesive along the edges. When we reach the end of a row, we simply measure the distance and cut the last plank to size with a circular saw.
I'll put this down.
JESSIE GAIL ATKINS:
That was exhilarating.
RON HAZELTON:
Yeah, in what way?
JESSIE GAIL ATKINS:
I love that power. That's fun.
RON HAZELTON:
Jessie installs the final plank in the first row, then in order to stagger our joints, we start the second row using the cutoff piece from the first row. This time, we interlock the side joints together.
This is the first board where we're going have to interlock both the end of the plank and the long side right here. So for this, if you'll back up just a little bit, we're gonna start again by engaging the long side -- there you go, slide it down to me a little bit and then drop this down.
Now this is interlock. This joint right here though is still open, okay. To close that up, we're gonna use this tool. It's called a tapping block. There's a slot right here. That slot is gonna slip over that tongue or tab right there and then I'm gonna take a hammer and drive this down.
Watch that joint down there, it will close up.
[MUSIC]
Okay.
When we get to the end of the row, the tapping block won't fit, so we switch to another tool called a pull bar.
JESSIE GAIL ATKINS:
That's good, that's great.
[BOTH SPEAK AT ONCE]
RON HAZELTON:
Excellent.
We continue expanding our floor across the room until we reach the door casing. Here, we stack a piece of flooring on top of a piece of underlayment to create a depth guide, and use an undercut saw to cut away the bottom of the casing so that the flooring can slide beneath it.
Using some guidelines I've drawn to approximate the shape of the door casing, Jessie uses a jigsaw to cut the shape out. We lock the plank into place, then slowly drive it beneath the casing by striking the opposite end of the entire row, using the tapping block.
Easy, easy, little more, little more, little more. Good, right there. Hold it, perfect.
[MUSIC]
[BANGING SOUNDS]
Okay, excellent.
JESSIE GAIL ATKINS:
We're done.
RON HAZELTON:
Next, we apply construction adhesive to a T-shaped transition molding strip, designed to cover the joint between the two different floors. We conceal the expansion gaps between the baseboards and the edge of the floor with strips of quarter round, which we attach with a pin nailer. Next, we move on to our chair rail, cutting 45 degree miters on both ends.
Ah, let's see if we've got a fit here, Jessie. Perfect on this end. How are you down there?
JESSIE GAIL ATKINS:
I've got it in perfectly.
RON HAZELTON:
Okay.
We've already marked the stud locations, so Jessie and I fire a couple of finish nails into each one to secure the chair rail into place.
Turn it on -- ah, pretty.
JESSIE GAIL ATKINS:
Oh, that looks nice.
RON HAZELTON:
Whoa, huh. So this is it.
JESSIE GAIL ATKINS:
It looks -- excellent.
RON HAZELTON:
You wouldn't know it was the same room, would you?
[BOTH SPEAK AT ONCE]
Well, look who's home from work. Hey, there, Ed.
ED ATKINS:
Wow.
JESSIE GAIL ATKINS:
Look what we did while you were gone.
RON HAZELTON:
Well, you know, you had a --
[BOTH SPEAK AT ONCE]
-- but the detail work, what do you think, like the floor?
ED ATKINS:
Beautiful, gorgeous.
JESSIE GAIL ATKINS:
Did you think you were at the wrong house?
ED ATKINS:
Well, I honestly did. Well, look at the light.
RON HAZELTON:
And what about these colors? Huh? Gotta love them.
[BOTH SPEAK AT ONCE]
ED ATKINS:
I'll tell you what -- it's gonna be beautiful with the furniture and such.
RON HAZELTON:
Gee, I'm sure glad you came home when you did.
[LAUGHTER]
[MUSIC]
All right, there you go. All right, excellent. Yeah. This furniture looks terrific.
JESSIE GAIL ATKINS:
Isn't it lovely? It all comes from Ethan Allen, so it all matches beautifully and I could not be more pleased. I mean I -- it just looks great in here.
RON HAZELTON:
So this is a set.
[BOTH SPEAK AT ONCE]
JESSIE GAIL ATKINS:
Exactly.
RON HAZELTON:
Very nice.
JESSIE GAIL ATKINS:
We are happy.
RON HAZELTON:
What a transformation, huh?
JESSIE GAIL ATKINS:
Unbelievable. This is really my house?
RON HAZELTON:
I think so.
JESSIE GAIL ATKINS:
You think so? Should we -- we should check. It looks so good, I can't believe it.
RON HAZELTON:
I want to compliment you guys on your choice of colors, you know. This is pretty bold. But these really do work in here.
JESSIE GAIL ATKINS:
The room is able to carry them well and they look fabulous.
RON HAZELTON:
Did you get enough saws?
JESSIE GAIL ATKINS:
Yeah, I think I'll do a little more sawing. I'm gonna go out and get some now. I love the sawing. I feel comfortable doing it and i'm ready to take on the world of power tools.
ED ATKINS:
Did I marry the right woman or did I marry --
RON HAZELTON:
You did well, Ed, you did really well.
Well, I'm sure if could keep Jessie supplied in power tools, there's no telling how many jobs like this one, she'll complete. And having gone from a bland, unfinished dining room, to this in only two days, should provide more than enough inspiration.
