RON HAZELTON:
Now sometimes a little bit of detail goes a long way. I'd say that's the case in a project coming up. Lisa and Darren Hoffman's home in Tucson, Arizona is southwestern in style, with a rounded arch leading to the back of the house.
But in the passageway from the kitchen to the dining room, well, it's all angles. There's not a curve to be seen. They'd like to change that. So I'm going to pay them a visit and see if I can lend a hand.
DARREN:
Good to see you. Come on in.
[BOTH SPEAK AT ONCE]
RON HAZELTON:
Great spot you've got here at the base of the mountain.
DARREN:
It's beautiful, thank you.
LISA:
Beautiful. So what we were hoping to do was to add the kind of character that this arch provides over around in the kitchen. And also to provide a little more distinction between the living room and the kitchen.
RON HAZELTON:
Okay, so you like the - you like the curve here. Well, there's a lot of curves in this house. I can see why you - you'd probably want to carry that out. So there's another place you'd like to put this?
LISA:
Yes.
DARREN:
Yes.
RON HAZELTON:
And that's where?
DARREN:
Right over here.
RON HAZELTON:
Oh okay. Oh, I see what you mean, Lisa, now about you wanting to separate these two rooms. So something that will go right up here.
Constructing this archway is simpler than you might think. First, we'll install four vertical wall supports. On top of them, we'll place two upper supports. Then, to the face of the frames, we'll attach plywood panels, cut to form the arch.
Lisa, if you'll take this short level -
Since the structure we're building will not go all the way to the ceiling, we decide to align the top of it with this ledge. Using levels, we extend a line onto the adjacent wall, then transfer the line to the opposite wall.
Now this is a template that we made by tracing the arch in the other room. I want to put this up here, let you take a look at it and see if you like the, the curve and the proportions here. How does that look to you?
[BOTH SPEAK AT ONCE]
DARREN:
Looks great.
LISA:
Great.
RON HAZELTON:
Yeah, you happy with this?
DARREN:
Yeah, very.
RON HAZELTON:
Once we're satisfied with the curve of the arch, we construct a mockup to help us determine how deep it should be.
LISA:
I think that it being wider does add more character than a smaller one. And then the second issue was providing some distinction between the two rooms. However, I don't want it to feel as if they're completely different and new.
You know, now you're going to the real part of the house. Do you feel like it does that?
DARREN:
No, I don't feel like it does that.
LISA:
How much more complicated is it to build it wider?
RON HAZELTON:
Going to have to stay here at least a week.
[LAUGHTER]
That means those cookies every day.
[BOTH SPEAK AT ONCE]
LISA:
Okay, that we can do.
RON HAZELTON:
No I, it's not that much more complicated. It really isn't.
With the dimensions finalized, we move into the garage to do some cutting. Using our cardboard template, Lisa traces the curve onto a sheet of three quarter inch plywood. Then cuts out the curve with a jigsaw. Next, Lisa switches to the chop saw or power miter box and cuts the two by four wall and top supports.
Very nice, okay, guys.
Now since we don't have wall studs in that wall where we need them to attach these pieces of wood, we're going to use toggle bolts. This is a toggle bolt. And this is the way it's going to work. We're going to put the bolt part of this through the two by four and then we're going to attach the toggle on the other side, just a few turns like this.
Now to insert the toggle into the hole in the wall, we're going to have to pinch these wings together like - we're going to slide this through the hole in the wall and then as it goes through the hole, these wings are going to flip out like that.
They're going to catch. And then as we tighten this bolt right here, it's going to pull this piece of wood up snugly to the wall. Okay, well I kind of commandeered your kitchen island here for our contemporary workbench. These are the first pieces of framing that we're going to put up on the wall right here.
So what I'd like you guys to do is just drill a hole through here. These are going to have to be put up with toggle bolts. So as vertical as you can make these, will help, okay.
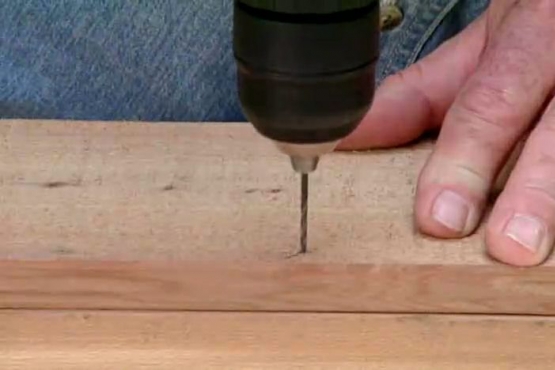
Darren holds the supports in place while Lisa inserts a bit into the pre drilled holes, transferring the hole locations onto the wall. Then using a bigger bit, Lisa enlarges the hole so that it's big enough to allow the toggle to pass through.
Lisa and Darren work the toggle bolts through and tighten them into position on all four vertical supports. Next, Lisa and Darren set the top supports in place, and secure them with screws.
All right, well here's our first arch. You guys did a nice job cutting that out. We're going to just set this right up here now on our frame.
The plywood arch is screwed securely to the frame, making the entire structure quite strong at this point. Next, the couple installs the first of five stringers that will form the framework for the interior of the arch.
Three more stringers span the top of the structure. There you go, Lisa.
Next, we cover the top of the framework with wallboard, attaching it with screws. Okay, Lisa, here's the face panel. Now it's, it's rectangular right now. We're going to cut the curve after we put it up. Just let me know when it's flush up there.
LISA:
Okay, a little more. About an inch or so.
RON HAZELTON:
More, more?
LISA:
There we go, that's good.
RON HAZELTON:
Okay. I'm going to hold this now. Why don't you go ahead and put a couple screws in.
Okay, Darren, now it's time to cut that arc that we already have on the plywood onto the wallboard here. Now we could use a wallboard saw to do that. Just sort of file along the edge. But I'm going to try something that's a little faster.
This is a spiral-cutting saw. It's got what's called a pilot, a self-piloting bit. That's going to run right along the edge of that plywood.
Now it's time to cover the curved interior of the archway. Using a garden hose and sponge, we'll apply a small amount of water to a piece of quarter inch thick wallboard. Then, wrap it in plastic for about ten minutes to let the moisture soak through so that it will become pliable.
All right, here's our quarter inch wallboard. It's been wet, so we're going to lay it up and bring the ridge all the way over here. There you go and it will bend, okay. So just push it up very gently. Hold it kind of in place there.
Okay, okay, you guys, you guys got it?
DARREN:
Got it.
RON HAZELTON:
Okay. See, and I see that sort of warm to our arch up there. I'm going to put some screws in here. This is a second piece -
A second layer brings our thickness up to one half inch. The same as the walls.
Now this is corner bead there and it protects the corners because they're very fragile as you can see right here. And also, in your house, you've got this rounded corner right here which is what this shape will give us.
But also, this has been cut or curved to allow it to bend in an arc, which is what we need about here. So if you'll hold your end right here, what I'm going to do is come over here and just kind of get an idea about how long this should be.
The plastic corner bead cuts easily with scissors and is held in place with ring shank nails which must go through the wallboard and into the framing. Next, we apply joint compound to cover the nailing flange and blend the corner bead into the surrounding surface.
Wherever the archway meets the wall, we apply joint compound and joint tape.
Just like that and kind of press that paper tape, into the joint compound. The paper tape acts to reinforce this joint. Keeps it from cracking.
After the joint compound dries and is sanded, the archway is primed, painted and complete.
Well guys, I really think you made the right decision about making this wider. It definitely separates the living room in here from the kitchen out here. Is that what you wanted?
LISA:
I'm very pleased. It adds a great deal of interest to the home, I think.
RON HAZELTON:
Oh great, great.
DARREN:
It's actually better than I expected.
RON HAZELTON:
Better?
DARREN:
Yeah.
RON HAZELTON:
Oh, that's nice to hear. You know, the real beauty of this archway is that it blends seamlessly into the architecture as if the builder himself had put it there.


