RON-VO:
LIFE AROUND GAINESVILLE MIGHT REVOLVE AROUND THE UNIVERSITY OF FLORIDA, BUT THIS CITY, LOCATED ABOUT A HUNDRED MILES NORTH OF ORLANDO, IS ALSO A TERRIFIC PLACE TO RAISE A FAMILY. AND AFTER GETTING HIS Ph.D. IN ENGINEERING HERE, RAISING A FAMILY IS EXACTLY WHAT JOHN BIANCHI AND HIS WIFE LAURIE CHOSE TO DO.
THE BIANCHIS ARE AN ACTIVE FAMILY WHO LOVE BICYCLING AND GARDENING…SO THEY MAKE A LOT OF USE OF THEIR GARAGE. KEEPING IT ORGANIZED HOWEVER, HAS BEEN LOW ON THEIR PRIORITY LIST. THAT’S GOING TO CHANGE WITH TODAY’S HOUSECALL.
Ron:
Well, you know, I’ve ordered a whole bunch of stuff, anticipating that we might need it. I think we’re gonna use all of it. Uh, kind of take me around here and show me a couple of things. Over here, I notice you’ve got a work bench of sorts.
John:
That’s my work bench.
Ron:
So you do use the garage as a workshop?
John:
I mostly use it as a tool storage space, but it would be nice--
Ron:
Tool storage space. Well, I can see why you don’t use it as a work space ‘cause there’s not much way to get to the top, is there?
Ron:
Now, what about over here? What’s this area?
Laurie:
This is my gardening bench.
Laurie:
I hate to even go near it because I call it my bug memorial cemetery. They’re-- It’s caked with bugs and it’s really nasty.
Ron:
Well, then something’s working. I mean, their bodies are over there; I don’t know what you’re doing, but it’s the right thing.
Ron:
Floor over here. This looks pretty bad.
John:
Yeah.
Ron:
But I’ve got a solution for that, too.
Laurie:
Great.
John:
All right.
Ron:
So first thing we gotta do is get everything out of here.
MUSIC
RON-VO:
THERE’S A REAL SENSE OF ADVENTURE IN CLEANING OUT A GARAGE…YOU JUST NEVER KNOW WHAT’S IN STORE FOR YOU.
Laurie:
I found the neighbor’s blower.
Ron:
The neighbor’s blower?
Laurie:
Yeah.
Ron:
They’ll be glad we did this project, huh?
Laurie:
Ooh. This is so nasty.
Ron:
Is there a bird in there?
John:
It is. We get birds in the garage.
Ron:
Come on. It’s actually in use?
John:
It, it is. Well, I think he’s out right now.
Ron:
Well, I’m gonna be very careful with this. This has gotta come back in here, I would imagine.
[SOT: GARAGE OPENER]
Ron:
That’s great for a massage. It’s not gonna do very much for new garage door, though, is it? Kind of seen better days.
Ron:
I want to replace this with a different type of garage door opener, brand new. It’ll eliminate the power unit here and this track that’s hanging down on the ceiling. And where it’s gonna mount, actually, is over here.
[SOT: garage door]
Ron:
On top of the door, just to the right of the spring up here. The entire mechanism is going to be right there. So it’ll clean all this out of here.
RON-VO:
REMOVING THE POWER UNIT FOR THE OLD GARAGE DOOR OPENER IS SIMPLY A MATTER OF UNPLUGGING IT AND UNBOLTING IT FROM THE SUPPORT BRACKET.
MUSIC
RON – VO:
NOW JOHN AND LAURIE HAD A NEW GARAGE DOOR INSTALLED RIGHT BEFORE MY VISIT, BUT I STILL WANT TO CHECK IT OUT BEFORE PUTTING IN THE NEW OPENER.
Ron:
Now, guys, for any garage door opener to operate properly, the door itself needs to be balanced. Now, here’s a simple test you can perform to find out if it is. Uh, start by bringing the door down about one panel, like this, and let go of it. Then bring it down two panels. And let go of it. And finally, three panels. And let go. At none of these positions should the door either drift upward or drop downward. If it does do that, it needs to be adjusted, and that’s a job to be left for the professionals. Well, this is a brand new door here.
John:
Mm-hmm.
Ron:
Your old door, was it balanced?
John:
Um, uh, it was extremely heavy and almost gave me a hernia every time I had to lift it or pull it down.
Ron:
Okay. So the new door’s gonna solve that problem.
John:
Oh, absolutely.
Ron:
Let’s go on inside here and get started on the opener.
RON-VO:
INSTALLATION OF THIS SYSTEM IS NEARLY AS SIMPLE AS THE REMOVAL OF THE OLD ONE. FIRST JOHN AND LAURIE INSTALL THESE SPLIT GEAR WHEELS OVER THE DOOR SPRING SHAFT AND BOLT THEM CLOSED.
Ron:
Now stay right where you are, ‘cause I’m gonna hand up the power unit to you.
RON – VO:
THE POWER UNIT IS ALSO DESIGNED TO FIT OVER THE SHAFT. IT ENGAGES THE GEAR WHEELS AND IS SECURED TO THE WALL WITH LAG SCREWS.
Ron:
This is the power cord. It's gonna go from your receptacle of the ceiling over to your new garage door opener. All right? And to make this installation look really neat, we're gonna put it inside this plastic channel right here, like this.
MUSIC
Ron:
And then the top of the channel just closes like this.
[SOT: DRILL]
Ron:
All right. Now I've attached several clips up here. So guys, just hand that up to me now. And that channel is gonna snap right into these clips.
RON-VO:
MOST OF THE ELECTRONICS FOR THIS DOOR OPENER ARE LOCATED IN THE BASE OF THIS LIGHT FIXTURE WHICH MOUNTS RIGHT ON TOP OF THE EXISTING ELECTRICAL OUTLET IN THE CEILING. WE PLUG ONE END OF THE POWER CORD INTO THE FIXTURE, THE OTHER INTO THE POWER UNIT…THEN SNAP ON THE COVER.
Ron:
Well, here's your control panel right there, completely wireless. In fact, there are really no wires in this system, except the one that goes from your receptacle out here to the motor. Everything else is wireless. In addition to the normal up and down button here, a couple of interesting features. One is a ten-second delay. So you can have the door open, push this, and take your time walking out before it closes.
Ron:
This is a pet button right here. So you can bring it up a prescribed amount. Pets can go in or out, or the garage can ventilate. And here is your remote control for the car.
John:
All right.
Laurie:
Fantastic.
John:
Fantastic.
Ron:
Who's gonna get that?
Laurie:
Thanks.
John:
Well, we fight over it.
Laurie:
We fight over it.
Ron:
No. You don't have to fight, 'cause I got two of 'em, one for each of you.
[SOT: AUTO GARAGE OPENER]
RON-VO:
WE GIVE OUR GARAGE DOOR ITS MAIDEN VOYAGE, BUT THERE’S ACTUALLY A MUCH MORE IMPORTANT TEST THAT ANYBODY WITH AN AUTOMATIC GARAGE DOOR OPENER SHOULD CONDUCT FROM TIME TO TIME.
TIP GRAPHIC (TIP SFX)
Ron:
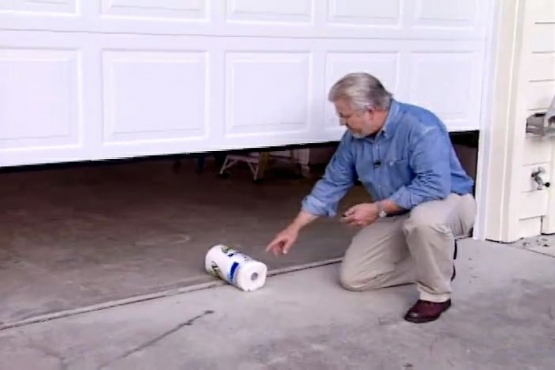
You know, most folks think their garage door opener is working properly if they push the button and the door goes up and down. But there's one more important factor. Garage door openers are equipped with a safety feature that stops the door and reverses it when it encounters resistance, like a child or a pet.
Now here's a simple test you can make to be sure that your door is adjusted properly. Start the door down. Put an unopened roll of paper towels underneath it. The bottom of the door should contact the paper towels, compress it slightly, stop, and then reverse. If it doesn't, your door needs to be adjusted. You can do that yourself by checking your owner's manual, or call a professional.
Ron:
This is called Gladiator Garage Works by Whirlpool Corporation. And the real key component are these slotted wall panels down here. They're made of composite plastic. We are going to literally cover all of the walls with these panels.
And once they're up there, everything else is gonna clip into and slide on these, so that you've got total flexibility with the system. Now these do have to be attached onto the wall studs.
RON-VO:
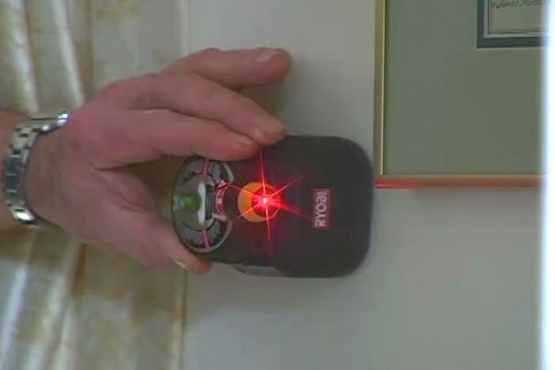
JOHN, LAURIE AND I USE ELECTRONIC STUD FINDERS TO LOCATE, AND MARK ALL THE WALL STUDS. THEN, USING A LEVEL, WE EXTEND OUR MARKS FROM THE FLOOR TO THE CEILING.
MUSIC
Ron:
Now we're going to install these slotted wall panels, beginning at the top and then working down. What we need is a reference line, a level reference line that's a little over a foot from the ceiling. The problem is that chances are this ceiling is not level. It's got, running down a slope or a slant. So we need to find the lowest point of the ceiling.
RON-VO:
TO DO THIS, I FIRST SET A LASER LEVEL ABOUT SIX INCHES BELOW THE CEILING. JOHN AND LAURIE THEN MEASURE THE DISTANCE FROM THE CEILING TO THE LASER LINE ABOUT EVERY FIVE FEET ACROSS THE WALL.
Ron:
Okay, Laurie, what are you getting there?
Laurie:
It's about five and a half.
Ron:
Okay. So it's continuing to slope down.
RON-VO:
WE CONTINUE WORKING OUR WAY AROUND THE ROOM CHECKING THE DISTANCE FROM THE CEILING TO THE LINE.
Ron:
So guys, this is the lowest part of our ceiling right here. I have measured down twelve and a quarter inches, made a mark there. Now we're gonna shoot a level line across this wall. Let me put the laser level up here.
All right, John. Now if you'll make a mark down there.
John:
Okay.
Ron:
Just, uh, three or four inches out from the corner.
RON-VO:
JOHN AND I MARK BOTH ENDS OF OUR LASER LINE, REMOVE THE LASER LEVEL, THEN SNAP A CHALK LINE BETWEEN THE MARKS.
(SOT – SNAP)
RON-VO:
WE NOW HAVE A LEVEL REFERENCE LINE. THIS IS WHERE WE’LL LINE UP THE BOTTOM OF OUR FIRST ROW OF PANELS.
Ron:
Well, we are ready to put up our first panel. Now, these come in eight-foot lengths, but the trick is the end of the panel has to end on the center of a stud. So this first one is a little bit too long. We're gonna have to shorten it by about six inches.
MUSIC
[SOT: SAW]
Ron:
Okay. Let's put that first panel up. Bottom edge of the panel on the chalk line. Laurie, yours should be touching the wall down there.
[SOT: DRILL]
RON-VO:
WE DRIVE SCREWS THROUGH EACH OF THE PANEL’S GROOVES WHEREVER THEY INTERSECT A STUD. THIS WILL MAKE FOR A VERY STRONG INSTALLATION.
Ron:
Panel number two headed for home.
[SOT: SAW]
RON-VO:
THE SECOND ROW OF PANELS IS INSTALLED BY INSERTING THE TONGUE ON THE UPPER EDGE OF THIS ROW INTO THE GROOVE OF THE ROW ABOVE, THEN DRIVING IN THE SCREWS.
[SOT: DRILL]
Ron:
Now you notice the joint on the top row is right here?
John:
Mm-hm.
Ron:
The joint on the second row is gonna be back here. That's what we want, at least two studs separating the joints on adjacent rows.
RON-VO:
SOON WE ENCOUNTER OUR FIRST ELECTRICAL RECEPTACLE. WE MEASURE HORIZONTALLY AND VERTICALLY TO DETERMINE WHERE AN OPENING SHOULD BE CUT.
RON-VO:
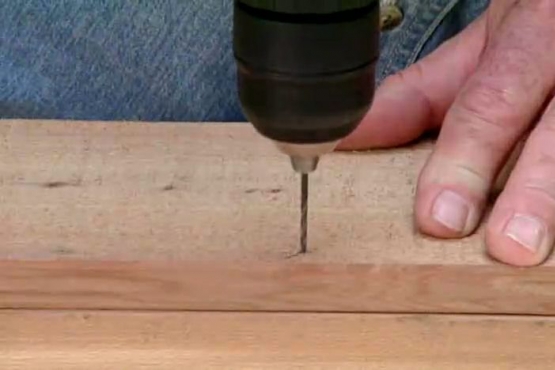
… THEN TRANSFER THESE MEASUREMENTS TO THE PANEL ITSELF. WE ALIGN THE EDGES OF A FACE PLATE WITH THE MARKS AND TRACE AROUND IT. NEXT, I USE A SPRING LOADED PUNCH TO CREATE FOUR SMALL DEPRESSIONS AT EACH CORNER. THESE WILL KEEP THE DRILL BIT FROM DRIFTING ACROSS THE SURFACE AS LAURIE BORES A HOLE IN EACH CORNER.
[SOT: DRILL]
Ron:
Beautiful.
John:
All right. Good job!
Laurie:
Good deal.
Ron:
All right. Now who wants to cut these out?
John:
Oh, I will.
[SOT: JIGSAW]
RON-VO:
THE JIGSAW BLADE IS INSERTED INTO THE HOLES, AND THE OPENING IS CUT OUT.
Ron:
Hey, right on. Okay. Excellent. Now we’re gonna trim out this opening, using this material. This is called gear wall trim. So bring this back down. We’re gonna cut this to size, and put it in the opening. All right?
MUSIC
RON-VO:
AFTER SNAPPING ON ALL FOUR SECTIONS OF TRIM, WE ATTACH THE PANEL TO THE WALL…AND CONTINUE WORKING OUR WAY AROUND THE GARAGE.
[SOT: DRILL]
[SOT: SAW]
WHEN WE GET DOWN TO THE BOTTOM ROW, OUR PANELS NEED TO BE A NARROWER WIDTH, SO WE RIP THEM TO SIZE ON A TABLE SAW.
[SOT: SAW]
[SOT: DRILL]
RON-VO:
AS WE MOVE ON TO THE NEXT WALL, WE ATTACH A LONG STRIP OF THE GEAR WALL TRIM IN THE CORNER, WITH THE OPENING FACING THE UN-PANELED WALL. THIS WILL GIVE THE CORNERS A MORE FINISHED LOOK.
WE SLIDE THE FIRST ADJOINING PANEL INSIDE THE WALL TRIM THEN ATTACH IT. WE’LL REPEAT THE PROCESS FOR EACH INSIDE CORNER. WE ALSO USE THE TRIM TO CONCEAL THE CUT ENDS AROUND THE DOORWAYS … AND ON OUTSIDE CORNERS. SOON, ALL OF THE WALLS ARE COVERED, BUT BEFORE WE MOVE IN THE SHELVES AND CABINETS, THERE’S ANOTHER ISSUE TO ADDRESS.
Ron:
You know the only problem, is now this floor looks awful. You got some grease stains here, rust over there, a crack running across this way. Now, we could scrub this and bleach this, and spend a couple days painting it. Or, this could all disappear in about 30 seconds. So it’s up to you guys?
John:
Thirty seconds.
Laurie:
Thirty seconds.
Ron:
All right, okay. So walk back over here. This is a ma--, a vinyl floor-covering mat from Better Life Technology. And all you guys have gotta do is just simply roll this out. No adhesive required. Just roll it right out into the room.
Ron:
You notice it’s just lying flat on the floor here. It’s got grooves cut into it, so if you want to wash this out, the, uh, grooves will carry the water right out of the garage. Now we’ve got another roll over here that’ll cover the other half of the garage. Let’s get that, okay?
Ron:
And one nice shove. Okay. You ready to turn this back into a garage?
Laurie:
Yeah.
John:
Yeah.
Ron:
Okay, let’s get some cabinets.
John:
Okay.
Laurie:
Great.
RON-VO:
JOHN AND LAURIE ORDERED SEVERAL OF THE OPTIONAL PIECES THAT ARE OFFERED WITH THE GARAGEWORKS SYSTEM. INCLUDING A HEAVY-DUTY WORK BENCH, SEVERAL BASE CABINETS, AND WHAT THE SYSTEM IS REALLY DESIGNED FOR, THESE EASY-TO-INSTALL HANGING CABINETS.
Ron:
Now here’s one of the great things about this system. The lip on this rail on the back of these cabinets hooks onto those slots in the gear wall.
Ron:
Engage the track. Put the bottom in. That’s it.
John:
There we go.
Ron:
Alright, you want to grab the bench and put it back?
John:
Alright.
MUSIC
RON-VO:
THE CABINETS SIDE ALONG THE TRACKS OF THE GEAR WALL, SO SPACING THEM EXACTLY WHERE YOU WANT IS A SIMPLE TASK. OTHER HANGERS RANGING FROM BASKETS TO BICYCLE RACKS SNAP ON TO THE GEAR WALL AS WELL.
AS WE CONTINUE WORKING, IT’S HARD TO EVEN REMEMBER THE CONDITION OF THIS GARAGE JUST A SHORT TIME AGO. ALL THE ITEMS THAT WERE JUST SITTING OUT ON THE FLOOR, ARE NOW SAFELY AND CONVENIENTLY STORED. OF COURSE, WE TOOK THE OPPORTUNITY TO THROW AWAY A LOT OF ITEMS, BUT NOW THERE’S A PLACE FOR EVERYTHING. JOHN HAS HIS WORKBENCH, LAURIE HAS HER GARDENING CENTER, AND WE’VE EVEN LEFT A SPACE FOR THE BIRD NEST.
Ron:
Now just one thing, when I do a project like this, I make unannounced inspections to make sure that you keep it neat. All right?
Laurie:
We promise.
Ron:
I could come back any time, now.
John:
You hear that?
Ron:
Guys, I had a great time with you.
Laurie:
Thank you so much.
Laurie and John:
[SIMULTANEOUSLY] Ron sandwich.
RON-VO:
WELL YOU CAN’T BLAME LAURIE AND JOHN FOR BEING EXCITED. FROM THE TRACK-FREE GARAGE DOOR OPENER TO THE STAIN-FREE FLOOR AND STATE OF THE ART ORGANIZATION SYSTEM, THEIR GARAGE HAS BECOME THE ABSOLUTE MODEL OF DO-IT-YOURSELF EFFICIENCY.
