How to Build a Picnic Table
Build a Picnic Table from Two-by-six Treated Lumber Cut to Dimension in an Assembly Line to Speed the Building Process
Use this simple design and two-by-six treated lumber to construct a picnic table with built-in benches. Set up an assembly line and end stops to cut multiple pieces of identical dimensions. Screw the components together initially, but insert carriage bolts to hold them securely for the strength and stability to serve an immoveable feast and seat many people!
Read More
Mark Angle Cuts for the Picnic Table End Frames
Measure and mark for angle cuts on the ends of the two-by-six planks as you construct the end frames for the picnic table. Use a bevel gauge to transfer the angle to the power miter saw.

Cut Picnic Table Components to Exact Dimensions
Set up the power miter box with end stops to ensure that like picnic table components are cut exactly to length. Using an assembly line to cut multiple pieces makes the project go faster.

Position Supports for Picnic Table End Frames
Use a workbench to position a short and a long lateral support (for the picnic table top and benches, respectively) onto a pair of angular legs. The resulting end frame resembles an uppercase letter "A." You'll need two per table.

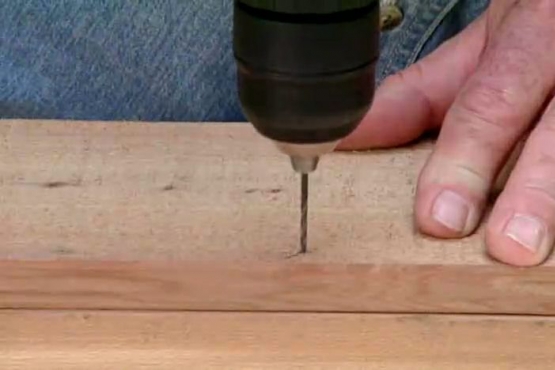
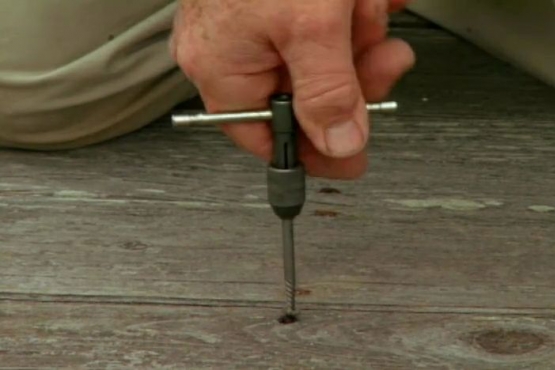
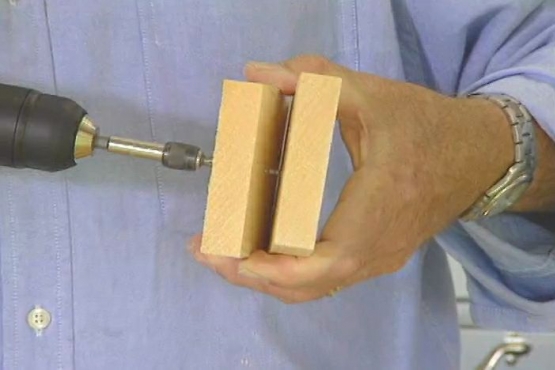
Drill Picnic Table End Frames for Screws and Carriage Bolts
Pre-drill and initially attach the end frame components for the picnic table. Next, drill additional larger holes through all the thicknesses of the end frames for the carriage bolts.

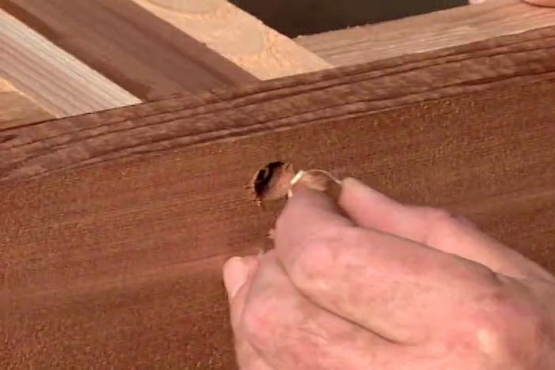
Reinforce End Frame Construction for a Strong Picnic Table
Insert carriage bolts through the large holes with the smooth heads inside to protect legs from getting scratched under the picnic table. Add washers and nuts on the outside, finger tightening them and snugging them with a socket wrench.

Secure Planks for the Picnic Table Top
Set the end frames upright and evenly position the planks for the picnic table top, spacing them 1/4 inch apart with temporary spacers. Pre-drill holes and drive in screws to secure the planks to the supports.

Center Planks for the Picnic Table Benches
Position outer planks for the picnic table benches with an even overhang at the tips of the supports and centered on the table. Space the second bench blank 1/4 inch away and secure all to the supports with screws.

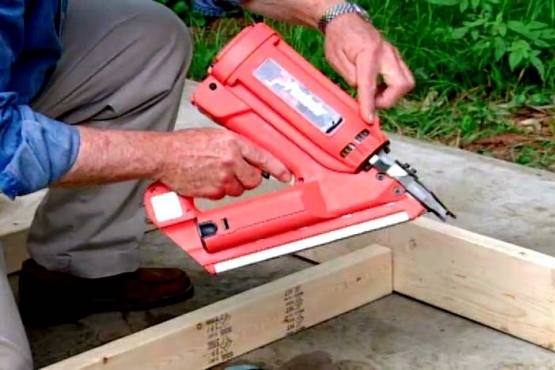
Reinforce the Picnic Table with Cross Braces
Add cross braces to the underside of the picnic table top, spanning laterally across the planks. Secure angle braces from the table top to the end frames for even more stability and strength.

Coat the Picnic Table with Multi-surface Sealer to Protect It
Brush on multi-surface sealer to penetrate the wood to seal and waterproof the picnic table and protect it against sun and weather. Let it dry thoroughly per manufacturer's directions before using the picnic table.
Related Tips


Blog Articles

Have You Heard of Landscape Glue?
You love the rustic charm of a gravel walkway, but the constant scattering of stones across your lawn and patio can be a real headache. Whether it’s from pets, lawn mowers, or just foot traffic, it seems impossible to keep those stones in place. Sound familiar? Well, Brian shows us a simple DIY method using landscape glue to keep your gravel path looking pristine and, more importantly, in place.

How to Remove Candle Wax Drips: Two Effective Methods
Candles create a warm and inviting atmosphere, but those pesky wax drips can be a real headache. Luckily, Brian shows us a couple of effective methods to tackle this issue, and they involve two very different temperatures: hot and cold. Here, we'll explore two effective methods: one using cold and the other using heat.

Guide to Hanging on Masonry Walls
Ever wondered how to hang that picture frame or shelf on a brick or concrete wall? It can seem daunting, but with the right tools and techniques, it's a straightforward DIY project. This guide breaks down two common methods: using concrete screws and using anchors, making it easy for you to tackle your next hanging project.


