RON-VO:
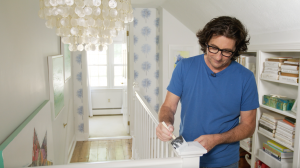
TODAY’S HOUSECALL TAKES ME THROUGH ATLANTA, GEORGIA TO THE SUBURB OF LAWRENCEVILLE, AND THE HOME OF DEREK AND GWEN ALLEN. WITH TWO YOUNG SONS, THREE-YEAR-OLD DREW AND 15-MONTH-OLD JASON, THE ALLENS HAVE HAD TO RE-ALLOCATE SOME OF THE ROOMS IN THEIR NEW HOME.
THE FORMAL LIVING ROOM HAS EVOLVED INTO A COMBINATION HOME OFFICE AND PLAYROOM. THE ALLENS WOULD LIKE TO RE-DECORATE THE ROOM, AND FIND A WAY TO MAKE IT SERVE THEIR DUAL NEEDS MORE EFFECTIVELY.
THE PROJECT ITSELF WILL BE PRETTY STRAIGHTFORWARD, BUT WHAT MAKES THIS HOUSECALL DIFFERENT IS THAT WE’RE GOING TO SHOW YOU A FEW OF THE BEHIND THE SCENES ACTIVITIES THAT ARE AN INEVITABLE PART OF MAKING HOUSECALLS.
AS I HEAD TOWARD THE ALLEN’S HOME, CARPENTER DAVID SCHULTE AND ASSISTANT CARPENTER, SCOTT HAINES ARE ALREADY ON THE SCENE WITH OUR WORKSHOP-ON-WHEELS -- TO BEGIN PREPPING FOR TODAY’S PROJECT.
Gwen:
Hello, Ron! How are you?
Derek:
How ya’ doing?
Ron:
Hey, Gwen, how are you?
Gwen:
Fine!
Ron:
Derek.
Derek:
Good to meet you.
Ron:
And who is this?
Gwen & Derek:
This is Drew.
Ron:
How are you?
Gwen:
This is Ron!
Ron:
Do I get a hug?
Ron:
And you were using you said that you were using it for oh, because you had to take your computers stuff out of what is now the nursery?
Derrick & Gwen:
Yes, yes.
Ron:
Okay, so it's down here now.
Gwen:
So it…we’ve put all…
Ron:
What were you thinking Dave?
Dave:
Ah, we're gonna paint the walls kind of a burgundy color, crown molding and then to make this more of an office we've got some ready to assemble unfinished furniture from Whittier Wood products, and so we'll put those together. Some bookcases a computer armoire and a toy chest.
Ron:
Okay. A toy chest?
Dave:
Well…
Gwen:
Yeah, all these toys…Yay!
Ron:
I know, it’s always a mix, right? Always a balance when you’ve got children. OK.
RON-VO:
WE’RE GOING TO START OFF BY PRIMING THE WALLS, SO TO PREPARE FOR THAT, WE FIRST COVER THE CARPET WITH PLASTIC DROP CLOTHS, THEN MASK THE WINDOWS, DOOR CASINGS, AND BASEBOARDS.
WHILE WE’RE PREPPING THE ROOM, DAVID AND SCOTT ARE PAINTING A SECTION OF DRY WALL WITH THREE DIFFERENT SHADES OF BURGUNDY THAT GWEN AND DEREK HAVE PICKED AS POSSIBLE COLORS FOR THE ROOM.
Ron:
What do you think, you have a choice here?
Gwen:
Yes, definitely the first one.
Ron:
This one.
Gwen:
The one on the left yes.
Derek:
It’s really rich.
Ron:
All right.
RON:
ONCE WE TAKE A LOOK AT THE COLORS IN DAYLIGHT, WE SHUT THE BLINDS AND TURN ON A LAMP TO GET AN IDEA OF HOW THE COLORS WILL LOOK AT NIGHT.
Ron:
(SINGING). Man, Derek you are easy to entertain. Alright so we're gonna prime. Alright this may not look like primer. Because it’s got color in it. But it is and we've tinted this primer because we're going from a pretty dramatic, very light colored wall over here actually stark white, to a color that's very dark.
Gwen:
Right.
Ron:
So to help us get better coverage on the final coat we've added a little color to the primer which is a something you can do anytime you're gonna make a drastic change like that.
RON-VO:
USING EDGING TOOLS, DEREK AND GWEN GET TO WORK PRIMING THE EDGES AND CORNERS OF THE WALLS.
Ron:
I generally try to keep the pan close to the work, however, be careful not to step in it, which I have done.
MUSIC
RON-VO:
GWEN AND DEREK FINISH PAINTING THE EDGES AND NOW WE’RE ABOUT TO ROLL ON THE REST OF THE PRIMER.
TIP GRAPHIC (TIP SFX)
Ron:
Now if you’re going to be rolling paint onto walls like these here's a tip that'll save you time and give you more uniform results. Instead of putting your paint in a pan like this, put it in a 5 gallon bucket. In this case we've got 2 gallons to put in here.
Now if there's any color variation between these 2 gallons, it's gonna go away when I mix them together.
Everything's mixed.
Now we're gonna drop this over the side of the bucket, this is called a painter's screen. And instead of going back to a paint pan and dipping our roller in that, we're going to dip this directly into the 5 gallon bucket. Submerge it like that. Roll off the excess on the screen. And we're ready to paint. Now this means you have far fewer stops to refill a roller pan like that, and as long as you keep this bucket up close to the wall, you have to spend almost no time reloading.
Place the fully charged roller near the top of the wall, and make one long stroke from top all the way down to the bottom, and back up again.
Recharge the roller, move over about one roller's width, and repeat that process. After you've made 3 or 4 stripes, then come back and blend them together. With long vertical strokes going from the top all the way down to the bottom.
Ron:
Try this technique; it'll save you time and you'll avoid what painter's call holidays. That's the spots on the wall where you just didn't get quite enough paint.
MUSIC
Ron:
Alright so, we are ready to start rolling.
MUSIC
RON-VO:
NOW I KNOW MY TIPS LOOK SIMPLE, BUT OCCASIONALLY THEY REQUIRE A LITTLE HANDS ON PRACTICE.
Gwen:
I don't feel like I’m doing this right let's see.
Ron:
All the way down.
Ron:
Oh, oh, no. Look what Gwen did! Gwen hit the ceiling, Gwen hit the ceiling.
Ron:
Whoops look what I just did. I saw Gwen’s marker there and I said, “I gotta match that.”
Ron:
There you go now you come down so you have that white stripe in between.
Gwen:
Oh, I thought you… Whoops.
Ron:
You thought I had a hold of it? Like I’m going to do to yours and mine? Wow, she was really quick to give up that roller, wasn’t she?
Ron:
You’re unloading the roller now. You've already got enough paint on the wall, all the way up and down, all the way down. All the way down there you go, top to bottom. That's it. And then back up. And all the way down, you keep working your way across the wall so you've got a nice even coverage there.
Gwen:
Okay. And cover all the white spaces.
Ron:
That's the idea, yeah.
RON-VO:
IF PART OF A HOUSECALLS PROJECT INVOLVES REPETITION, LIKE ASSEMBLING ALL THIS FURNITURE, I OFTEN DO SOME OF THE WORK ON CAMERA, WHILE DAVID AND SCOTT WORK OFF-CAMERA.
Derek:
Hey Ron we finished with the primer.
Ron:
You did?
Gwen:
Yeah. Finally finished.
Ron:
That was fast.
Gwen:
Yeah. It was pretty quick.
Ron:
Okay, so while that's drying ah, let's go ahead and start putting some of the furniture together.
Gwen:
Okay.
Ron:
So we've got the first piece right here this is actually ah, well there's a picture of it right here you can see this is a book case.
Gwen:
Book shelf.
MUSIC
Ron:
And I guess I'm gonna be forced to read the directions here.
Ron:
Now everybody pay attention, place the right side panel A on the clean cardboard inside the box run a carpeted surface with the holes pointing upward screw cam connectors J into the holes for the permanent shelves they show in figures 1 and 1A.
Gwen:
Wow.
Derek:
Ba dump bum.
Derek:
How you coming Gwen?
Gwen:
Think I'm doing it right. Let's see.
Ron:
Oh, Gwen you're putting 'em in backwards huh.
Gwen:
I put 'em in backwards oh, no.
Ron:
No you didn't.
Ron:
This is the top. The screws are pointing, good, alright. Now is there a front or back to this?
Ron:
Only one more cam somewhere is there… seen one down there anywhere?
Gwen:
No.
Ron:
Oh, man.
Gwen:
Maybe it fell on the ground.
Ron:
Oh, here's one, here it is.
Gwen:
You see it?
Ron:
You see David has read the directions.
Gwen:
I'm becoming an expert at this now.
Ron:
I like it.
Gwen:
Yeah, this is really nice.
Ron:
Now here’s the back. This is eighth inch plywood. Okay Gwen see those little, uh little groove right there?
Gwen:
Uh huh, just slide it in?
Ron:
Slide it in.
Ron:
All the way up. Okay it should be flush with the top there, right?
Derek:
Yes we are.
Ron:
Here’s the thing on this Gwen. This is a variable speed drill. The further you pull this back the faster it goes. So pull it very slowly.
Ron:
The most enjoyable part’s going to be what we’re doing right now.
Ron:
You can go a little faster than that.
Derek:
Today.
Ron:
When I said slow Gwen took me at my word.
MUSIC
[SOT: DRILL]
Derek:
OK.
Gwen:
Final screw.
Ron:
Okay guys. All right now just flip it over and we should have a bookcase.
Derek:
All right. Voila.
Gwen:
Here it is.
Ron:
There it is. All right, guys. Let’s carry that up to the garage. I’ll supervise. That way.
Gwen:
This way.
Ron:
Up the hill.
ACT 2 TEASE RON-VO:
COMING UP…A COAT OF PAINT, A BIT OF CROWN MOLDING … THEN WE GET DOWN TO THE SERIOUS WORK.
Ron:
No you can’t. This is the police.
Ron:
Do we have to put this away now?
WE NEED TO PUT A FINISH ON THE FURNITURE, BUT FIRST, SINCE OUR PRIMER IS DRY WE APPLY ANOTHER COAT OF PAINT TO THE WALLS.
Ron:
You know very few things cost so little yet have such a dramatic effect on your home as paint. And the nice thing is, you know, if you do it and I know we were joking about this later but if you don’t like it just do it over again.
Gwen:
That’s true.
Ron:
I’m not suggesting that that’s going to be the case here.
RON-VO:
WHILE PAINTING IS GOING ON INDOORS, I’VE MOVED BACK OUTSIDE TO START PREPPING OUR FURNITURE FOR FINISHING. I DRIVE A COUPLE OF NAILS INTO THE EDGES OF THE BOOKSHELVES AND PLACE THEM ON A PAIR OF TWO-BY-FOURS.
MUSIC
Ron:
So see now we can let these nails rest on these two by fours and even though we could have wet finish on both sides of this no part of the shelf is touching anything. So that allows us to kind of work a little bit faster. I don’t have to wait for one side to dry.
Gwen:
That’s a good idea.
Ron:
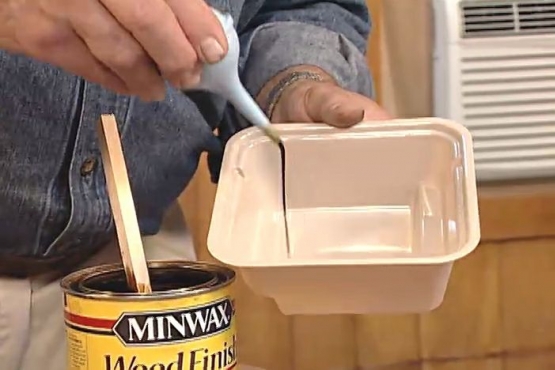
Now the shelves uh these, these cabinets are made of Birch and Alder and it has a tendency to splotch a little bit when you stain it.
So we’re going to put this material on here. This is called a pre-stain wood conditioner and all we have to do is brush this on. It’s kind of almost water like. So you guys just go ahead and start, start putting this on.
Gwen:
All right.
Ron:
You’re going to put it on both sides
Ron:
Okay. And now we can just flip this right over. See that’s wet on the other side but it’s not touching. Yeah is this, is that brilliant?
Gwen:
Yeah. I never would have thought about that.
Ron:
Yeah, I learned that from somebody. Everything I know I learned from somebody else, I tell you.
RON-VO:
AFTER APPLYING THE WOOD CONDITIONER, WE WIPE OFF THE EXCESS WITH CLOTHS AND LET IT DRY. NOW WE’RE READY FOR OUR FINISH STAIN.
Ron:
This is a stain that’s been added to a finish or a coating. So it’s sort of suspended in the coating and again because of this kind of wood, the Birch and the Alder, it’s going to go on with less spotting and blotching.
RON-VO:
IT’S IMPORTANT TO APPLY THE FINISH AS QUICKLY AS POSSIBLE TO AVOID LEAVING STREAKS AND LAP MARKS.
Ron:
And then come back with nice long strokes like this.
RON-VO:
ONCE THE FINISH DRIES, WE RUB OUT THE SURFACE WITH FINE STEEL WOOL TO REMOVE BUBBLES OR TRAPPED DUST PARTICLES. MOVING THE STEEL WOOL IN LONG STROKES IN THE DIRECTION OF THE WOOD GRAIN PREVENTS SCRATCHING.
(SOT: SANDING)
RON-VO:
NEXT WE RUN A TACK CLOTH OVER THE SHELVES TO PICK UP ANY RESIDUE … THEN WE’LL APPLY A SECOND COAT OF FINISH.
MUSIC
Ron:
All right. We are going in search of some studs. Wall, wall studs that is. Alright so, Gwen there's a stud finder for you.
Gwen:
OK.
RON-VO:
BACK INSIDE, WE’RE GOING TO INSTALL SOME CROWN MOLDING, SO WE LOCATE AND MARK THE WALL STUDS.
Ron:
Let's put up some crown molding.
RON-VO:
WE’RE GOING TO BE PUTTING UP A SIMPLE-TO-INSTALL MITERLESS CROWN MOLDING SYSTEM THAT REQUIRES NO ANGLED CUTS. USING CONSTRUCTION ADHESIVE AND FINISH NAILS WE FIRST ATTACH INSIDE CORNER BLOCKS. THEN, AT THE CENTERPOINTS BETWEEN THE CORNERS, WE PUT UP DIVIDER BLOCKS.
MUSIC
RON-VO:
WHILE CROWN MOLDING CAN BE NAILED TO THE WALL AND CEILING, I PREFER TO USE SMALL TRIANGULAR MOUNTING BLOCKS WHICH WE ATTACH WITH CONSTRUCTION ADHESIVE AND NAILS.
THEN WE SIMPLY CUT THE CROWN MOLDING TO LENGTH, SET IT IN PLACE AND NAIL IT INTO THE MOUNTING BLOCKS.
WE FILL ANY GAPS WITH PAINTER’S CAULK AND THE SMOOTH THE BEAD USING A FINGER.
Ron:
I love this part this is the unveiling you know.
RON-VO:
FINALLY WE REMOVE THE MASKING PAPER….AND BRING IN THE FURNITURE.
MUSIC
Gwen:
Look at this Drew. It is so pretty. You like it?
[SOT: DRILL]
Ron:
You can’t run into a police car like that.
Drew:
Hey.
Ron:
Oh yes I can. I can drive anywhere I want to. No you can’t. This is the police.
Ron:
Do we have to put these away now?
Drew:
No.
Ron:
I’ll trade you. Come on, the car for the paintbrush, OK, buddy.
Gwen:
Tell him thank you.
Ron:
Let’s see how, how does this work. Comes up.
Gwen:
And it goes down.
Ron:
And it goes down. Comes up.
Gwen:
And down.
Ron:
Goes down.
RON-VO:
WELL, THERE’S NO TIME FOR SITTING DOWN ON THE JOB JUST YET. ONCE WE’VE SETTLED ON A LOCATION FOR THE FURNITURE, I WANT TO TAKE AN IMPORTANT PRECAUTION.
Ron:
Tall cabinets like this one and children can be a dangerous combination. Children tend to want to climb up on these, use them as ladders and if they get up too high well they can tip over. The solution is really simple. Just install a small bracket on the top. First attach it to the top of the cabinet…And then right into a wall stud…
(SOT: DRILL)
Ron:
And then right into a wall stud…
(SOT: DRILL)
Ron:
There. Now that’s safe and secure. One added precaution: keep things that are attractive to children off high shelves, down low where they can reach them without having to climb up.
Drew:
Come on in.
Ron:
Hey come on in. Hey! Huh?
Derek:
This is great.
Ron:
Not bad huh?
Derek:
This is awesome.
Ron:
You’ve got a nice workspace here, keyboard, monitor, little shelf over here. But you know what’s really cool about this?…
Ron:
While it works really well as an office.
Gwen:
Look at that.
Ron:
This goes up and locks here. This slides in. This closes.
Drew:
And this goes…
Ron:
Hey Drew put the chair over there, would you hon?
Drew:
Yeah.
Ron:
Let’s show mom and dad how we can transform this room from an office into a room that’s multi-purpose so we can get down to the really important work at hand. Which is go over here and play with the toys huh?
Gwen:
Oh Drew! The place for the toys.
Ron:
So you like the color?
Gwen:
Love the color. It’s perfect.
Derek:
It’s perfect.
Gwen:
Just what we wanted.
Ron:
And it was good for you guys?
Derek:
Oh man I enjoyed every minute of it.
Gwen:
Yes and we learned so much. So now we’re real confident to do other projects too. So watch out. We’re going to do lots of weekend projects now.
Ron:
Uh that’s, that’s the best thing I could hear guys.
Derek:
All right.
Ron:
Hey Drew? Coming at you buddy.
RON-VO:
WELL OUR DAY BEGAN WITH A LIVING ROOM SUFFERING FROM AN IDENTITY CRISIS, BUT HAS ENDED WITH A GREAT-LOOKING SPACE THAT OFFERS SOMETHING TO EVERY MEMBER OF THE FAMILY.
