How to Lay Ceramic Tile over Concrete
Use the Tavy Thin-Skin Method to Ensure a Long Lasting Tile Installation
If you have ever install tile over concrete, then you know the frustrations of uneven surfaces, pits, and ridges. With the new Tavy Thin-Skin method, these problems are eliminated, virtually guaranteeing you professional results and a tile job that you can be proud of.
Read More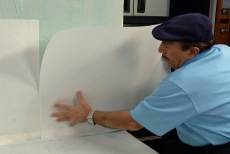
Prepare the Concrete Surface
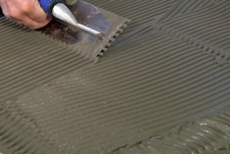
The first step in the Thin-Skin method is to cover the surface with the custom adhesive. Use a smooth trowel to coat the entire area to be tiled. Once the adhesive has been applied, the skin of fiberglass based paper can be put down. Use a broad drywall knife to smooth the surface of the paper and to squeeze out any wrinkles or air bubbles. Remember that the surface needs to be perfectly smooth so that the tile don't rock and pop loose.
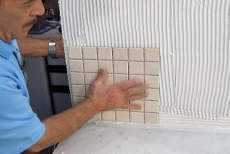
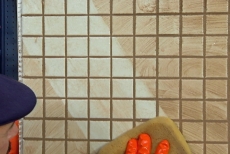
Apply the Wall Tiles
For this project, we've also applied the Thin-Skin to a wall board sample. We'll begin by applying mastic to the wall board surface with a notched trowel and then setting the pre-made tile pads into place. When tiling on a vertical surface, always start at the bottom so that gravity doesn't cause the tiles to sag.
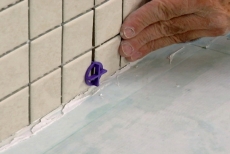
Install the Spacers
As you work your way across the surface, applying the vertical tiles, be sure to install spacers. Not only will the spacers prevent the tiles from sagging, but it will ensure that you have uniform grout lines throughout your project.
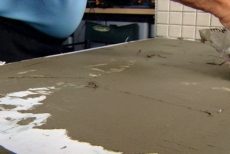
Condition the Concrete Surface
Before you apply a thick coat of notched mortar to the flat concrete surface, you will need to condition the fiberglass paper that you laid in step 1. Use the same thin set mortar, but only apply a thin skim coat with a smooth trowel. This process is much like putting a coat of primer under paint. Once the skim coat dries, you will have a smooth and clean masonry surface on which to install your tiles.
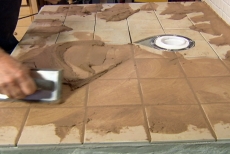
Spread the Mortar
After the skim coat of mortar has dried, you are ready to begin installing tile! Mix another batch of mortar, and spread it with a 1/4" notched trowel. Hold the trowel at a 45 degree angle, as this will ensure that all of the ridges are the same height.
Set the Tile
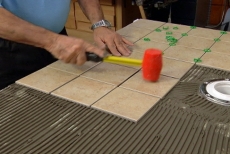
When you set the tile into place, move it back and forth about 1/4' in both directions. This step will fold the mortar from the ridges into the valleys. As you work your way across the field, install spacers between the tiles. Just as with the vertical surface, the spacers will help you ensure a uniform grout line throughout the project. Any tiles that are high can be set further into the mortar with a rubber or plastic mallet.
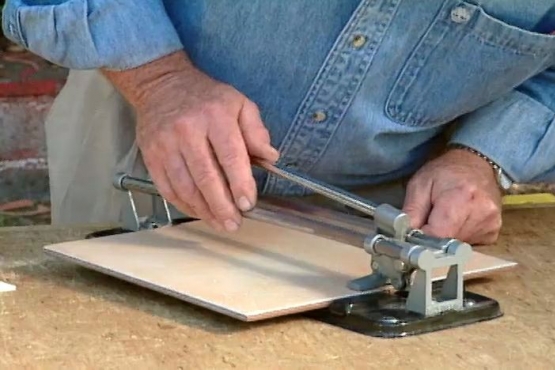
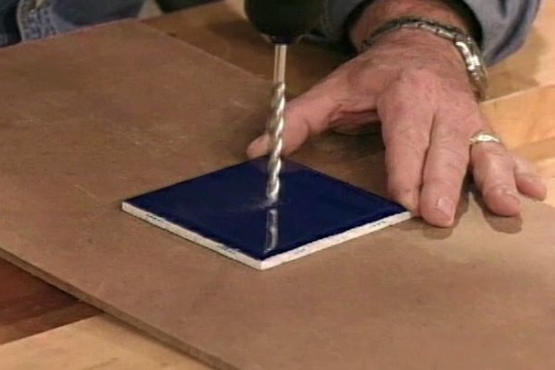
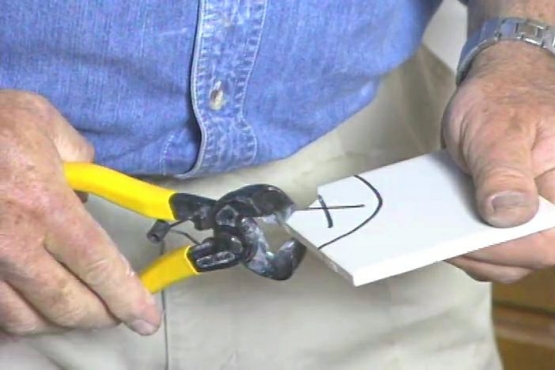
Cut Custom Pieces as Needed
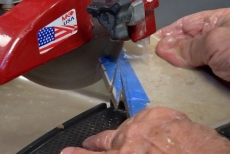
This tile project has a toilet in the middle of the floor, so a few pieces will need to be custom cut to fit around the base. Trace a straight line onto the tile that is roughly the shape of the cut that you need. Make the straight cut using a tile saw. After the main cut is made, smaller cuts can be made with the saw the chip away at the tile, until the proper shape is achieved. Once you are done, the tile saw can even be used as a grinding wheel to smooth any rough spots off of the cut.
Prepare the Tile for Grout
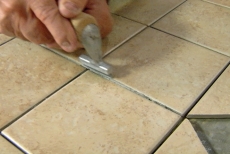
The next step in tile installation in to apply the grout, but before you do that you will want to take a few minutes to make sure the spaces are ready to receive it. Use a grout saw or a utility knife to make sure that no ridges from the mortar are visible between the tiles. This simple step guarantees that your grout will be the same depth throughout. Now you are ready to mix the grout. Before adding any water, mix the dry grout well so that the dye is evenly distributed. This step will ensure a uniform color throughout. Add water and mix the grout until it reaches a creamy consistency.
Applying Grout
Using a rubber grout float, work the grout into the joints, making sure that it goes all the way to the bottom. Once the joints are filled, turn the float at a 45 degree angle and begin working across the tiles from corner to corner, removing any excess material. Keep in mind that the more excess you are able to remove during this step, the easier the final stages of clean up will be.
Cleaning the Face of the Tile
Allow the grout to dry until the material left on the face of the tiles becomes hazy. You can now use a clean sponge, with about 80% of the water wrung out, to clean the tiles. Use long, broad strokes, always making sure that you have a clean edge down. If, after this step, you still have a bit of haze on the tiles, use a clean dry cloth to buff the haze away, just as you would if you were polishing your car.
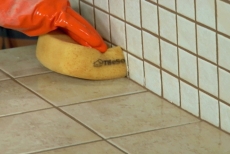
Cleaning Hard to Reach Places
If you have a 90 degree joint, such as with this project, don't be afraid to cut your sponge into the shape you need. For this angle, a simple sharp cut on the tile saw turns the sponge into the ideal tool for the job.
Related Tips

Blog Articles

Have You Heard of Landscape Glue?
You love the rustic charm of a gravel walkway, but the constant scattering of stones across your lawn and patio can be a real headache. Whether it’s from pets, lawn mowers, or just foot traffic, it seems impossible to keep those stones in place. Sound familiar? Well, Brian shows us a simple DIY method using landscape glue to keep your gravel path looking pristine and, more importantly, in place.

How to Remove Candle Wax Drips: Two Effective Methods
Candles create a warm and inviting atmosphere, but those pesky wax drips can be a real headache. Luckily, Brian shows us a couple of effective methods to tackle this issue, and they involve two very different temperatures: hot and cold. Here, we'll explore two effective methods: one using cold and the other using heat.

Guide to Hanging on Masonry Walls
Ever wondered how to hang that picture frame or shelf on a brick or concrete wall? It can seem daunting, but with the right tools and techniques, it's a straightforward DIY project. This guide breaks down two common methods: using concrete screws and using anchors, making it easy for you to tackle your next hanging project.


