RON HAZELTON:
When it came time to redo our kitchen, instead of replacing the cabinets, I decided to repaint them and replace the hardware. Well the paint job is done, and now it's time to install the new knobs. Now this is the kind of job that any smart do it yourselfer would not start without consulting his or her better half. Well you know you gotta say where you want the knobs. All right. So I have -
[BOTH SPEAK AT ONCE]
LYNN:
I know it's not typical.
RON HAZELTON:
So here's what we're gonna do. This is a reusable adhesive. It's kind of like a sticky clay.
[BOTH SPEAK AT ONCE]
- thought. Take a little dot of this and put it on the back of a knob. Put it where you think you'd like -
LYNN:
Like right there.
RON HAZELTON:
Right there?
LYNN:
Yeah.
RON HAZELTON:
Well, my wife Lynn really seems to be into this project. So I invite her out to the shop to get more involved in the making. So you want to know my plan?
LYNN:
Love to know your plan.
RON HAZELTON:
OK. I'm gonna make up something I call a boring jig. So the idea is, it's gonna slip onto the door and it's gonna, it's gonna put the hole for the knob in the same place on every door. It's pretty clear what's needed right off the top is a little lesson in table saw operation.
Here's what I want you to do. You're gonna put one hand here. And you're just gonna kind of push this all the way through -
[BOTH SPEAK AT ONCE]
LYNN:
- what if it's all different lengths?
[BOTH SPEAK AT ONCE]
LYNN:
What if -
RON HAZELTON:
The main thing is -
LYNN:
Do I have to hold it really -
[BOTH SPEAK AT ONCE]
RON HAZELTON:
Straight. Just push it - why don't you do it right now with the blade down. Just push it straight through.
[BOTH SPEAK AT ONCE]
LYNN:
I can push without the blade down -
[BOTH SPEAK AT ONCE]
RON HAZELTON:
No, you just get your thumbs back on the back edge here. See, there you go. It's on both, on both sides. That's right, all the way -
[BOTH SPEAK AT ONCE]
LYNN:
Oh no way. No, because when I do that, my thumb is like - ]
[BOTH SPEAK AT ONCE]
- here's a saw, and these are fingers. I'm watching. I'm - I'm witnessing.
[SOUND OF SAW]
RON HAZELTON:
Sorry - if you're not comfortable, I really don't want you using the saw. I'm gonna have you nail this strip of wood now to the edge of the plywood.
[BOTH SPEAK AT ONCE]
LYNN:
With the hammer?
RON HAZELTON:
No, with this. There you go.
LYNN:
What could happen -
RON HAZELTON:
It's gonna drive the nail in.
LYNN:
Ow - oh [BLEEP]. I can do it, I can do it.
RON HAZELTON:
You're used to it now. You know what it sounds like. There you go. And one more here, see. It’s not so bad huh?
LYNN:
Okay. I got it. Hey girls, if I can do this, you can do this.
RON HAZELTON:
Okay, there you go. Now, this is a neat little saw. And it cuts as you pull it toward you. All right. Good. So here's our - here's our template. We've just got one thing left to do. And that's drill a hole through here, which will correspond to where we want the hole in the doorframe.
You just pull that lever down. Just pull it down.
LYNN:
This?
RON HAZELTON:
Yeah. Slowly.
LYNN:
This?
RON HAZELTON:
Turn it. So that this little - keep going, keep going. You’re gonna put it right on the crosshairs. Keep going. Staying all the way through, all the way through. Good.
LYNN:
Now what?
RON HAZELTON:
Let it come back up.
LYNN:
Oh, do I have to hold onto it?
RON HAZELTON:
Well yeah. All right. So there's our hole where we started it.
LYNN:
Now this - I could do -
[BOTH SPEAK AT ONCE]
RON HAZELTON:
Okay and this is where the hole came out.
LYNN:
All right.
RON HAZELTON:
All right. So we're all set. I'm gonna take this in and put the mounts in for you. I like this. I like this so much I think I'm gonna put my brand on it. And this is how it works. I open the door, slip this right over the edge like that.
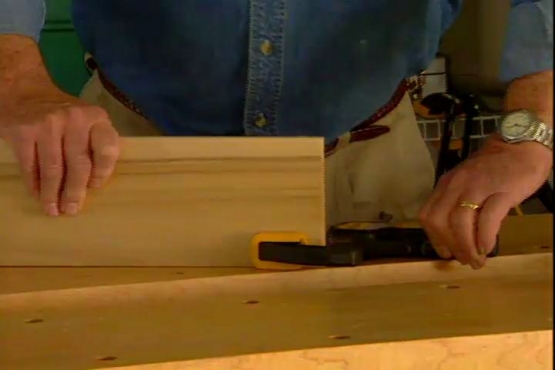
Push it up. Make sure it's in contact on the side and the bottom. Then take an adjustable clamp. The template not only gives me the right position for this drill, but because it's thick, it keeps the drill going in at a straight or a perpendicular angle.
It should really minimize the tearout. Clean hole. Give a little snug to the back here. There we go. I can do the entire kitchen here probably in 30 or 45 minutes with that.


