RH: My Washington journey begins in the Northwestern corner of the state. Imagine having a home on the beach, looking out from your yard to the Pacific ocean. That’s what Carolann and Tom Hyatt enjoy everyday from their home in Ferndale, Washington. They’ve asked me to help them install a garden sprinkler so they can spend less time working on the garden and more time enjoying it. I have the system for them. Hey folks! How are you? Good morning.
CH: It’s a pleasure Ron.
RH: Hey Carolann. Tom.
TH: Hey Ron! Glad to meet you.
RH: I got to ask you why would you need water in Washington? It rains all the time here.
CH: Yeah.
TH: Well, we just get some spells where we . . .
RH: It gets dry?
CH: Yeah.
RH: Right. Want to show me the yard and we’ll see what you got in mind here.
CH: Yes, come this way.
RH: All right. Hey! You guys spend more than a little time out here.
CH: Yeah. Lot’s of time. Twenty five hours a week.
RH: Look at this garden. Come on, 25 hours a week?
CH: Yup. Twenty five hours a week.
RH: The Hyatt’s Garden really reflects their lives. It sits right on the edge of Loomy Bay which borders the Loomy Indian Reservation. Carolann, an interior designer, has divided it into several gardens that are joined together by paths. Tom is a professional musician with a love of golf. So, when he’s not touring he is out on his putting green. So, you’ve got a lot of different kinds of plants here. You have to hand water a lot of these?
CH: Yes.
RH: Now for the parts of this that you have to hand water how long does that take you?
CH: An hour and a half.
RH: Wow.
TH: If it’s really dry weather we might be out here twice.
RH: I want to sort of focus on the different applications here because you’ve got so many different kinds of plants and different situations. But, we need to start by connecting to your existing water supply somewhere. All right?
CH: Right.
RH: Okay. After the water supply was hooked up and the basic control system installed I showed Tom and Carolann where they were and how they would work. So, guys, here’s where we are going to get the water for your irrigation system. You already had this “T” in the line here. I took the plug out, attached some PVC and, of course, this is running now underground and out to the rest of the system. Now, at the other end of this actually there is something I want to show you. The PVC plastic pipe runs underground to a device that will distribute the water to different sections of the garden. This is it, right here, to what we call a manifold. Each one of these is a valve and it controls a different area or zone in your lawn. Next, I take Carolann and Tom into the garage and show them the brains of the system. Now, this is your irrigation system timer. You’ve got a number of controls up here which will tell each of those zones when to come on, when to shut off and how long to stay on. It’s time for Tom and Carolann to go to work. They’re digging trenches a few inches deep. This is where we are going to lay the plastic pipes that will serve as the main water lines for sprinklers that will water the putting green. Earlier we placed these small red flags around the edge of the green to show us the location of the new sprinkler heads. In order to supply each of these sprinklers with water we’ll have to tap into the main supply line. That means cutting the pipe and installing branch lines or off shoots. You get this up out of the dirt right here. This is a good trick. Just take a short piece of pipe, lay it across the trench. Okay, Carolann, let’s cut this pipe right here. There you go. The quickest way to do this is with an inexpensive plastic pipe cutter that uses a blade and ratcheting action to easily slice through the pipe. In a moment we’ll rejoin the pipes with this “T” shaped connector. But first, we screw in this “L” shaped fitting called an “L” or elbow. All right. Now it’s time to weld this “T” to this pipe right here.
CH: Okay.
RH: So, if you’ll take the brush out. Carolann applies pipe cement to the inside of the “T” and the outside of the pipe then pushes them together and holds them firmly for a few seconds while the glue sets. Now, we’re ready to attach a flexible hose which will carry water from the supply line to the sprinkler head. We determined the proper distance and then cut the hose to length. Now, this is the sprinkler head. This is the pop up valve right here.
CH: Right.
RH: Now, we’re going to put one end of this flexible hose on the sprinkler head like that. Just wiggle it up and down for a minute. Carolann connects the other end to the “L” shaped tube. That’s it. That’s it. Push. Excellent. Excellent. We make sure that the sprinkler head is flush with the soil. Top of this flush with the soil and then fill in the trench with dirt. You can go ahead and help . . . Okay. Now, we don’t have to fill it all the way. Just enough to keep this in position and then we’ll move on to the next sprinkler head. Okay?
CH: Yup.
RH: Great. Now, one of the real benefits of this watering system is it’s adaptability. Pop up sprinklers like the one we just installed can cover broader areas like the putting green but, the Hyatts also have a variety of garden plants with a wide range of watering needs. So, the next part of their system will be designed with this in mind. So, the general rule here is to glue as many things together outside the trench as we can. So, let’s start with the “L”. We’ll begin in this small area of the garden. Tom has dug a trench for another run of plastic pipe that will bring water to this location. Using the same cementing technique as before he assembles a short “L” shaped section called a riser. In to the end of the riser he screws a plastic “T”. The entire assembly is then attached to the supply line. Now, this is called drip tubing.
CH: Right.
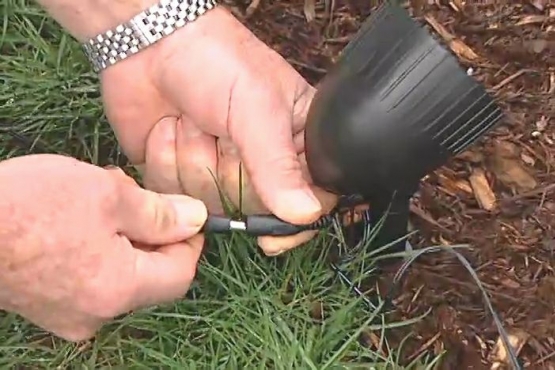
RH: This is what’s going to supply the water to all the plants in here. Tom, if you’ll plug one end of it into that “T”, and kind of rotate it and then up and down and push it in. Now, we’re going to run this in a big circle down here and we’re just going to put these stakes over the hose to hold it in place just like that. All right? So let’s start. I’m going to cut this right here. Once we have laid out enough tubing to encircle this section of the garden we cut off the excess and insert the end of the tube into the other side of the “T” while Carolann helps camouflage it. Then using a punch we puncture holes in the flexible tubing and attach smaller soaker hoses which will carry water directly to individual plants. On the end of each soaker hose goes a water emitter. The emitter determines how much water a plant receives and how it’s delivered. Some emitters drip water at the base of the plant while others spray a fine mist onto the foliage. Some spray emitters even have interchangeable heads each producing a different spray pattern.
TH: It’s so tunable to whatever you want to do with the system that I know we’re going to just thoroughly enjoy it.
RH: As the day came to a close I knew Tom and Carolann could adapt and expand their watering system anyway they wish. They wouldn’t need me anymore and there was something else they could get along without.
TH: Before you go and for all the help in putting this system in I’d like to leave you with something that I’m not going to need any more.
RH: Oh, I guess you won’t will you. Well, I can always use a garden hose. I’ll tell you. I don’t have irrigation. Bye guys. Well thank you.
CH: Thank you, Ron. It’s been great. Thank you.
RH: You’re very welcome. This was fun. I learned a lot from this. So how long . . . how long have you had this lavender bush? Take time to stop and smell the lavender. Isn’t that what they say?


