RON-VO:
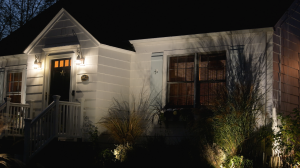
TODAY’S HOUSECALL HAS ME HEADING NORTH FROM ORLANDO THROUGH CENTRAL FLORIDA. THIS ISN’T WHAT MOST PEOPLE THINK OF WHEN THEY THINK OF FLORIDA. THIS IS A LAND OF ROLLING HILLS… FARMS… AND IT’S THE HEART OF FLORIDA HORSE COUNTRY.
THE RURAL BEAUTY HERE IS WHAT LED JANET WOOTEN AND STEVE BROWN TO PURCHASE THIS 1884 FARMHOUSE IN THE TOWN OF ALACHUA.
AND THIS MIGHT BE FLORIDA, BUT IT GETS COLD HERE IN THE WINTER AND THESE LIVING ROOM WINDOWS OFFER LITTLE INSULATION. SO TODAY WE’RE GOING TO REPLACE THEM WITH A NEW SET THAT WILL ALSO BE IN KEEPING WITH THE LOOK OF THEIR HOME.
Ron:
I love this house.
Steve:
We do, too.
Ron:
It’s such got a great feel in here. There’s something about the older houses that just appeals to me, uh, but there are obviously some problems with older houses, one of them being your windows. These are the three we’re talking about right over here?
Janet:
Yes.
Steve:
These are the three.
Ron:
So, what’s been the problem?
Janet:
Well, in the winter, believe it or not, even though this is Florida, it gets very cold in here.
Ron:
How cold?
Janet:
Well, outside it gets down to 36 or 32, and in here, the heater never quits trying to maintain a livable temperature.
Ron:
All right, well, I’ve got some windows outside that I want to show you. I think they’re going to not only look great in here and solve that problem of, of the heat, but also, they’re gonna be surprisingly easy to put in. So let me show you.
Ron:
These are called retrofit windows.
Janet:
What do you mean?
Ron:
Well, some windows are designed more to be installed in new construction. These are designed to replace the windows that are already in there. And you’ll see when we get into the installation how easy this is actually gonna be because of that. Uh, more importantly, they have two pieces of glass. They’re called dual glazed windows. And in-between those two pieces of glass is a sealed space filled with argon gas. And that combination, the two glasses and the dead air space in-between with the gas in it, is gonna give you much higher insulation value.
Steve:
Sounds good.
Ron:
Also, you notice they look pretty much exactly like the windows we’re taking out, because we don’t want these windows to scream “new window.” You know, you’ve got a beautiful antique house here--
Janet:
Exactly.
Steve:
Mm, exactly.
Ron:
And they should look like, pretty much like the windows that we’re taken out, but they’re gonna perform a lot better. Now, we’re gonna start the installation, actually, we’re gonna do all the installation from the inside. Let’s go back in there and begin by taking out the old windows.
Ron:
We’re gonna start by taking out this stop right here. These are called double-hung windows, and they slide up and down, as you know, in a track over here. And in order to get these out, that’s a little sticky, in order to get these out, we’re gonna pull this off.
MUSIC
RON-VO:
WE USE UTILITY KNIVES TO CUT THROUGH THE CAULK AND MULTIPLE LAYERS OF PAINT WHERE THE STOP MEETS THE JAMB.
THIS WILL HELP US REMOVE THE STOP WITHOUT DAMAGING THE SURROUNDING AREA.
Ron:
All right. Next step is we’re gonna take a, a wide putty knife like this, and I’m gonna try to work this in behind the stop. So kind of put it in like this, give it a couple of taps with a hammer.
[SOT: hammer]
Ron:
You see how it’s begun to pull it out a little bit?
Steve:
Yes.
Ron:
Kinda get it started with a putty knife, because it’s really thin. All right? And then we’ll come back with this kind of spoon-shaped pry bar here, work it in behind the stop, and then start pushing it out. And generally, we want to start at one end and work toward the other, like this.
Ron:
And there’s gonna be a nail, in this case, about every eight inches. So, kinda go up near the next nail and start prying like this. And so far, so good. We’re taking this off in one piece right here.
[SOT: hammer]
MUSIC
Ron:
Well, you'll see the window's loose now. So all we've got to do is cut these sash cords. So these are ropes that go up inside the frame here. There are weights on the other end. We're not gonna need those for the new windows. So what I'm gonna do is just snip these off, let 'em drop back inside the wall. Bye-bye. And we'll do the same over here.
Ron:
Okay. So we'll just pull it down. Clip it off. Let it go.
Ron:
There it goes. Okay. Then you just take this out, Janet. Just lift it right out. Okay. That's the bottom sash.
MUSIC
Ron:
Okay.
Steve:
One, two, three. Bombs away.
RON-VO:
AFTER STEVE AND CAROL CUT THE SASH CORDS AND REMOVE THE REMAINING BOTTOM WINDOWS, I USE A PAIR OF VICE GRIPS TO BEGIN PULLING THIS PIECE OF WOOD -- CALLED A PARTING STRIP -- FROM THE GROOVE IN WHICH IT SITS. ONCE THE END IS CLEAR I INSERT A FLAT BAR BEHIND THE STRIP AND PRY OUT THE REST OF IT.
Ron:
All right. Goodbye, parting strip.
MUSIC
RON-VO:
WE REMOVE THE OTHER PARTING STRIPS… CUT THE SASH CORDS… REMOVE THE UPPER WINDOWS, PRY OUT THE SASH CORD PULLEYS, AND OUR INTERIOR PREP WORK IS DONE. SO WE HEAD OUTSIDE TO GET THE WINDOWS.
Ron:
When I said we had to bring more horsepower to this project, I didn't know you were gonna bring an actual horse in.
Ron:
Who's this?
Janet:
This is Tinker's Moon.
Ron:
Hey, Tinker's Moon. Oh, you're beautiful.
Janet:
She's a three-year-old Connemara mare.
Ron:
Wow.
Janet:
They're an Irish breed of pony.
Ron:
Yeah. Well now I can see why you guys have got eight acres here. Perfect for horses, huh?
Janet:
Exactly.
Ron:
Not bad for people, either.
Janet:
Oh. We love it.
Ron:
Say, listen. We've got a little project over here. We've got to take these three windows inside the house. You think we could like put 'em up on your back and-- Yeah. Yeah.
Steve:
Earn your keep.
Ron:
I think we're gonna have to do it.
Steve:
Yeah. Okay.
Ron:
All right. Well, thanks for the introduction. See you later, Tinker.
Janet:
Say you're welcome.
RON-VO:
THESE WINDOWS WERE SPECIAL ORDERED FROM THE MANUFACTURER, TO FIT CAROL AND STEVE’S WINDOW OPENINGS, BUT IT’S ALWAYS A GOOD IDEA TO DO A TEST FIT.
Ron:
So they should slip right in like a glove, huh?
Steve:
Like a glove.
Ron:
Beautiful. Okay. Take it back out. We'll get these prepped, do this for the final time.
RON-VO:
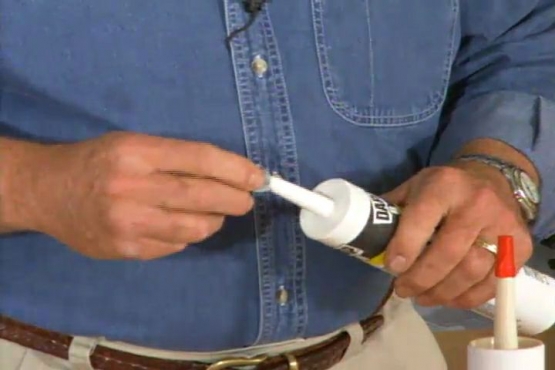
WE BEGIN OUR INSTALLATION BY RUNNING ONE THICK BEAD OF PAINTABLE SILICONE CAULK ACROSS THE SILL TO PROVIDE A SEAL AT THE BOTTOM OF THE WINDOW.
Ron:
Also now we're gonna lay a bead of caulk in, up in this corner right here. Top, bottom and sides.
RON-VO:
I RUN THE BEAD ALL THE WAY DOWN THE SIDE, THEN STEVE CAULKS THE OTHER SIDE AND RUNS A FINAL BEAD ACROSS THE TOP.
MUSIC
Ron:
All right, Steve. The transformation begins.
Steve:
This is good.
Ron:
All right. So we'll just set the bottom in first.
Steve:
Okay.
Ron:
Just inside the sill there. Beautiful.
Steve:
Good.
Ron:
Tip it up.
Steve:
Okay.
RON-VO:
WE PRESS THE WINDOW AGAINST THE STOPS SO THAT IT COMES FIRMLY INTO CONTACT WITH THE SEALANT.
Ron:
So the window's actually held in place here with four screws, two on each side, through, uh, pre-drilled holes. There's the top, left one right there. So I'm gonna just put a shim back here, because I don't want to pull this up. I don't want to pull the window out of position here. So I put that in. Drop the screw through the hole. And go ahead and run that in.
Ron:
Okay. Let's throw a level on here, Steve.
Steve:
Okay.
Ron:
See how we're doing.
Ron:
Perfect. Absolutely perfect.
Steve:
Excellent.
Ron:
Now let’s do this side.
Ron:
Okay. Let's just double-check, be sure we didn't move anything.
Ron:
Well, I'd say that's perfect, too. So it's perfectly level, perfectly plumb. Windows are working well. You guys want to go ahead and put in the next two?
Steve:
Sure.
Ron:
All right.
Janet:
We'll give it a try.
Ron:
All right. I'm gonna go down to the pond, do a little fishing.
Ron:
Hey, what a team! You know what they say, the couple that caulks together sticks together. Get it?
Ron:
Now you got these good, thermally efficient windows here. So we don't want to have you losing heat or having cold air come in around the edge. So, Steve, take a piece of that insulation over there. Just stuff it into this crack right here, between the edge of the frame--
Steve:
Gotcha.
Ron:
--and the old jamb. Like this.
Steve:
Got ya.
Ron:
We'll seal this house up snug as a bug in a rug.
RON-VO:
BECAUSE CAROL AND STEVE DID SUCH A GOOD JOB REMOVING THE TRIM, WE CAN RE-INSTALL IT RATHER THAN REPLACE IT. WE ATTACH IT WITH PNEUMATIC NAIL GUN CALLED A PIN NAILER.
[SOT: NAIL GUN]
Ron:
That noise you hear, there's actually a little compressor built into this to provide its own air supply. So every time it fires, it has to recharge the little tank that’s on board. This is how, it's very easy to use.
RON – VO:
I TURN THE PIN NAILER OVER TO JANET WHO STARTS PUTTING UP THE TRIM ON THE SIDES.
Ron:
I predicted you were gonna like this tool.
Janet:
Oh yeah.
Ron:
Was I right?
Janet:
You, oh, you were exactly correct. Yes, you're right. It's on my Christmas list.
Ron:
Somebody-- Okay. I knew it.
Steve:
More than that diamond ring. Okay.
Ron:
Well, I'm gonna save you some money, buddy. Tools are a lot less expensive than jewelry.
RON-VO:
WITH THE TRIM APPLIED TO THE FIRST WINDOW WE MOVE ON TO THE OTHERS.
Ron:
Now we've got a small gap right down here. We're gonna do two things. First of all, I'm gonna take some of this material called backer rod. This is often used to put behind caulk when you've got a really wide gap. We're just gonna lay this in here to make a seal. We’ll cut off the excess.
RON-VO:
CAROL AND STEVE USE A MITER SAW TO CUT THIN STRIPS OF FLAT MOLDING TO LENGTH. THESE WILL CONCEAL THE GAP BETWEEN THE NEW WINDOW FRAME AND THE OLD SILL.
[SOT: NAIL GUN]
RON-VO:
NEXT, WE CUT 45 DEGREE MITERS ON STRIPS OF SHOE MOLDING AND SET THEM IN PLACE TO CONCEAL THE GAPS BETWEEN THE TRIM AND THE WINDOW FRAME.
RON – VO:
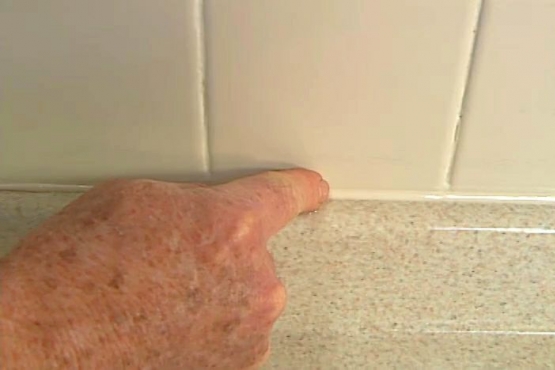
FINALLY … WE FILL ANY REMAINING SMALL GAPS AND CRACKS WITH PAINTABLE CAULK.
Ron:
Okay. Nice job. Okay.
Steve:
You like that?
Ron:
I say we're ready for some paint.
Steve:
Yeah?
Ron:
I do like it, very much. Now, there's always a debate whether it's better to just paint and then scrape off the excess or to tape. I think I'm a taper. This is actually, uh, masking paper with an adhesive on one side right there. You see it? Kind of sticky.
Steve:
Mm-hm.
Ron:
So this is how I like to do it. Start by putting a strip up here.
RON-VO:
I BRING THE MASKING PAPER RIGHT TO THE EDGE OF THE WINDOW MULLIONS – THOSE WOOD STRIPS SEPARATING THE GLASS PANES. … USE A PUTTY KNIFE TO TEAR IT OFF SHORT AT EACH END…THEN DO THE SAME ON THE OTHER SIDE.
NEXT, I OVERLAP A STRIP ACROSS THE TOP…TEAR OFF THE EXCESS ON THE ENDS AND DO THE SAME AT THE BOTTOM.
RON-VO:
I PREFER THIS METHOD OVER SCRAPING BECAUSE I BELIEVE IT’S A BIT FASTER AND ELIMINATES THE RISK OF SCRATCHING THE GLASS WITH A RAZOR BLADE. WE ALSO APPLY STRIPS OF MASKING TAPE TO THE TRACK TO KEEP IT FREE OF PAINT.
Ron:
All right. It's painting time. And let's start up at the top and work downwards. That way, if we get any drips, we'll catch 'em on the way down.
RON-VO:
WHILE STEVE AND CAROL PAINT, I MOVE OUTSIDE TO FILL ANY GAPS BETWEEN THE OLD AND NEW WINDOW FRAME WITH BACKER ROD… AND FINALLY A WEATHERPROOF EXTERIOR CAULK.
AFTER THE PAINT DRIES, IT’S TIME TO REMOVE THE MASKING PAPER. FIRST, THOUGH, WE USE A UTILITY KNIFE TO CAREFULLY CUT ALONG THE EDGE. THIS WILL GUARANTEE A CRISP CLEAN LINE AS WE PULL THE PAPER AWAY.
Ron:
Now this is a nice extra feature on these windows. You don't have to go outside to clean the outside, 'cause they tip in like this. And so anyway, I think this has probably got everything nice and tidy. Let's put this back.
RON-VO:
FINALLY IT’S TIME TO DRESS THESE WINDOWS UP AND I’VE BROUGHT ALONG A SET OF WINDOW TREATMENTS THAT I THINK ARE PERFECT FOR THIS ROOM.
MUSIC
RON – VO:
INSTALLATION IS AS SIMPLE AS ATTACHING A PAIR OF BRACKETS… THEN SNAPPING THE BLINDS RIGHT INTO PLACE.
Ron:
Well done.
Steve:
Thank you.
Ron:
Just one more step. That's to put up this valance. So there are a couple plastic clips right here. Snap those over the top.
Steve:
Okay.
Ron:
These are from Hunter Douglas. They're from their Country Woods Collection. This is all solid cherry, beautiful. Even the valance up here is, is solid cherry. And they have something that's very interesting. It's called a light-blocking feature. When these are closed, there are no holes in any of these slats, and the light is completely blocked out. So, you know, if you have to sleep out here some night and you want to sleep late,--
Steve:
For whatever reason.
Ron:
--well, there you go, no light waking you up. So you guys happy with this?
Steve:
Oh.
Janet:
Um, absolutely delighted.
Ron:
Yeah?
Steve:
Very happy.
Janet:
Yeah.
Ron:
Yeah. I can't wait now for this next winter storm to come.
Janet:
Oh. I, I can't either.
Steve:
It'll be interesting.
Ron:
Just to see how much better. Truthfully, this house was so warm and so comfortable and cozy before I even got here. This is just gonna make it a little warmer when that winter storm comes, huh?
Janet:
Yeah.
Steve:
I think so.
Ron:
All right, guys.
Steve:
I know so. Thank you very much.
Ron:
Thanks very much. It was a pleasure working with you.
RON-VO:
WELL THERE WAS A TIME WHEN WINDOW REPLACEMENT MIGHT HAVE BEST BEEN LEFT TO THE PROS. BUT WITH NEW, EASY TO INSTALL PRODUCTS LIKE THESE RETROFIT WINDOWS AND SOLID WOOD BLINDS NOT ONLY ARE THE RESULTS BEAUTIFUL BUT WE CAN SAY … “I DID IT MYSELF”.


