How to Retro-fit a Window
Do a Little Demolition to Resize the Window Opening and Retro-fit an Inefficient Window with a Double-hung Double-glazed Replacement
Retro-fit an existing sliding window with a double-hung double-glazed replacement. If it's a different size from the original, the project will require removing the window frames and wooden siding to custom fit the old window opening prior to installing the new window. Once this project is successfully completed, retrofitting your remaining windows should be a breeze.
Read More
Remove Old Window and Trim for the Window Retro-fit Project
Begin the retro-fit by prying up and retaining existing trim for reuse. Remove the moving glass panes. Cut away the window flange, any exterior siding that covers it and the two-by-four on which the old window rests.

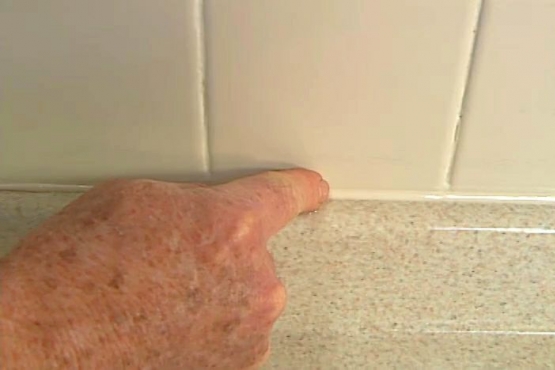
Increase the Height of the Opening for the Window Retro-fit
Measure the new window and opening to assess fit. This window opening is too short for the retro-fit, so create extra height by breaking out the perimeter wallboard. Remove the corner bead without damaging the interior wall.

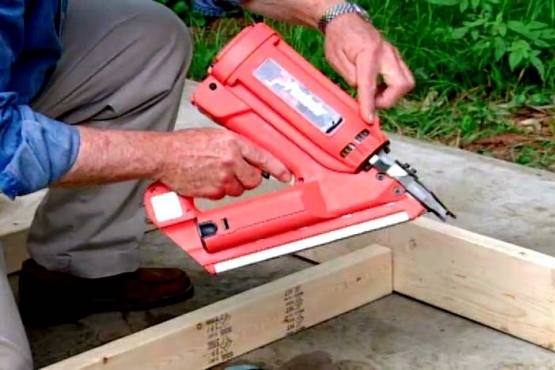
Narrow the Window Opening to Prepare for the Window Retro-fit
Decrease the opening width to accommodate the new retro-fitted window. Fill in the extra width with strips of exterior-grade lumber on each side. Layer outward to reach the desired dimension and secure the strips with a pneumatic nail gun.

Prepare and Position the New Window for the Retro-fitted Project
Bend the new window's nailing flanges outward. Run exterior caulking down the center of each flange as part of the window retro-fit. Set the bottom edge in place and tip the centered window upward to contact the frame.

Level and Secure the New Window for the Retro-fit Project
Plumb and level the new window using a bar level. Insert shims as necessary for the window retro-fit. Hold the positioned window in place and secure it with rust-resistant galvanized roofing nails driven through the flange, shims and framing.

Cover the Gaps and Caulk for the Window Retro-fit
Seal the gaps at the corners of the window flanges with self-adhesive rubber corner seals. Insert strips of roofing paper around the perimeter of the retro-fitted window and where the roofing paper meets the siding.

Replace the Original Trim for the Window Retro-fit
Fill remaining hollows with nailed strips of exterior lumber to bring the surface flush with the exterior of the house. Replace the original exterior trim removed earlier in the window retro-fit project. Secure it with rust-resistant finish nails.

Add Caulk around the Trim to Seal the Window Retro-fit
Squeeze a bead of exterior-grade caulk around the trim, sealing the gap between it and the siding. Smooth out the bead with your finger, forcing the caulk into the grooves of the siding to complete work on the outside of the window retro-fit.

Add Interior Jamb Extensions for the Window Retro-fit
Install jamb extensions to the retro-fitted window, working from the interior of the house, to bring the surface of the jamb flush with the wall. Attach the jamb extensions with a pneumatic pin nailer.

Nail up Interior Molding to Complete the Window Retro-fit
Secure mitered strips of interior molding with the pneumatic pin nailer to cover the jamb extensions. Dress the nail holes and paint as necessary to complete the final part of the window retro-fit.
Related Tips


Blog Articles

Have You Heard of Landscape Glue?
You love the rustic charm of a gravel walkway, but the constant scattering of stones across your lawn and patio can be a real headache. Whether it’s from pets, lawn mowers, or just foot traffic, it seems impossible to keep those stones in place. Sound familiar? Well, Brian shows us a simple DIY method using landscape glue to keep your gravel path looking pristine and, more importantly, in place.

How to Remove Candle Wax Drips: Two Effective Methods
Candles create a warm and inviting atmosphere, but those pesky wax drips can be a real headache. Luckily, Brian shows us a couple of effective methods to tackle this issue, and they involve two very different temperatures: hot and cold. Here, we'll explore two effective methods: one using cold and the other using heat.

Guide to Hanging on Masonry Walls
Ever wondered how to hang that picture frame or shelf on a brick or concrete wall? It can seem daunting, but with the right tools and techniques, it's a straightforward DIY project. This guide breaks down two common methods: using concrete screws and using anchors, making it easy for you to tackle your next hanging project.


