RON HAZELTON:
Now this was our laundry room and as you can see, it's right off the kitchen. Now that's great for convenience but it does present a couple of problems. First of all, when both the washer and dryer are running in here, there's a fair amount of noise that comes through this doorway and sometimes the room is not as neat as it looks right now and I'd kind of like to block the view.
But on the other hand, I don't want to put a solid door in here. I'm thinking about something that instead would allow a little bit of light to come through. The other day I was on the Internet, sort of poking around and I came across something that just might work.
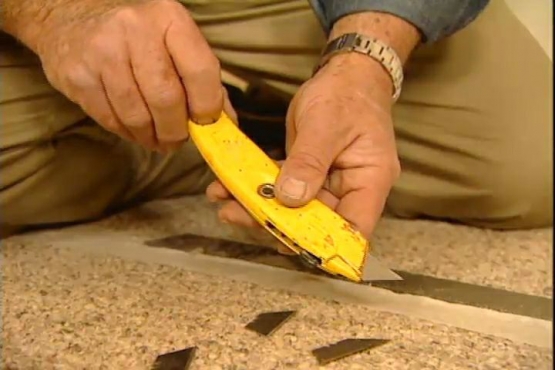
On the Simpson Door website, I actually found a laundry room door inspired by a traditional European design, I liked it, so I ordered it. The day before it's due to arrive, I begin preparing the opening. Using a utility knife, I cut through the caulk and paint around the door casing. This will help prevent damage to the face of the wallboard when the trim is pulled away.
I also cut along the miter joints at the corners. Next, I drive a wide putty knife between the back of the casing and the wall, then with a few taps of the hammer, drive in a spoon-shaped pry bar behind the trim.
Once there's a bit of space behind the casing, I switch to a flat pry bar and continue prying. The putty knife keeps the bar from damaging the wall as I leverage the casing away. The putty knife can also be used to keep the prying tool from denting or crushing the jamb.
My cordless reciprocating saw is just the right tool for this next step. I insert the blade into the gap between the doorframe and rough opening, quickly cutting through the finish nails that hold the frame in place.
[SOUNDS OF SAWING]
Now with all the nails cut, I can just push the doorframe out of the opening.
[MUSIC]
This unit from the Simpson Door Company is an engineered wood door. The core is made of smaller wood pieces joined together with alternating grain patterns to resist warping and twisting. Door edges are clad with solid wood banding in the face's veneer. Oversized hardwood dowels reinforce the joints where the stiles and rails meet.
Well, there's my new door. It's prefinished and prehung, so I'm gonna be putting it in as one unit. Now I am going to be working alone today, so I'm gonna show you a couple of tricks that I've picked up that make working solo on a job like this, a little bit easier.
For starters, I temporarily attach blocks that will stop the door flush with the inside wall. Then I pre-tack shims along one side, since the opening is slightly larger than the doorframe. Now, I set the door and frame as one unit, into the opening, up against both the stops and the shims.
I check the jamb for plumb or vertical, slip in additional shims where I need them and attach this side in place, making sure the nails pass through the shims and into the stud. With the hinge side secured, I close the door and check the margin or gap between the edge of the door and the frame.
Now right now, it gets wider as I go from top to bottom. Using a flat bar, I move the frame closer to the door, then insert shims to hold the jamb where I want it. With the door closed, I recheck the margin. This time it's consistent from top to bottom.
So I secure this side in place, again nailing through the shims.
[BANGING SOUNDS]
I trim the shims to length by first scoring them with a utility knife, then snapping them off. If the protruding portion is too short or thick, I cut off the excess using a small Japanese handsaw. Now it's time for the casing. First I lay a scrap piece on the jamb and draw a line on the outside, then repeat the process at the opposite corner. Next, I cut the top piece of trim slightly oversized and put a 45 degree miter on one end.
I place the point of the miter on the first line, then mark the opposite end at the second line. This will be the outside of the second miter. Now, all I have to do is align the ends with the marks on the wall and nail the casing in place.
Next, I set the side piece on the floor with the backside of the molding facing outward. Then draw a pencil mark where the top trim meets. I cut the miter on the mark, set the section in position and nail it in place. The procedure's the same for the opposite side.
With a miter saw, it can be difficult to tell exactly where the blade will contact the wood. Sometimes I purposely cut long, then feed the stock slowly toward the cutting edge, nibbling my way right up to the line.
Now not every carpenter does things the same way, but I find that most of the time, this top first size next method gives me pretty good results. Now one of the beauties of a prehung unit is that the door and frame are already bored and mortised for the hardware.
The only exception here is the latch plate mortise. I'll have to cut that myself. I start by temporarily attaching the plate with screws. Then I use a sharp utility knife to score the outside. After I've removed the plate, I'm left with a shallow groove.
Now it's time for a little chisel work. I pick a tool that's just about the same width as the mortise and set the tip into the score line left by the utility knife. First, I cut the outline, then pare away the inside material. All that's left now is to attach the latch bolt, screw it in place, insert the latch mechanism --tighten the mounting screws, and test things out.
Now let's see, what was that definition of a door I found in Wikipedia? It gives an impression of what lies beyond, it can separate a more formal area from the utility space and it can act as a barrier to noise. You know, I guess I never really realized how much a door can do until now.


