RON HAZELTON:
The Lou family of Durham, North Carolina, wants some separation between their kitchen and family room. So I'm going to pay 'em a House Call.
MRS. LOU:
How are you?
RON HAZELTON:
How are you?
MRS. LOU:
Just fine, how are you?
RON HAZELTON:
I'm Ron.
CARTER LOU:
I'm Carter.
RON HAZELTON:
Hey, Carter.
JILL LOU:
Hi, I'm Jill, how do you do?
RON HAZELTON:
Jill.
AARON LOU:
Hi, I'm Aaron.
RON HAZELTON:
Hey, Aaron, how you doing?
AARON LOU:
Good.
RON HAZELTON:
How you feeling about the project?
AARON LOU:
Excited.
RON HAZELTON:
Are you?
AARON LOU:
Yeah.
RON HAZELTON:
Okay, you want to show me inside.
BOTH:
Sure.
RON HAZELTON:
Okay.
CARTER FEMALE:
Come on in.
RON HAZELTON:
Space was the key issue when the Lou family built their home and they got a lot of it. But the wide-openness of the kitchen/living room just seems a bit too roomy. Jill envisions a couple of columns from the floor to ceiling that would visually separate the two rooms more than these mini-walls and she and the boys are ready to roll up their sleeves.
Okay, let's get some tools out of the truck then, all right? We'll build each column as a long hollow box with four sides made from plywood. A base on the bottom and a capital on the top will dress them up, along with a variety of trim molding.
Now, this is 3/4" birch plywood. This is what we're going to make our columns out of. But I'm having a little bit of a problem here. I'm not sure exactly how wide or thick these should be.
Well, we know our columns will run from floor to ceiling. But since we're uncertain of the proper width, we decided to make some patterns to help us visualize our options. Aaron and Carter mark different column widths along the edge of the plywood, then use a chalk line to connect the points.
You ready? Here we go. Okay, guys, we've got four widths here. What are they again?
AARON OR CARTER LOU:
Twelve, eleven, ten and nine.
RON HAZELTON:
Okay. So what do you think? Can you tell from this, which one would work better?
AARON OR CARTER LOU:
Not from this.
RON HAZELTON:
I can't either.
So the boys and I decide to cut out our patterns using the table saw.
Okay, you and Carter take this off and set it over there, if you would.
With two fine apprentices on hand to help, the job is an easy one.
All right, so what do you think, Jill?
The panel of experts gathers inside to make the decision. Bill, the dad, joins us just in time to weigh in.
RON HAZELTON:
Ron Hazelton.
JILL LOU:
This is Ron.
BILL LOU:
Yeah, good to meet you.
RON HAZELTON:
We were just looking at some different column widths here. Well, what are your thoughts?
BILL LOU:
I think definitely toward the smaller end.
RON HAZELTON:
Since this is the entire family's project, the boys get a vote too.
All right, Carter, what about you?
CARTER LOU:
I like the small ones.
RON HAZELTON:
With all in favor of the narrower width, we go back to the table saw and begin cutting wood. Very shortly, it's time to assemble. We apply glue to the edges of the plywood and then place the pieces together.
Want to use our finger to feel that this is flush here. Finger's more reliable than our, than our eye, actually, okay. So give me one nail right here.
While Bill nails, Jill makes sure the boards remain flush. Carter and Aaron prove just as effective a team, wooden box and all. The columns will have a base, a thicker section at the bottom. But we're not sure what would be the best height, so the Lous reconvene for discussion and opinion.
CARTER OR AARON LOU?:
I like it.
CARTER OR AARON LOU;
I think it's perfect.
RON HAZELTON:
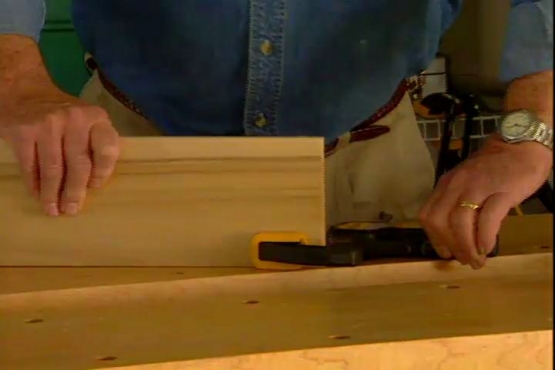
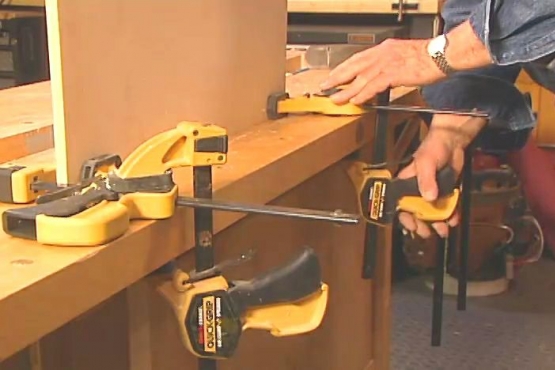
With the vote in on the ideal base height, Jill and Bill take turns cutting 45-degree bevels on the base sides, so the raw edges on the plywood will be concealed. Glue is applied to the beveled edges, and then the sides are clamped together with an adjustable band clamp.
Finally, the bases are nailed by parent-son teams and the clamps removed.
Now we're going to attach this column base to the floor with this wooden block or cleat. I've marked the position right here with this masking tape and this will put the side of the column at almost exactly one foot from the end of this wall.
So let's attach this in place with some sixpenny finish nails. We'll slip this over the end.
The bases fit like sleeves around the columns, so it's easier for us to put them on from the side. A plastic mallet helps me get things in place without marring the wood.
Good, okay, we're there. All right, Aaron, go down to that end of the column, if you would. Okay?
AARON LOU:
Yeah.
RON HAZELTON:
Lift it off. I'm going to set it down here over the cleat.
AARON LOU:
Okay.
RON HAZELTON:
Okay, stand it up, all the way up. Just walk toward me, okay, good. Okay. Here we go.
Things are certainly coming together nicely.
All right?
AARON LOU:
Yep.
RON HAZELTON:
Excellent.
To secure the top of the column to the ceiling, we'll need to install another cleat, similar to the one we attached to the floor. To locate the proper position, we temporarily slip on the column top or capital and clamp it in place.
Aaron checks to make sure the column is plumb while Bill traces around the inside of the capital. The resulting line will tell us exactly where to place our top cleat.
BILL LOU:
You can nail that up there. I'm ready.
JILL LOU:
Okay.
RON HAZELTON:
Okay, Jill, if you can put the clamp on down here.
With the top cleat in position, we clamp the capital back on —
JILL LOU:
Okay, I'll put that in here.
RON HAZELTON:
— and nail the fourth side in place. Then we nail the capital and the base to the cleats and the column.
Well, our columns are in and they look great, but a little on the plain side. So here's where we're going to have some fun. We're going to take a variety of decorative moldings and add a lot of detail and interest to these.
While I man the saw, the whole family got into the act, really dressing up the columns with a variety of moldings on the corners, edges and sides. As a finishing touch, I add a crown molding at the very top that complements the trim in the rest of the room.
We finished up the project with a little family bonding over some primer and paint. And I'll tell you, in the HouseCalls grade book, each one of these guys gets an A.
Now tell me the truth, did you really think this morning, we'd be able to build these ourselves?
BILL LOU:
No.
AARON OR CARTER LOU:
No.
RON HAZELTON:
No?
JILL LOU:
No.
RON HAZELTON:
No?
JILL LOU:
No [LAUGHS].
RON HAZELTON:
I'm the only one who thought we probably could?
[LAUGHTER]
JILL LOU:
Pretty much.
RON HAZELTON:
I'm glad you guys didn't tell me beforehand. Thanks for having me here. I'm going to head down the road now.
BILL LOU:
Thanks, Ron.
RON HAZELTON:
Got another family who needs columns.
JILL LOU:
Thank you very much.
RON HAZELTON:
Or maybe a colosseum.
JILL LOU:
Yeah. [LAUGHS]
RON HAZELTON:
All right, all the best to you guys.
JILL LOU:
Okay, thank you.
RON HAZELTON:
Thanks for working with me.


