How to Build a Tree House or Tree Fort
Build a tree house with two-by-eights and four-by-four posts that will last a lifetime
Construct this kid's tree house or fort and children will play there for hours. A perfect do‑it‑yourself project with neighbors, the tree house design uses the tree as one support post and straddles a wall to offer access to both families. Build by this plan and the tree house will be safe, won't damage the tree, and will last for years.
Read More
Position the First Frame Board for the Tree House Platform
Place the first two-by-eight pressure-treated frame board in the crotch of the tree to position the tree house platform and use the tree as the first support post

Position the Second Frame Board and Chalk-mark the Post Hole
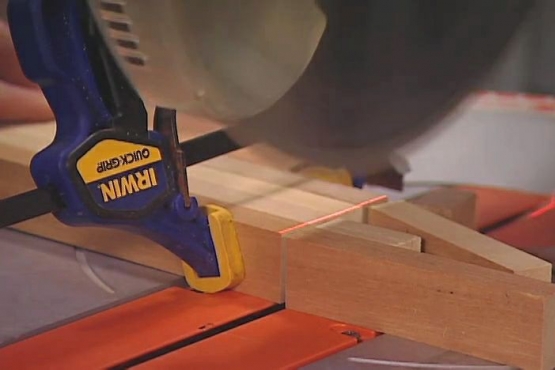
Position the second frame board and brace it. Drop a plum bob from the board to the ground, marking the site for the first post hole. Chalk mark the perimeter and excavate with a post-hole digger to two feet.

Add a Gravel Base and Level the First Four-by-four Post
Pour in a 3-inch gravel base and drop in a four-by-four post. Use a post level to insure that the post is vertical. Clamp the post to the frame board to keep it from moving.

Set the Three Posts in Quick-Dry Concrete
Add dry-mix concrete within three inches from the top of the post hole. Add water and tap the wet mortar to help the water penetrate the dry mix and eliminate air pockets. Set the other two posts the same way.

Complete the Tree House Frame and Square the Corners
Add the remaining two frame boards to complete the 4-sided platform with "square" corners. Drive rust-proof screws through the corners to secure them.

Attach the Posts Permanently to the Tree House Frame
Pre-drill through each post and the frame and hammer in carriage bolts. Add a washer and nut and tighten the nut with a socket wrench. Trim the post tops flush with the top of the frame using a Japanese handsaw.

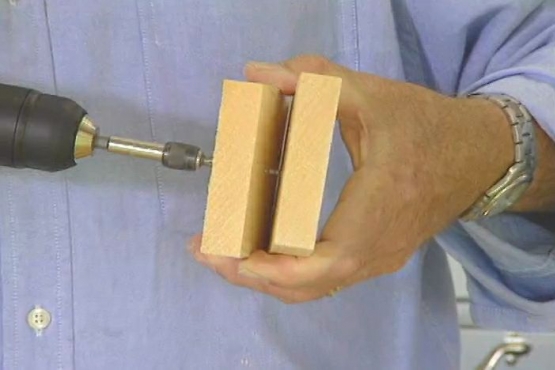
Construct Two Matching Tree House Ladders
Clamp together two pairs of two-by-fours as ladder rails and identically pre-drill each for rungs with a portable drill press. Pinch the ends of heavy dowels and insert through matching holes in each set of rails. Nail them in place.

Attach Joists and Secure the Deck Planks
Use rust-proof screws to secure two two-by-eight joists across the platform's base flush with its top. Lay deck planks perpendicular to the joists, allowing half-inch gaps where water and debris may fall through. Screw them to the joists and platform.

Frame the Tree House Walls
Construct four wall frames with four-by-four end posts and two-by-four studs and top/bottom rails. One at a time, position each wall frame at each side of the platform and screw it to the deck.

Sheath the Wall Frames and Enclose the Tree House
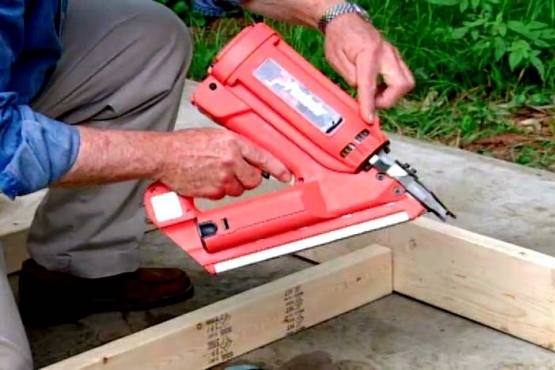
Cut 6-inch pickets from exterior sheathing to enclose the wall frames. Work around the perimeter to position and tack them with a nail gun. Reinforce them permanently with screws.
Related Tips


Blog Articles

Have You Heard of Landscape Glue?
You love the rustic charm of a gravel walkway, but the constant scattering of stones across your lawn and patio can be a real headache. Whether it’s from pets, lawn mowers, or just foot traffic, it seems impossible to keep those stones in place. Sound familiar? Well, Brian shows us a simple DIY method using landscape glue to keep your gravel path looking pristine and, more importantly, in place.

How to Remove Candle Wax Drips: Two Effective Methods
Candles create a warm and inviting atmosphere, but those pesky wax drips can be a real headache. Luckily, Brian shows us a couple of effective methods to tackle this issue, and they involve two very different temperatures: hot and cold. Here, we'll explore two effective methods: one using cold and the other using heat.

Guide to Hanging on Masonry Walls
Ever wondered how to hang that picture frame or shelf on a brick or concrete wall? It can seem daunting, but with the right tools and techniques, it's a straightforward DIY project. This guide breaks down two common methods: using concrete screws and using anchors, making it easy for you to tackle your next hanging project.


