How to Remove and Replace a Toilet Yourself
Learn how to remove a toilet and replace it yourself by installing a new one. This step-by-step video guides you through the removal and replacement of your old toilet.
Learn how to remove a toilet by replacing your damaged or mal-functioning bathroom toilet or just update the old model with one of hundreds of available colors, styles, or materials. An assortment of wrenches, a putty knife, a screwdriver, and a bucket and sponge are the required tools. The hardest part of this DIY toilet installation is lifting the heavy units into place.
Read More
Turn off the Toilet Water Supply at the Shut-off Valve
Turn the shutoff valve on the wall behind the tank clockwise to cut the water supply to the toilet.

Remove Water from the Toilet Tank and Bowl
When learning how to remove a toilet, it is important to first drain water from the toilet tank by flushing and keeping the drain valve in the tank bottom open by holding the lever up. Soak up the remaining water in the tank and bowl with a sponge and bucket.

Loosen the Nut Attaching the Water Line to the Tank
Use an adjustable wrench to loosen the nut that attaches the water line to the toilet tank and then pull the line free. Keep a towel handy to mop up any residual water.

Detach the Bathroom Toilet from the Floor
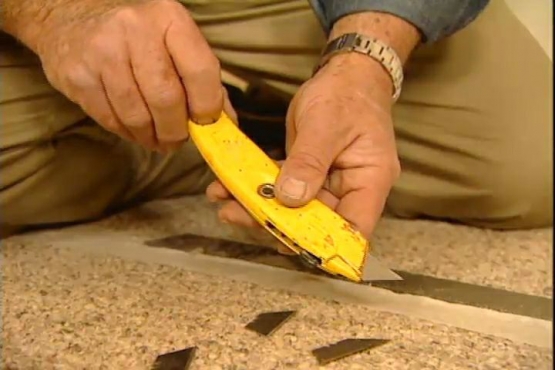
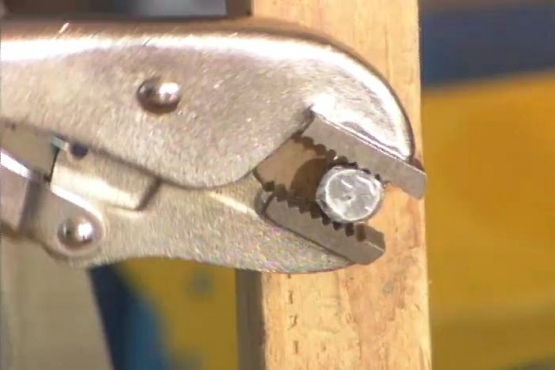
Remove decorative covers from the bolts holding the toilet to the floor is an important next step when learning how to remove a toilet. Remove the nuts from the bolts. Use a utility knife to cut any caulking seal around the base, and lift the toilet up and out of the way.

Remove the Wax Ring from the Toilet Drain Flange
Remove the old wax ring from drain flange, using a putty knife to lift it and scrape remaining waxy residue and debris. Note that the plastic collar in the wax ring faces downward into the drain.

Replace the Old Water Supply Line on the Shut-off Valve
Replace the water supply line on the water shut-off valve. Older lines may lose their seal after being disturbed, so a new one is just good preventive maintenance--especially when it is so easily accessed with the toilet removed.

Install a New Wax Ring on the Toilet Bottom
Add a new wax ring to bottom of toilet with its plastic ring facing away from the underside of the toilet. The plastic ring must fit downward against the floor drain flange once the toilet is installed.

Set Toilet in Place with Bolts Extending through the Base
Pack plumber's putty in flange slots to hold bolts upright. Set the toilet in place carefully with bolts extending through the base. Press down without rocking to compress the wax ring. Replace washers and nuts, tighten, and break off the excess. You are one step closer to learning how to remove a toilet.

Position Water Tank to Align with Holes on the Base
Set water tank in place, aligning bolts to holes in the toilet base. Push bolts down inside tank and secure with washers and nuts below. Ensure tank is level by tightening left or right nut as necessary.

Fit Toilet Seat Hinges into Holes on Toilet Base
Position toilet seat with hinges in the holes on the toilet base and secure w/nylon bolts. Tighten the nuts under the base with your fingers and then finish tightening with a screwdriver in the slot on top of the bolt. Congratulations, now have now learned how to remove a toilet.
Related Tips
Blog Articles

Have You Heard of Landscape Glue?
You love the rustic charm of a gravel walkway, but the constant scattering of stones across your lawn and patio can be a real headache. Whether it’s from pets, lawn mowers, or just foot traffic, it seems impossible to keep those stones in place. Sound familiar? Well, Brian shows us a simple DIY method using landscape glue to keep your gravel path looking pristine and, more importantly, in place.

How to Remove Candle Wax Drips: Two Effective Methods
Candles create a warm and inviting atmosphere, but those pesky wax drips can be a real headache. Luckily, Brian shows us a couple of effective methods to tackle this issue, and they involve two very different temperatures: hot and cold. Here, we'll explore two effective methods: one using cold and the other using heat.

Guide to Hanging on Masonry Walls
Ever wondered how to hang that picture frame or shelf on a brick or concrete wall? It can seem daunting, but with the right tools and techniques, it's a straightforward DIY project. This guide breaks down two common methods: using concrete screws and using anchors, making it easy for you to tackle your next hanging project.


