Build a Wood Baby Cradle A Few Easy Steps
Build a Beautiful Wooden Cradle for Your Baby
Follow these simple woodworking plans to construct a rocking wooden cradle that can be painted or stained. Seven main pieces are cut from solid 1-inch wood panels and then assembled with glue and countersunk screws hidden under wooden plugs. The cradle bottom is secured on narrow rails and provides additional structural support to the baby bed.
Read More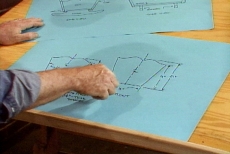
Plan the Design and Dimensions of the Baby Cradle
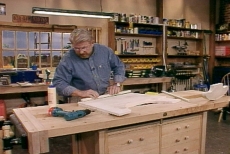
Draw the plans for the wooden cradle on paper and mark the dimensions of each component. The project requires cutting a headboard, footboard, two sides, a bottom, two rockers, and narrow wooden strips to support the bottom.
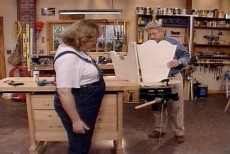
Prepare a Full-Scale Drawing of the Curved Cradle Components
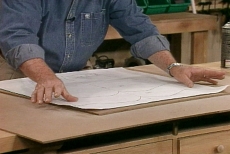
Make full-sized paper drawings of the curved headboard, footboard, and rockers. Spray adhesive on the back, turn them over, and glue the drawings onto 1/4-inch hardboard, smoothing them from the center outward to avoid wrinkles.
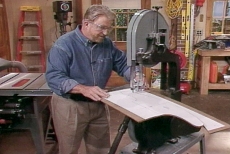
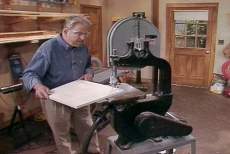
Cut out the Shapes to Make Hardboard Templates
Cut along the lines of the drawing. Use a band saw and cut through the paper and hardboard to make light-weight but stiff templates.

Trace the Templates onto Solid Wood Panels
Trace the shape of each template with a pencil to mark cut lines on the solid wood panels. Be sure to keep the templates aligned with the grain of the wood.
Cut All the Curved and Rectilinear Cradle Parts
Cut each cradle component, cutting along the trace lines for the curved parts and carefully measuring and marking for the rectilinear pieces.
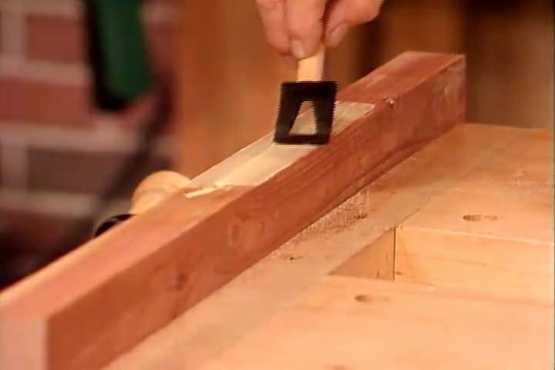
Install One-by-one Wooden Strips to Support the Bottom
Cut one-by-one wooden strips to attach at the bottom of the headboard, footboard, and both sides to support the cradle bottom. Glue and secure the strips with screws.
Attach the Sides to the Headboard and Footboard
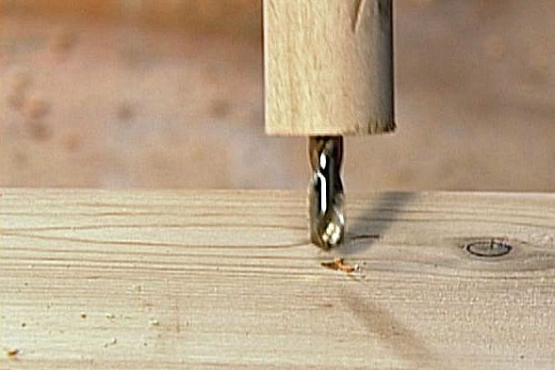
Apply glue to one edge of the headboard and butt it against the inside edge of one side panel. Insert screws through pre-drilled countersunk holes to secure the pieces. Repeat to attach the footboard and second side.
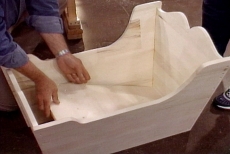
Attach the Cradle Bottom to the Support Strips
Drop the bottom into the cradle from the top after pre-drilling countersunk screw holes around the perimeter. Insert screws to attach the bottom to the support rails.
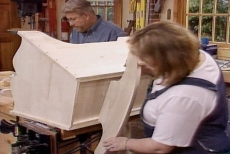
Secure the Rockers to the Underside of the Cradle
Apply glue to the tops of the rockers and position them against the underside of the cradle under predrilled and countersunk screw holes. Insert screws to secure them.
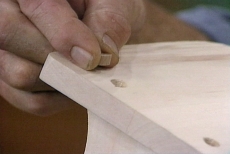
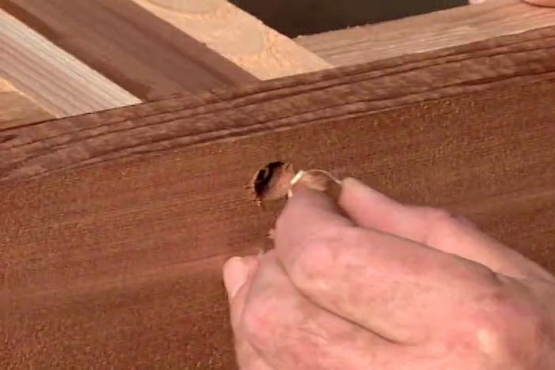
Glue Wooden Plugs in Each Countersunk Screw Hole
Dab a little glue in each screw hole and position a wooden-plug in each. Tap each plug gently with a hammer to seat it in the hole.
Related Tips
Blog Articles

Have You Heard of Landscape Glue?
You love the rustic charm of a gravel walkway, but the constant scattering of stones across your lawn and patio can be a real headache. Whether it’s from pets, lawn mowers, or just foot traffic, it seems impossible to keep those stones in place. Sound familiar? Well, Brian shows us a simple DIY method using landscape glue to keep your gravel path looking pristine and, more importantly, in place.

How to Remove Candle Wax Drips: Two Effective Methods
Candles create a warm and inviting atmosphere, but those pesky wax drips can be a real headache. Luckily, Brian shows us a couple of effective methods to tackle this issue, and they involve two very different temperatures: hot and cold. Here, we'll explore two effective methods: one using cold and the other using heat.

Guide to Hanging on Masonry Walls
Ever wondered how to hang that picture frame or shelf on a brick or concrete wall? It can seem daunting, but with the right tools and techniques, it's a straightforward DIY project. This guide breaks down two common methods: using concrete screws and using anchors, making it easy for you to tackle your next hanging project.


