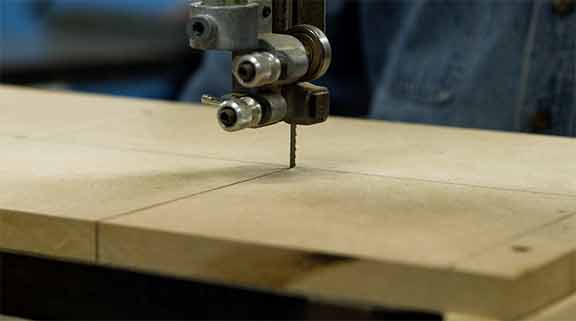
DIY Shop-Built Woodworking Circle Jig
This DIY woodworking jig can cut perfect circles of any size
Woodworking jigs are an essential part of any workshop. They help guide wood through the blade of a saw to make sure that parts are square, holes are in the right place, and you get a perfectly shaped cut whether it’s a straight cut or a circle. Fortunately, many of these types of jigs can be made right in your workshop.
Woodworking jigs are worth the time to make because they’ll make your woodworking jobs easier and you’ll use them over and over again for years. Taking the time to make them now can save you time and frustration later.
 In this video and blog, I’ll show you how to cut perfect circles of any size using a simple-to-make jig for the band-saw. A round table, for example, requires a perfectly circular piece to be cut for a tabletop. While you can try to cut it by hand, even the steadiest of hands wouldn’t get close to the precision that a jig offers. With this jig, you'll be able to cut perfectly rounded circles every time, in a variety of diameters using your band saw.
Step One: Making the Rails
Using a miter saw, cut two rails that will go on either side of the saw table. These will be just about the same length as the table itself. Then, clamp the rails to the sides of the saw table.
Step Two: Creating the Top
For the top of the jig, you can use just about any material as long as it’s relatively smooth and flat. I’m using a high-density particle board, known as MDF or Medium Density Fiberboard, and cutting it to size on the table saw. You want it to be as wide as the table and extend out a couple of feet.
Finding the center of two opposite sides,  connect those points with a straight line. I center the board on the saw table and make a mark at the edge of the band-saw blade, then draw a line from that mark to the center line we drew just a moment ago. Now, we turn on the band-saw and cut along the line we just drew, stopping at the center line.
I mark the location of the rails I clamped on earlier and draw lines across the top. Then, drill clearance holes in the MDF. Next, I bore counter-sinks for each hole and attach the top to the rails with screws.
With the rail secured to the top, I can remove the entire assembly and simply slide it into position when I want to use it. Once the jig is in place, I clamp it to the saw-table to keep it fixed in position.
Here is a tip! Place masking tape on the drill bit to act as a depth guide that also sweeps away any debris as it spins.
How To Use the Woodworking Jig
To use the woodworking jig, you need to measure from the saw blade to half of the diameter or radius of the circle you want to make. For example, if you want to cut a 12-inch circle you measure and make a mark at 6 inches from the blade, measuring along the line you drew earlier on the top of the jig.
Next, drive a small finish nail on that mark and clip it off at a sharp angle using a pair of diagonal cutters. Then, place the plank for the circle up against the blade and drive it down onto the cut-off nail, using a hammer or mallet.
With the blank in place, I turn on the saw and begin rotating the piece of wood until the cut-out circle is complete.
You can repeat these instructions to make any size circle. To do so, you simply measure from the saw blade to half of the diameter or radius of the circle you want to make.
This simple woodworking jig can help you make your projects easier for years to come. Consider adding more woodworking jigs to your workshop like A Make-Your-Own Clamp Jig Perfect for Miter Joints.
Recommended Articles

The How’s and Why’s of Upgrading a Central AC System
A step-by-step video demonstration showing removal and replacement of a central air conditioning system. Includes advantages of new, state-of the-art AC systems.

If You’ve Got a Project That Involves Demolition, You’ll Want to Know About This Tool.
I try out a new tool designed and engineered to do one task exceptionally well -- demolition.
