7 Tips for Successful Painting and Refinishing
These 7 Tips Will Give You Better Results and Help Avoid Finishing Headaches
This post is in partnership with Minwax and Hyde Tools. All opinions are my own.
___________________________________________________________
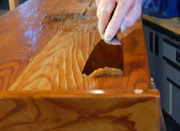 1. Stripping Do's and Don'ts
The secret to easy stripping is to let the chemicals do the work. Apply the stripper with a brush but avoid using more strokes than necessary to distribute the material. Over-brushing can reduce the stripper’s effectiveness. On flat surfaces, the old finish should come off easily with one or two passes of a 2-inch putty knife.
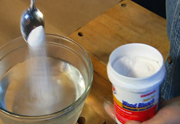 2. Getting Rid of Dark Stains in Wood
Oxalic acid, a powdered wood bleach available in paint stores, is an effective way to remove black or dark gray stains often left by potted plants. Watch the video to learn how to mix and apply it.
3. Eliminate Drips with Gel Stains
Because of their consistency, gel stains are often easier to use and less messy, especially on vertical surfaces. I like to apply them with a brush then wipe using a soft cotton tack cloth, always moving in the direction of the grain.
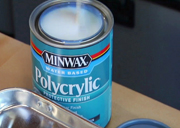 4. Water-Based Protective Finishes Have Clear Advantages
These tough topcoats are virtually odor-free and have the added benefit of soap and water clean-up. They do though tend to dry rapidly, so it’s important not to over-brush them. One way to apply these finishes quickly and smoothly on flat surfaces is by using a foam painter’s pad.
5. Spray Hard-To-Reach Spots
Many finishes, like the Minwax Polycrylic I used in this video, also come in aerosol cans. The spray approach can save time and eliminate brush marks especially on more intricate or hard-to-reach surfaces.
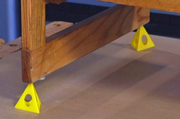 6. Elevate the Work Piece
Finishes tend to run under the bottom edges of cabinet doors or furniture pieces causing them to stick to the work surface beneath. These painter’s pyramids from Hyde Tools solve that problem.
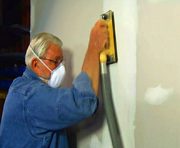 7. Capture the Dust
If you’ve ever sanded wallboard joint compound, you know how much dust can be created. What’s more, not only is there a lot of the stuff, but it’s very fine and seems to go everywhere. This dust-collecting sanding pad, also from Hyde, hooks up to just about any shop vacuum and collects dust at the source, saving a whole lot of cleanup time and effort.
Recommended Articles

The How’s and Why’s of Upgrading a Central AC System
A step-by-step video demonstration showing removal and replacement of a central air conditioning system. Includes advantages of new, state-of the-art AC systems.

If You’ve Got a Project That Involves Demolition, You’ll Want to Know About This Tool.
I try out a new tool designed and engineered to do one task exceptionally well -- demolition.
