RON HAZELTON:
Kathy and Tim Podovich have asked me for a hand so I'm going to pay them a house call.
KATHY:
Hi.
RON HAZELTON:
Hi Kathy, how are you.
TIM:
Hi Ron.
RON HAZELTON:
Tim. This is Cooper.
RON HAZELTON:
Cooper. My pleasure, sir. And you are -
COLE:
Cole.
RON HAZELTON:
Hey. Cole. And this would be -
TIM:
Riley Rose.
RON HAZELTON:
Hey, Riley, how are you this morning? Huh?
TIM:
Take a look inside -
[BOTH SPEAK AT ONCE]
KATHY:
Come on in. Ron, this is where we'd like to put the beam up in our living room.
RON HAZELTON:
Okay, right. Now why do you want to do this?
KATHY:
Well we're looking for a little more lodge look.
RON HAZELTON:
Okay. So this would be like, a iittle bit of, touch of rustic.
KATHY:
Right. That's what we're looking for. Warm it up.
RON HAZELTON:
I think that will do it. It will also probably divide up these rooms a little bit more which might make it look good too.
KATHY:
Right, that's what we're trying to do.
RON HAZELTON:
All right. So what are you going to do this afternoon?
[OFF-MIKE OFF TOPIC]
RON HAZELTON:
Go to the movies? You're not going to be here working with us?
To create the rustic look Kathy wants, we'll build 3 elements. A beam, two posts, and 2 diagonal braces, often called knee braces. Now these will look authentic but we're going to trick the eye a bit. Okay, guys. I've set up a bunch of tools here in the backyard. We're going to make these beams and posts today using something called box construction. Several pieces of wood put together to look like solid wood but it's really hollow on the inside.
So you cool with this? You got the idea?
KATHY:
Yeah, it will be great. Think it will look great.
RON HAZELTON:
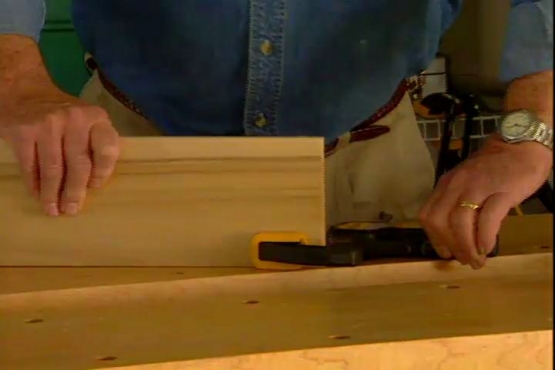
So let's start by doing some cutting here. Our first step is to fashion the individual pieces for the beam, posts and braces. We'll start by cutting standard one by fours and one by sixes into strips of varying widths. Next we'll make angled cuts or bevels along the edges.
To do this we've set the blade on a table saw at a 45 degree angle. With the bevels cut on the edges, it's time to measure and mark for length.
This one needs to be 91.
Then we make our cuts on the power miter saw. Well guys we've cut all the wood for the entire project over here. And now what I want to do is to begin to assemble the pieces. We're going to start with the beam that goes up on the ceiling.
And I've got a little mock up here. This is what it's actually going to look like. I think it would clear things up if we went inside. Let me show you how this is actually going to work, okay.
KATHY:
Okay.
RON HAZELTON:
It's going to go right up here in the corner and it's going to give us the look, with this all the way across, of the beam.
Back outside, we begin assembling our beam, posts and braces. Yellow wood glue is first applied to the beveled edges. Then the sections are placed together and carefully aligned.
Put that right up there, kind of squish it a little bit. What you want to do is you press down first and then a quick pull on the trigger.
Small headed finish nails driven in with a pneumatic nail gun will hold the pieces together until the glue dries. With the beam finished, we move onto the post that will support each end of the beam.
The process is the same but the shape is slightly different. Like a shallow U. Finally we assemble the knee braces. After nailing them together, they resemble long hollow boxes. On each end, we make 45 degree cuts or miters that will allow the braces to fit snugly between the beam and posts. Inside, we go to work on the art of illusion. We begin by screwing a strip of one by four lumber to the ceiling.
Okay Tim, just push it right up on there-
Then snip a section of our ceiling beam over this cleat and nail it in place.
Good, very nice.
Next we measure the remaining distance to the wall - cut the next section to length and slip it into place.
In a little further, yeah, yeah, there you go, that's it.
To cover the joint between the two sections, we create a make believe scab. It's a brace that would have been used to join real beams together. An authentic scab would have had wooden pegs that passed entirely through the beam.
Ours are only long enough to enhance our illusion. With the beam up, we turn our attention to the posts. Once again we start by installing a cleat. Luckily we find wall studs just where we need them and are able to use wood screws.
If we hadn't been so lucky, we'd have secured the cleats with toggle bolts. Finally we add the diagonal knee braces. And our illusion is complete. If you didn't know differently, you'd swear these make believe timbers were the real thing.
Now what could be better, your own lodge right here at home huh?
KATHY:
We love it. It's exactly what we were looking for.
TIM:
Turned out great.
RON HAZELTON:
Well here's to more successful home improvement projects, guys.
KATHY:
Thank you Ron.
TIM:
Thank you.


