RON HAZELTON:
I decided that I want to update my cooktop and range hood. Now there's really wrong with these, it's just that there are some new features in the updated models that I'd really like to take advantage of. A more efficient burner in the cooktop, a quieter range hood with built in halogen lighting.
Now, I know when you think about taking out built in appliances like this, it might seem a little intimidating. But as long as you're replacing them with similar models, well, it's a lot easier than you may think.
This job begins with a certain amount of, well, undoing -- like removing the grills and burner covers from the existing cooktop. Next, I take off the cabinet doors and pull out the drawers to give myself plenty of work room and light.
Turning my gas shutoff, so that it's perpendicular to the line, puts it in the off position. I unplug the electrical supply that powers the electronic igniters, then loosen and remove the flexible gas supply line.
My cooktop, like many, is held firmly down on the countertop with metal brackets that easily unscrew. That's about all the undoing that's necessary. A little tug, and the range lifts right out. The only things that are standing in the way of dispatching the range hood are a few farm animals. I turn off the electrical power at the circuit breaker, then remove the filters, and take off the cover that conceals the fan, motor and controls.
Even though the fan and light won't operate, I use a voltage detector to make doubly sure there's no current in the wires. Then I go ahead and disconnect them. Now this range hood, like most, is held in place by several screws that I run into this cabinet up here.
Now, I'm working alone today, so what I want to avoid is having this come crashing down once I take the last screw out. So I'm gonna put some temporary bracing in place. In situations like this, I use whatever works. A strip of one by three lumber and a pair of clamps will support the front, while a couple of two by four scraps will work just fine to keep the rear from dropping. This extra long bit holder, makes it easier for me to reach up inside the hood, and take out the fasteners. With the screws gone, I just hold the vent with one hand and remove the temporary bracing with the other.
To give myself a little more elbow room, I remove the narrow shelf that was below the vent and I'll probably put it back later. You know, I'm sorry, I just don't like that. This is some kind of a previous repair. I don't know, maybe they were putting new plumbing pipes in here.
And I realize this is gonna be covered back up with the new range hood, but I just don't like to leave open holes in walls like that. Potential fire hazard. It's a place for rodents to come through. So I'm gonna take just a couple of minutes and repair this.
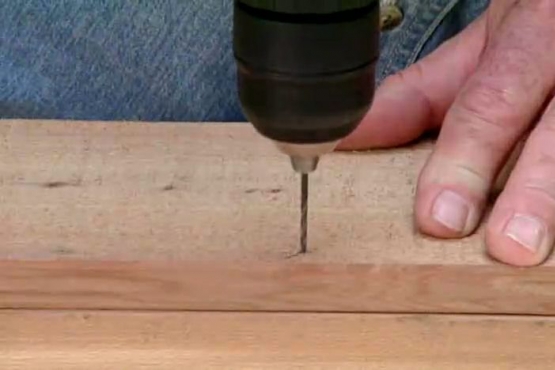
I remove a piece of plastic laminate covering the wallboard. Then, using a drywall saw, I cut away the damaged material and create a clean rectangular opening. [SAWING SOUNDS] Next, I use a right angle drill to bore holes through the wall studs [DRILL].
This will allow me to run the electrical cable to the upper corner, where it will exit the wall and eventually, enter the range hood. I secure the wire with electrical staples, then begin attaching strips of wood or battens to the sides of the opening.
This will give me a place to attach the new piece of drywall. After cutting the wallboard to size, I set it in place, allowing the wire to pass through the hole I bored beforehand. Then, I attach the piece with drywall screws.
[MUSIC]
I made a trip to the home improvement center to pick up the new appliances and I'm ready to start installing. Step one is to clamp a temporary support in place that will hold the exhaust hood in position and leave my hands free to make the necessary preparations.
A strip of duct tape on top of the brace will help prevent any scratching when I slide the range hood into place. Now, I can work the electrical wire through the rear of the unit without having to worry about supporting the weight.
Next, I push the hood upward, so that it connects to the existing vent, then insert small blocks of wood to keep it where I want it. With everything in position, I can use both hands to do the important work of screwing the range hood securely to the underside of the cabinet.
Well, putting up the exhaust hood might have been struggle free, but getting out of this cabinet, [LAUGHS] well, that's another story. With everything secured to the cabinet, the temporary bracing can come down. Now it's time to make the electrical connections.
First, I attach the ground wire to the green screw on the frame. There are really only two additional connections. The black wires are twisted together and secured with a wire nut. Then the white or neutral wires, are handled in the same way.
Remember, I turned off the power to the circuit breaker panel before I started. All I have to do now is set the cover in place, attach it with a few screws -- and install the washable filters.
Before I move on to the cooktop, I'm replacing that piece of plastic laminate and reattaching the shelf. One of these days, I'm going to do something different here, maybe some decorative tile.
Well, here's my new cooktop. Now what I really like about this are these star-shaped burners, but more about those shortly. I'm turning the cooktop bottom side up because it's on the underside that I'll find this short pipe nipple protruding.
First, I brush on a liberal coating of pipe sealant. Then, screw on the regulator that will keep the gas pressure at a level that is optimal for the burners. I use an adjustable wrench for a final tightening. Next, I screw the flexible gas line onto the regulator, and snug it up, using a pipe wrench. The cooktop is now ready to drop into the countertop opening.
Down below, I once again apply pipe sealant, connect the other end of the gas line, tighten the connection using two opposing wrenches and open the valve. Right away, I begin testing for possible leaks, by spraying on a soapy water solution.
Here, I've intentionally loosened the connection so I can show you what a leak might look like. As you can see, the escaping gas creates soap bubbles. After retightening the fitting, I go ahead and shut the valve and the remaining pipe joints to make sure they are leak free.
Now I can plug in the power cord, replace the drawers, reinstall the cabinet doors, put on the knobs, assemble the burners and set the grates in place. Now this new gas cooktop from Thermador, has got some very nice features.
For one thing, a new burner layout. Now, I've got five very large pots on here at the same time and there's plenty of extra room. The center burner is oversized, big enough to accommodate even the largest stock pots. The flush grates are continuous, making it easy and safe to slide cooking utensils from one burner to another.
Two of the burners have an extra low feature that maintains gentle simmer temperatures by cycling the flame on and off at precise intervals, ideal for delicate sauces. Ah, yes, the star burner. Now the whole idea behind this design is that the star shape spreads the heat in a wider pattern.
That means more even cooking and faster time to boiling. The range hood has two halogen lights which are not only brighter, but render colors more naturally. The fan is super quiet, especially on low and medium settings.
And what's just as important to me is that I maintain at least a 24 inch clearance between the top of the cooktop and the bottom of the range hood and this low profile from Braun gives me exactly what I need.
Well, now that everything's in, I'd say it's time to get cooking.

