RON HAZELTON:
Well, I'm on my way to one of my favorite cities in the southeast, Charleston, South Carolina. I'll be visiting Luisa Cameron. Now she's got a project she wants to do, and I'm gonna see if I can help her out.
LUISA CAMERON:
Hi, Ron.
RON HAZELTON:
Good morning Luisa.
LUISA CAMERON:
Come on in.
RON HAZELTON:
How are you?
LUISA CAMERON:
I'm great, thank you. I'm just getting ready to do some gardening projects and I need your help.
RON HAZELTON:
Well, I know that we're going to be building something called a cold frame, but I have to confess, I'm not really sure what that's used for.
LUISA CAMERON:
Well, it's used as a miniature greenhouse without heat. That's why it's called a cold frame.
RON HAZELTON:
Luisa's passion is gardening and down here in Charleston, she can garden year round. She'll use the cold frame to incubate plants she'll grow from cuttings. We've come up with a simple design, a basic box, supported by four legs. On top, we'll place a hinged cover made of clear acrylic plastic, that will allow sunlight to provide warmth for the growing plants. First things first, so we'll start by cutting the pieces for the two-by-two frame.
Now I want you to tell me how you feel about using the saw right now, but you haven't touched it yet.
LUISA CAMERON:
I think it's a terrifying looking piece of equipment.
RON HAZELTON:
Okay.
We'll start by building the front and back sections of the base. It's clear that the only way Luisa will become comfortable with the power miter box is to dive right in, with a little instruction first.
-- pressing in the corner,
LUISA CAMERON:
Perfect, okay and now I turn it on.
[SOUND OF SAW]
Great, look at that.
RON HAZELTON:
Now, how is that? Is it, is it frightening now?
LUISA CAMERON:
No, no, I -- I just had a sense of my hands being too close to it, but you don't, it's, you're protected. [SAW] That is beautiful.
RON HAZELTON:
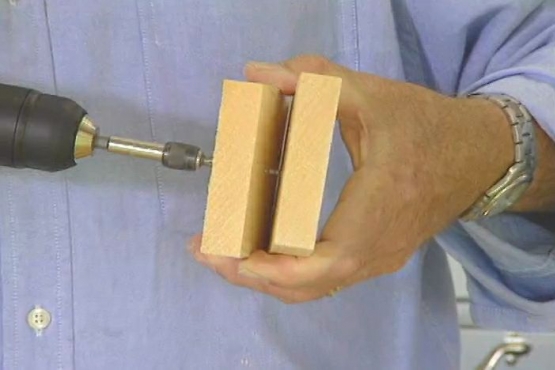
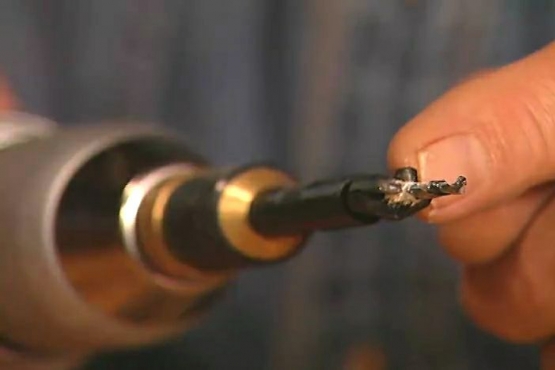
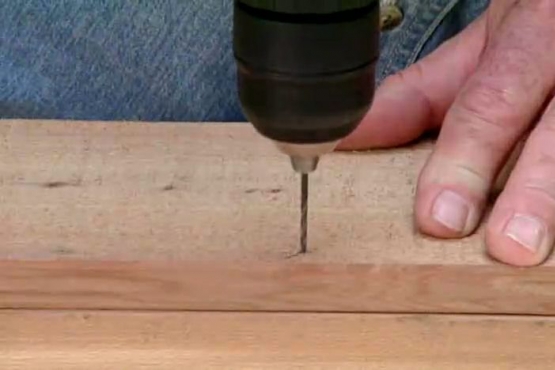
The cutting complete, we lay out the pieces on a temporary work table and begin drilling clearance holes for the screws that will hold the framed sections together. Counter sinking the holes will allow the screwheads to be flush with the wood.
And I want to use these stainless steel screws, they're rustproof. They just go right in the holes that we drilled just a --
[BOTH SPEAK AT ONCE]
LUISA CAMERON:
Can I hold this for you?
RON HAZELTON:
If you would, that would be great. Okay. Okay? Like that, want to try one?
LUISA CAMERON:
Yes, I do. There.
RON HAZELTON:
Okay.
LUISA CAMERON:
[SAW] Good.
RON HAZELTON:
Okay, let's move on.
LUISA CAMERON:
Good.
RON HAZELTON:
The next step is to install the braces that will connect the front and back frames.
Lay three of these out here, kind of -- let's do it like that.
LUISA CAMERON:
All right.
RON HAZELTON:
Now here's the front frame that we just did, we're gonna attach that now to this brace. Okay, flip this over now. If you could hold that, Luisa, right there.
LUISA CAMERON:
Got it.
RON HAZELTON:
Now put the, the other side in.
LUISA CAMERON:
And you're using that piece as a little brace.
RON HAZELTON:
Yeah, this is so you can push against this and they won't slide away.
[BOTH SPEAK AT ONCE]
LUISA CAMERON:
Sure.
RON HAZELTON:
All the way over this way. Very nice.
LUISA CAMERON:
I can see the shape of it now.
RON HAZELTON:
Beginning to take shape, so to speak.
LUISA CAMERON:
Yeah.
RON HAZELTON:
Luisa drives the final screw into the frame and it's time to take a look.
Actually, let's set this down on the ground. I want you to see it at sort of --
LUISA CAMERON:
For the height?
RON HAZELTON:
Yeah.
LUISA CAMERON:
Oh that's, that is really nice. That's got great dimensions.
RON HAZELTON:
All right, now we've got the pilot holes here.
With the frame together, we'll move onto the sides of the planting box. For this, we'll use two rows of three-quarter-inch cedar tongue and groove planks. By putting the tongue up, we'll form a joint that will prevent the soil and sand from seeping out.
Okay, everything flush on your end?
LUISA CAMERON:
Okay, flush on my end, yes.
RON HAZELTON:
Okay, why don't you go ahead and run the screws in?
[DRILLING]
Okay, so lift her up.
LUISA CAMERON:
Yes, white.
RON HAZELTON:
There we go. Okay --
[BOTH SPEAK AT ONCE]
LUISA CAMERON:
Oh, that looks so nice.
RON HAZELTON:
We're moving right along here.
LUISA CAMERON:
We are.
RON HAZELTON:
Let's put the bottom on here next.
Because it resists decay and insects, we'll also use cedar for the bottom. These planks though, have no tongue and groove edges.
LUISA CAMERON:
Umm, smells good too.
RON HAZELTON:
This cedar's wonderful.
Now some of the planks will need a little detail work to fit around the corners. So I'll introduce Luisa to, you guessed it, my Japanese handsaw.
Hold it, now come at this a little bit more from this direction, straight up and down.
LUISA CAMERON:
Oh, that's just lovely.
RON HAZELTON:
There you go.
LUISA CAMERON:
All right, let's see if it fits. Just so. Think it's just right.
RON HAZELTON:
There you go, final board.
LUISA CAMERON:
Right. That's it. Now what do we do next? Are we going to put the top on?
RON HAZELTON:
Yeah, I want to actually -- want to put a trim strip on here, just to cover this up. Slide it over here to this 45-degree mark, put the red arrow --
The trim pieces around the top will have 45-degree angles cut on the ends. To save time and steps, we bring this portable battery-operated miter box, right to our work site.
LUISA CAMERON:
Good, all right.
RON HAZELTON:
How is it?
LUISA CAMERON:
I think it's just right.
RON HAZELTON:
These rust resistant, finished head screws go in quickly, reduce the chance of splitting, and are practically invisible once in place. Now we're ready to build a frame for the acrylic plastic top.
Using a table saw, I cut slots or dados on the inside edges of the frame. These will hold the clear plastic panel in place.
So it's getting kind of dark, so I'm gonna go out and have dinner in Charleston. I hear it's great food here. And be back in the morning and we'll finish this up.
LUISA CAMERON:
Thank you so much. I'm looking forward to it.
RON HAZELTON:
Okay, see you then.
Well, it's a little cooler this morning, huh?
LUISA CAMERON:
It is, but it's gonna warm up later.
RON HAZELTON:
Okay, well, this is that strip that we cut last night with the groove or dado on the edge. This is gonna be part of the frame that will be on the top here and will have a plexiglass center. So let's start by cutting a miter on one end here and we're gonna assemble this the same way we did this trim piece right here.
The ends of the frame sections will also have angled miter cuts.
Wow, you were right on the money there.
Before assembling the frame, I apply waterproof polyester glue to the joints. Then we clamp the frame sections to the work table to keep them from moving around. We check each corner for squareness and then fasten the joints with finished head screws.
LUISA CAMERON:
Okay, this looks like --
RON HAZELTON:
This is the moment we've been waiting for.
LUISA CAMERON:
Yes. Oh, it's perfect.
[BOTH SPEAK AT ONCE]
Well, look at that.
RON HAZELTON:
We'll finish this off with brass hinges, handles, a chain to keep the top from falling back, and a bottom shelf.
[CHIMES]
Now we're going to leave these boards loose in the bottom right here for a couple reasons. You can replace them, and also I want these crevices between or cracks between to give us some drainage. But I don't want to take the chance that the soil or sand is gonna wash out.
So we'll put this weed cloth down here which will let the water go through but keep the soil in.
LUISA CAMERON:
That is a nice addition.
RON HAZELTON:
And you said you wanted a portion of this sand and a portion of this soil, right?
LUISA CAMERON:
I'd like that very much.
RON HAZELTON:
That's why we're putting this in, right in here. Let’s go ahead and put -- how much do you want, you want the whole thing in here?
LUISA CAMERON:
I think we need the whole thing.
RON HAZELTON:
Yeah, I think so too.
RON HAZELTON:
Whoa. Okay.
LUISA CAMERON:
Well, that looks so promising.
RON HAZELTON:
Very nice, that will do it. Looks like it's just inviting some kind of plant right now.
LUISA CAMERON:
It sure does. As a matter off act, I have a hydrangea cutting and I'll show you what I'm talking about for the rooting.
RON HAZELTON:
Okay, great. Well, I think we're ready to root.
LUISA CAMERON:
And I think we're a great team.
RON HAZELTON:
We are.
LUISA CAMERON:
Thank you, this is a beautiful project, and I'll make wonderful use of it.
RON HAZELTON:
So you've just be putting the cuttings in here now?
LUISA CAMERON:
I will. I'll cut them and put them in some rooting hormone and just put them in the sand here, the moistened sand.
RON HAZELTON:
You know, for someone who's never used tools before, you did amazingly well.
LUISA CAMERON:
And you're a wonderful teacher.
RON HAZELTON:
Well, thank you.


