RON HAZELTON:
I got an e-mail from Dennis. He says I can't seem to find out how to re-glaze window glass. The old putty on each pane is hard and brittle. Well Dennis didn't wait around for me to get back to him. He went ahead and did the job himself. And he says the results turned out great. In fact he goes on, this is one of those mysterious jobs that we would pay someone a lot of money to do. When the job was done I thought, this is just too simple.
No harder than making an apple pie. Well Dennis, thank you for the e-mail. I'm going to incorporate some of your suggestions with my own experience. Because I've got a window out there that's definitely in need.
Well I'd say this window is a real good candidate for re-glazing. Now the first step in this job is to remove the old material. There are several ways you can do that. I'm going to show you a few and pick the one that works best for you.
I'm going to start with a very stiff putty knife. Now the idea here is to go in on the bottom of the glaze where it contacts the wood and kind of break it loose like that. Now it helps to file a sharp edge on the end of your putty knife. Now sometimes heat from a heat gun in combination with a putty knife can work really well.
Because the heat actually can soften this glazing even though it might be really hard from age. I can see this works really well. One note of caution here, be careful not to overheat the glass because you can crack it.
Now this is called the putty chaser. It's made by Prozy and its sole purpose in life is to take old glazing compound out of windows. It has sort of a flat blade here like a blunt screwdriver. And it spins and knocks out the old material.
Let me show you right here. Well I got all of this old glazing cleaned off. But I got into a little bit of a rush right here and I cracked the pane. So I put some duct tape on here to keep it from shattering. I'm going to take this out now and replace it. When I'm removing broken glass panes, I protect my hands with leather or kevlar gloves and my face with a plastic shield.
With the masking tape in place on both sides, I tap the glass with the end of my putty knife just enough to make it shatter. Most of the broken pane can lift out in one piece. Well I've got that pane of glass out and we're just about ready to replace it and put our window glazing in.
But you can see we have a lot of exposed wood right here. And I'm going to paint that with an oil based primer. For two reasons. First of all, this wood is very old and very dry. And I don't want it to draw the oil out of the glazing prematurely.
Cause it to crack and shrink. Secondly, anything that's exposed here, I want to weatherproof and seal it and the primer will do that. Now since this is oil based paint I'm going to let it dry overnight. Then I'll come back tomorrow, put that glass in.
And finish up the glazing. Now truth be told, most often I just take my measurements down to the hardware store or the glass company and have them cut glass for me. But there are times when I do like to cut my own. So I'm going to do that now.
And maybe you'll pick up some tips here that you'll find useful. First thing of course is we've gotta clean the surface of the glass. And this may sound a little bit silly but glass that is not clean just simply won't cut very well.
It won't score properly. Now I'm going to make my measurements. The width was 8 and a half. And 8 and a half up here. Now a metal straight edge like this can slip a little bit on glass. So I like to put a piece of tape on the back. This is just masking tape. All right.
We're lined up. I'm just going to draw a mark down through here. Now it's time to cut or actually score the glass. This is a glass cutter. The way I hold it with these teeth or notches facing downward. I place my first finger about right here.
And then tip it up at about this angle. Now I like to dip the cutter in some oil, acts as a lubricant. Get a good grip on my straight edge here and I'm going to make just one scoring cut. Now you want to break the glass fairly soon after you score it.
And the way I like to do it just to make sure I get a straight cut is to put a piece of dowel under the score and then press down on two sides. I repeat the process to cut the glass to length. First scoring. Then placing a dowel underneath. And finally, breaking.
Well there it is. Now sure, I could go out and have somebody else cut this for me. But I have to admit, there's a certain amount of satisfaction in doing it myself. Now before I can set this in the frame, I've gotta put what I can call I guess a bedding coat of glazing putty in here.
And that will actually act as a cushion for the glass. Glazing putty is the material that seals glass panes into their frames. I find it easier to use if I first knead it, then form it into a rope shape. Next, I lay the putty into place with my fingers.
And finally use a flexible putty knife to press it firmly onto the lip of the window frame. I set the glass pane in the bed of putty and press around the edges to make sure I get a good seal. This is called a glazier's point. A small metal clip that will hold the glass in place especially while the putty is drying.
I embed these into the wooden frame using a putty knife. With the glass in place, I can now apply more glazing putty to the outside. This will form a weather tight seal to keep out water and drafts. Dipping my putty knife in paint thinner allows it to glide more smoothly over the surface, leaving it level and neat.
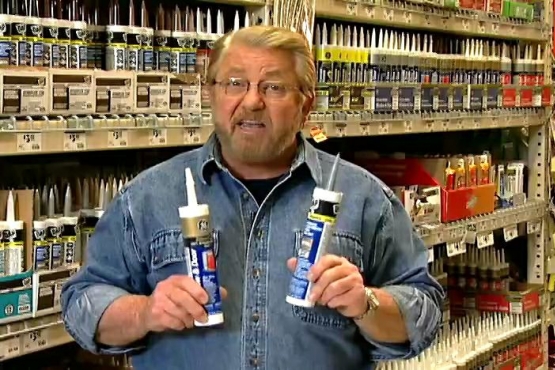
The excess putty on the glass lifts off easily. Now this is a product I haven't tried before. Window glazing in a caulking tube. Let's give it a shot. The caulking tube nozzle is designed to lay a bead that's just wide enough for the job.
This product is water based so that's what I'll dip my putty knife in. The material is also a bit thinner and stickier than glazing putty. I might be better off waiting until it's partially set before trying to remove the excess.
That turned out pretty well too. You know I'm not sure which variety I like. On one hand, the old fashioned kind cleans up a little more easily. But the caulking tube variety certainly does go in easily. You know what I think?
You should try both and then choose the one that you like best.
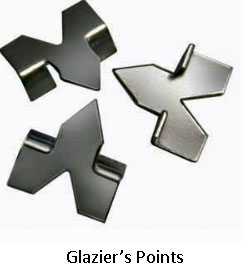 Most single pane window glass is held in place with glazier’s putty and, oftentimes, small metal clips called glazier’s push points. Perhaps the most challenging part of this job is removing the old putty which, can, at times, be quite hard. In this video I show you how to cut your own glass to size, however, you can also get many hardware stores and home improvement centers to cut it for you. Always order the glass cut slightly small than the opening.
 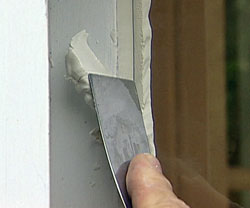 Glazier’s window putty can be quite sticky stuff. Kneading it in your hand and rolling in into a coil before applying it can make it a bit more obedient. Smoothing the putty after putting it in place is really a matter of practice. If it’s not turning out as neatly as you’d like, scrape it out and try again. It’s really a matter of holding the putty knife at the right angle and applying even pressure.
