RON HAZELTON:
Well, what a beautiful day for traveling. I'm headed to St. Paul, Minnesota to visit Steve and Stacy Hect. When they're not busy filling out adoption papers, Steve and Stacy are preparing a youngster's bedroom and childproofing their house for the baby girl they will soon adopt from China.
One area of special concern is the railing around the second story stairwell. The wide space between the balusters is a hazard. So today, I'm here to help Stacy and Steve fix that problem in a very attractive way.
And your concerns are what, with the existing balusters?
[BOTH SPEAK AT ONCE]
STEVE HECT:
Well, a couple things. First, we can't really gate the end of the stairwell off, and second, we're really concerned about the width of the — of the rails.
RON HAZELTON:
Right, right, right. Yeah, they're wide enough for a child to crawl completely through. And then some children as they get a little older, they can get their — squeeze their body through here, but then they fall and they can catch their neck. So we definitely — when we put the new one in, are going to change the spacing on that.
Our first step is to remove the old railing. It's attached to the floor with lag screws and to the wall the same way.
[BOTH SPEAK AT ONCE]
STACY HECT:
— I got it.
RON HAZELTON:
Good, okay — okay, Steve, let's just set this back here out of the way for now.
Well, I've laid out all the components for our railing system right here. There are really only three. This is a system by American Legacy, and the three major components are a newel post, a series of balusters in between the newel posts to go at the top of the stairs and at the corner, a series of balusters in between and the whole thing is connected together with a railing.
Now you notice that the newel post and the railing are in oak, 'cause you guys have got a lot of oak in the house and I thought that would be nice.
STACY HECT:
Right.
RON HAZELTON:
But the balusters right here are actually in poplar, and these are designed to be painted.
[MUSIC]
As Steve and Stacy clean the dust off each piece with tack cloths, I temporarily nail the balusters to a strip of lumber so that we can turn our painting into an assembly line operation. As the couple gets started on the balusters, I begin staining and finishing the oak railing.
All right, Stacy, you want to grab that newel post there and we're going to get this ready to attach to the floor. These are just plastic food storage bags. I'm sort of putting 'em in here to keep from doing any damage to that new finish we put on here. There you go.
That's the bottom end right there. This is top. We'll just tighten this up a tad. All right. Now the system that we're going to use to attach these guys, involves the use of this metal plate. We're going to attach the plate to the bottom of the post, and you see how it overhangs here and here?
STACY HECT:
Yes.
RON HAZELTON:
And then we're going to attach these ears to the floor.
To attach the plate, we have to drill a pilot hole dead center in the bottom of the newel post. A special center finder attachment on my combination square, makes locating the center as simple as drawing two diagonal lines.
Good.
STEVE HECT:
Nice work.
RON HAZELTON:
Next step is, we'll be attaching this plate right here. Now this can be just a little bit tricky but I can show you a couple things that will make it go easier.
[MUSIC]
You know, driving a large screw like this into hard wood like this oak, can be kind of tough going, but here are a couple of tips that will make it easier. First of all, be sure you choose the right driver tip for your drill. Did you know that there are three different size Phillip bits? A number one for very small screws like this, a number two for medium-sized screws and a number three for large screws like the one we're about to drive in. You can always tell the number three bit because it's got sort of a blunt end right here.
Secondly, try lubricating the screws either with soap or wax. In this case, the threads run the full length of the screws. So we're going to wax them all the way from one end down to the other. Now that we've got the right bit for the right screw and we've got our threads lubricated, this should be fairly easy going.
Now I want to make sure that this is square with the edge of the stairwell, so I'm going to take a carpenter's square and slip it in here.
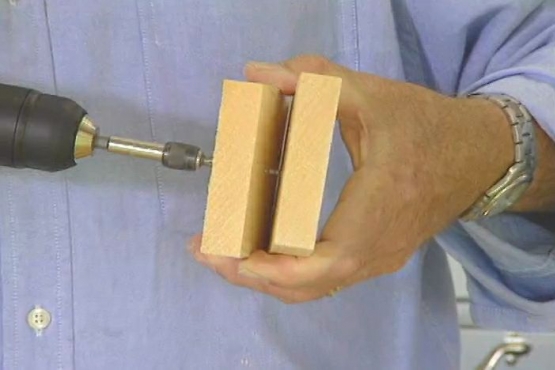
I align one edge of the square with the edge of the stairwell while Stacy adjusts the post. I've outfitted the drill with a flexible shaft that will allow us to get close enough to the post to bore pilot holes into the floor.
Steve then drives in a couple of screws that temporarily hold the post in place. In a little while, we're going to remove the newel post, then reinstall it with the railings attached.
Now this is called a rosette. We're going to mount this on the wall and the handrail's actually going to terminate in the center of this. To figure out where that should go, I took a level and I transferred this rectangular shape right here over to this wall, found the center of that and then used the center of that to draw this circle.
Now it's time to actually attach this rosette and we're going to do this with a toggle bolt. So first of all, let me put this in position. Now this is the bolt from the toggle bolt. I'm going to put that in the hole just like that, then I'm going to give it a little tap with the hammer. [HAMMERS] Okay.
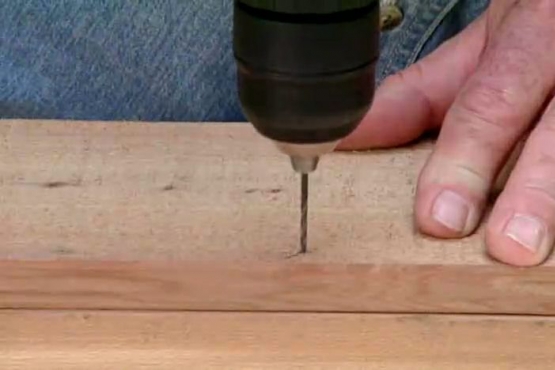
Give myself a reference mark right there. And then I'm going to bore out a hole — in this case, large enough so that the toggle can slip through. [DRILLS]. Next, I insert the bolt through the rosette and screw on the toggle. Then I pinch it closed and push it through the hole.
The toggle will flip open inside the wall. As I tighten the bolt, I pull the rosette away so the toggle will come into contact with the back side of the wall. This will prevent it from spinning. Our railings need to be cut to length, so Steve and Stacy begin taking measurements.
STACY HECT:
About 35 and a half.
RON HAZELTON:
Thirty five and a half. Okay, now come down and measure from that newel post to this one here.
STEVE HECT:
Okay.
STACY HECT:
You got it?
STEVE HECT:
Yeah, got it.
RON HAZELTON:
What have you got there?
STACY HECT:
About 105.
RON HAZELTON:
After recording our measurements, we move outside to start cutting. [SAWING] Nice job. Class A cut right there.
STACY HECT:
Beginner's luck.
[MUSIC]
ANNOUNCER:
Ron Hazelton's HouseCalls is being brought to you by the Home Depot and by GMC.
[SOUND CUT]
RON HAZELTON:
Today's HouseCall in St. Paul, Minnesota has me helping Steve and Stacy Hect replace their old wrought iron stair railing. The wide spacing between the balusters would pose a danger to the baby girl the couple is about to adopt.
We've just finished cutting the upper hand rails as well as the bottom toe rails that will be attached to the floor.
It's going to lay right in here like this and what's going to happen is these balusters eventually are going to sit on top of this. Sometimes these would go right into a finished floor but you don't have a finished floor here because of the carpet. So we're going to put this down instead.
We secure the toe rail to the floor with finish nails.
Have you ever driven a nail easier in your life?
STACY HECT:
I haven't driven many nails in my life. But I'm willing to say that was the easiest one I've driven.
[BOTH SPEAK AT ONCE]
RON HAZELTON:
Oh, really.
Because pencil marks can be difficult to see on dark wood, I've placed masking tape on top of the toe rail and make our measurement marks on it.
Spacing is an important thing here. It's a little formula that I use to come up with the spacing and then once I've figured out what the spacing should be, I made up a little block like this, just as a marking gauge and then just moved this along like so and made a mark at the right interval.
[BOTH SPEAK AT ONCE]
STACY HECT:
You don't have to measure each one,
RON HAZELTON:
Exactly. Now I'm going to turn these bottoms inside up for just a second 'cause I want to show you something. The final check here though is I'll put these on the marks is, that we want to make sure that the space between the balusters at the widest point, is no more than four inches. That's the maximum for child safety.
So that would be right here and we're about 3 and 7/8ths, so we're okay. Now, these are actually going to get installed with this pin right here, downward. That means that we've got to drill holes every place we've got a mark right here.
[MUSIC]
We've finished drilling all of our baluster holes but before we set the balusters in place, we have to first attach the hand rails. I've applied masking tape to the railing and the newel post, drawn center lines on each and aligned them.
Then using a few balusters to temporarily support the hand rail, I trace the shape onto the newel post. Next, we need to drill a very accurate hole into the side of the newel post. A portable drill press accessory allows me to bore a perfectly straight hole.
All right, one hole. Now this is called a hanger bolt. You see it's got two threads on it. It's got a coarse thread here, kind of a screw thread and a machine thread out here. And this is actually what's going to hold the hand rail to the newel post.
STEVE HECT:
Okay.
RON HAZELTON:
We'll install it by getting a good grip with a vice grips like this.
STEVE HECT:
Right in the middle.
RON HAZELTON:
Right in the middle.
STEVE HECT:
I can see now why it was important to be squared up.
RON HAZELTON:
Yeah.
STEVE HECT:
Can I add one more on there?
[BOTH SPEAK AT ONCE]
RON HAZELTON:
You can go one — yeah, just whatever — just, just as long as you don't scrape the finish there.
STEVE HECT:
That looks about right.
[BOTH SPEAK AT ONCE]
RON HAZELTON:
Good, right there.
STEVE HECT:
Okay.
RON HAZELTON:
Excellent.
Next, we secure the railing on the workbench and bore a hole into the end. For this, I've added a piece of wood to the drill press base to make it more stable. Then using a larger one-inch bit, I drill a second hole into the bottom of the hand rail that will intersect the first.
Now it's time to connect the railings to the newel post. This is the hanger bolt that we put in earlier. This is the hole we drilled in the end of the rail, and the larger one that we drilled in the bottom. We'll slip this hole over the hanger bolt like that. Now inside this larger hole, I'm going to slip this washer. It's actually got a convex surface on here that will form to the edge of the hole.
Now that gives me a flat surface on which to install this combination nut-washer. And the best way to put this in is with this special wrench that comes with the kit. Slip it in like this and then we tighten it up.
With the railing attached, Steve and Stacy set the base of the first newel post on the floor and slide the end of the hand rail over a hanger bolt we installed earlier in the center of the rosette. Stacy then slips on the washer and nut.
Okay, baluster number one in. So just put that base, the pin on the bottom in the holes that we drilled earlier, okay.
STACY HECT:
There we go.
RON HAZELTON:
And tip it to me. I'm going to lift this up just a little bit, so you can slide it up there.
We continue installing the rest of the balusters by inserting the bottom pins into the toe rail holes and sliding the heads into a slot on the underside of the hand rail.
Rail number two, newel post number two.
[MUSIC]
There we go, okay, here we go, guys.
With all our balusters in place, we screw the newel post plates to the floor, this time for good. Finally, we tack small finished spacers called filler strips into the slot on the underside of the hand rail between each baluster.
These help hold the tops of the balusters in position. We further secure them by toe nailing.
STACY HECT:
Watch your fingers.
RON HAZELTON:
Well, what do you think?
STEVE HECT:
Oh, it looks great.
STACY HECT:
Ron, I love how the oak contrasts with the white and the fact that it's safer to do it is just icing on the cake.
RON HAZELTON:
Right.
STEVE HECT:
It was a lot of fun. I learned a ton about how to back toe the banisters and actually, as we put each of the screws in, how it really took shape and really became solid. So-
RON HAZELTON:
You know, you see these all the time. You really don't have any sense of how they really got together until you actually build-
[BOTH SPEAK AT ONCE]
STEVE HECT:
See the final product.
STACY HECT:
Really an ingenious system.
RON HAZELTON:
It's all set up now for your child gate. Speaking of child, here's a little something for the — the new one.
STACY HECT:
Oh, my goodness, as if this wasn't present enough.
[BOTH SPEAK AT ONCE]
RON HAZELTON:
A Welcome Baby present, yeah.
STACY HECT:
My goodness.
RON HAZELTON:
Well, congratulations, Steve and Stacy. You know, there are so many reasons to improve our homes and safety, especially child safety is one of the most important. But isn't it great when a project like this one not only protects children but also makes the space look so much more attractive.