How to Build up Large Crown Molding by Stacking Trim
Construct elaborate crown molding by building up layers of inexpensive trim.
Layer inexpensive stock wood trim to build up stacked crown molding that costs less than one-piece crown molding, but looks as good. How to construct an elegant crown molding profile using a compound-miter saw, construction adhesive and a nail gun.
Read More
Create the Crown Molding Profile
Mockup a short length of crown molding, layering stock baseboard and ready-made crown molding to the desired weight and profile. Test on the ceiling.

Locate and Mark Ceiling Joists and Wall Studs
Use a stud sensor to locate ceiling joists and wall studs. Mark their locations with a faint pencil line and then painter’s masking tape.

Cut the Baseboard and Molding Stock
Use a compound miter saw to cut 45 degree miters on the ends of the baseboards that will be installed on the ceiling.

Join Sections of Baseboard Using Scarf Joints
Join sections of wood trim by cutting 45 degree bevels on the ends then overlapping the miters to create a scarf joint. Nail through the scarf joint to lock together both pieces of trim.

Attach the Baseboards to Ceiling and Walls
Place the baseboard on the ceiling first, securing it with construction adhesive and nails driven into the ceiling joists. Then, attach baseboards to the wall by nailing them into the studs.

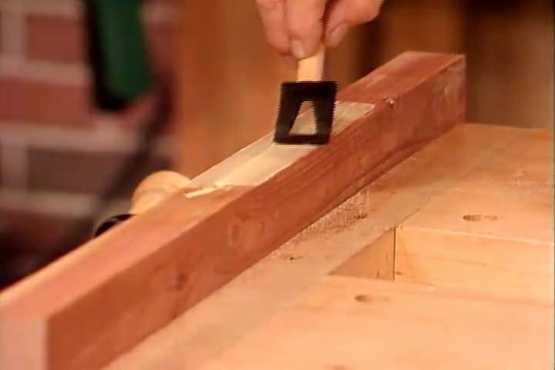
Attach Glue Blocks to Baseboard for Crown Molding Support
Apply construction adhesive to glue blocks, set them in place at each stud location and attach the blocks nails at the corners.

Make Compound Miter Cuts on the Ends of the Crown Molding
Install a crown-stop on the miter saw to hold the crown molding at the correct angle for cutting compound miters

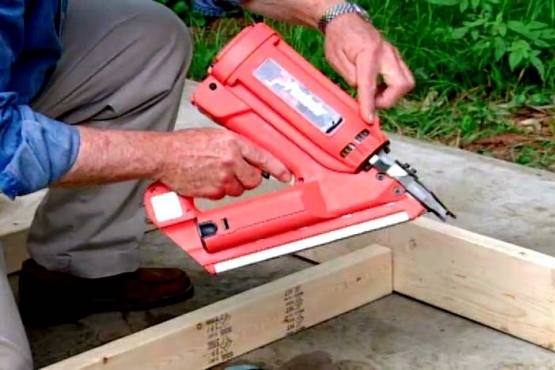
Secure the Crown Molding
Nail twice through the crown molding into each glue block and along the top and bottom edge where it meets the baseboards.

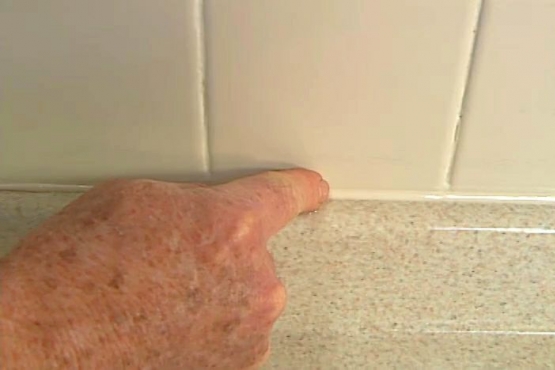
Fill Joints and Nail Holes
Use paintable caulk to seal any gaps where the molding meets the wall. Fill nail holes with spackle. Prime and paint the molding.
Related Tips

Blog Articles

Have You Heard of Landscape Glue?
You love the rustic charm of a gravel walkway, but the constant scattering of stones across your lawn and patio can be a real headache. Whether it’s from pets, lawn mowers, or just foot traffic, it seems impossible to keep those stones in place. Sound familiar? Well, Brian shows us a simple DIY method using landscape glue to keep your gravel path looking pristine and, more importantly, in place.

How to Remove Candle Wax Drips: Two Effective Methods
Candles create a warm and inviting atmosphere, but those pesky wax drips can be a real headache. Luckily, Brian shows us a couple of effective methods to tackle this issue, and they involve two very different temperatures: hot and cold. Here, we'll explore two effective methods: one using cold and the other using heat.

Guide to Hanging on Masonry Walls
Ever wondered how to hang that picture frame or shelf on a brick or concrete wall? It can seem daunting, but with the right tools and techniques, it's a straightforward DIY project. This guide breaks down two common methods: using concrete screws and using anchors, making it easy for you to tackle your next hanging project.


