RH: My last house call in the great state of Texas takes me to Longview where Laura Leaver has asked me to give her outdated interior doors a make over. Hey, Laura!
LL: Hi, Ron! How are you?
RH: Very good. Thank you very much. Laura has an entire house full of plain Jane doors. Today though we’re going to tackle the ones in her hallway. So these are the doors?
LL: These are the ones.
RH: Okay. What were you thinking?
LL: Well, I wanted to update them a little bit. They’re looking a little ‘70s. I was thinking I like the look of the panel doors and springboard a little more updated looking.
RH: All right, so you were thinking maybe of applying molding to these doors?
LL: Right.
RH: That’s a great idea because we can make these look like panel doors for a fraction of what it would cost to actually replace them.
LL: Great!
RH: So, why don’t we start by taking the down and taking them outside. You got a screwdriver?
LL: I sure do.
RH: I’ll go in here and we’ll start . . . After we remove the doors from the hinges we carry them outside to our work area. Now this kind of project is best done with the door laying flat at a comfortable work height. Our next step is to remove all the hardware, screws, hinges and door latch. The plan is to apply two rectangles of molding to the face of the door. Simple enough, if we choose the right molding and put it in the right place. So this is the molding you picked out?
LL: Yes.
RH: You like this one?
LL: The one I like the best.
RH: I think it’s a good choice. It’s thick enough to give you the illusion of a recessed panel which is what we want but, I want you to be absolutely sure. So, what I’m going to do is we’re going to stick this up on the door temporarily. Here take some tape. Just roll with the sticky side out like this. We attach three pieces of the molding Laura has chosen then stand the door upright so she can get a better idea of how it will actually look in place.
LL: Yeah, it looks great. I like the way it looks on the door and everything. It looks great.
RH: Now we’re going to go for placement. All right? I’m thinking you kind of liked where those were.
LL: Right.
RH: Maybe something between five and six inches down from the top. Again, you can just lay this down . . . Laura decides on five inches so we set a combination square at five inches and draw a line across the top of the door. Laura finishes drawing as I start placing strips of wide masking tape along the lines to simulate the molding. It helps to be neat here so we trim the overlapping ends to creat a mitered effect. Now what we’re looking for is proportion and placement of the molding. If something looks too high, too low, too narrow, too wide.
LL: It looks just right.
RH: What about the bottom?
LL: It looks just right. You can’t tell that is two inches larger than the top so the placement is just perfect.
RH: One of the first things we’re going to do is take some molding that I’ve cut slightly over sized, a little bit longer than we actually need. This is the piece for the bottom right here. We’re going to cut an angle off one end with the miter box. It’s an inexpensive plastic one but, it has a really nice feature. These cams or pegs which go in the holes here in the bottom. They kind of hold this in place.
LL: Kind of secure it.
RH: Now that we’ve decided which molding to use and where it should be placed it’s time to cut some wood. We’re just going to cut this end off right here.
LL: Okay.
RH: Laura wants this to be a hands on project so she takes over and makes the next few cuts. Perfect.
LL: Good.
RH: Okay. Here’s the important part now. We have to make four of these with miters on both ends that are exactly the same length. One, two, three and four.
LL: Okay.
RH: Here’s how we’re going to do it. From the pointed end right there we’re going to measure down 24 inches. We’re going to lay this in the miter box. We’re going to drop the saw in sort of temporarily here. Now what I’d like you to do is to line up the saw with that mark right there. Okay?
LL: Okay.
RH: Under this end we’ll install the stop block. We want the end of the molding to touch this block right here just like that. Adjustable C clamps will hold our stop block in place. All we have to do is slip in a piece of molding, insert the pins and cut away. Pretty much. Good. You’re through. Okay?
LL: Great!
RH: Very nice. Of course this will go right up here or right down here and no matter how many of these we cut using this system right here they’re all going to be exactly the same size.
LL: Great.
RH: So let’s cut the rest of these for the door.
LL: Okay.
RH: Okay, Laura, let’s just do a test fit here now. Let’s line it up on the outside edge of the tape. Okay. It looks pretty good. Pretty good fit?
LL: It’s great.
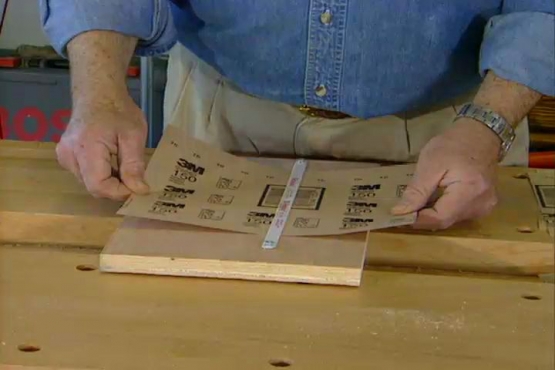
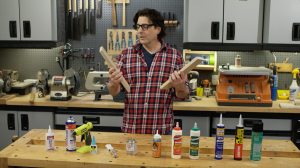
RH: Now it’s time to do a little light sanding. Laura wants to brighten up her doors by painting them in off white. The sanding will give the new paint a better grip. If we repaint the door before we attach the molding we can use a short nap roller and cover the surface very quickly. It’s also easier and faster to pre paint the individual pieces of molding before applying them. Okay. Well, we’ve laid out those original marks that we had very, very faintly because now of course we’re on a painted surface here. Now we can begin putting this molding down. Laura and I begin attaching the molding by first applying glue to the back of the pieces and then pressing them firmly onto the face of the door. We do the upper section or top panel first. Next we insert small brads or headless nails into the end of a tool called a brad pusher. As pressure is applied to the handle the tiny brad is forced through the molding and into the face of the door holding the trim work in place until the glue dries. With the upper panel complete we move on to the bottom one repeating the gluing and nailing process. It’s time now to reinstall the hardware. If the finish wasn’t in such good shape we might think about replacing the hinges and latch set but, that wont be necessary. So, what do you think?
LL: It looks beautiful. It’s exactly the look that I wanted.
RH: Isn’t it nice?
LL: It looks great. Totally brightens everything.
RH: Brightens it. Makes the hallway look wider to me even and adds a lot of very interesting detail. Boy, this is one of those times when seeing a before picture than comparing it with the end result makes quite an impression.


