RON HAZELTON:
Well, today I'm headed out to Studio City, California. I'm going to be visiting Steve Ledew. Now Steve loves to enter sweepstakes and contests. What he lacks is a good mailbox to handle the huge volume of mail he receives every day, so we're going to build one.
Now is this typical of the amount of mail you get every day?
STEVE LEDEW:
Actually, it's lighter than normal. I get so much mail because I enter all those sweepstakes and contests.
RON HAZELTON:
What I think we should do here, Steve, is design a custom mailbox for two reasons. First of all, I want to make sure your new mailbox is large enough to handle both the size and the volume of mail that you're getting, okay.
So when it gets to be that big, I think we want to build it so that it kind of blends in with your house.
STEVE LEDEW:
Great —
RON HAZELTON:
Together, Steve and I design a wall-mounted mailbox. We'll craft it from solid wood and it will consist of two main parts — a frame and a bin. The bin will sit inside the frame and be hinged at the bottom so that it can open and close.
Have you used a table saw much, before?
STEVE LEDEW:
When I was in wood shop a long time ago. That's the last time I used —
RON HAZELTON:
Since this project will require accurate crosscuts on the table saw, I decide to construct a simple accessory, called a cradle. It's a sort of wooden sled that will allow us the easily hold the wood in position as we cut.
We start with strips of wood called runners —small pieces of double-sided carpet tape and a bead of glue are placed on one side. Then the runners are set into the table saw grooves, glue side up.
This is going to be the bottom of our cradle right here. Just a piece of plywood. So if you could take that edge over there —
Steve and I place the plywood down on the runners.
Set this down so that the front edge of the plywood is just about even with the front of those sticks there.
The doubles-tick tape acts as a temporary clamp, holding the runners to the bottom of the plywood. Then we turn the plywood over.
And there's our rails. Now that positions the rails exactly where we want them.
STEVE LEDEW:
Okay.
RON HAZELTON:
Now we nail the runners in place. Next, we flip the cradle back over for a quick test. I turn on the saw and raise the blade so that it cuts through the center of the cradle. I stop the cut a few inches from the end.
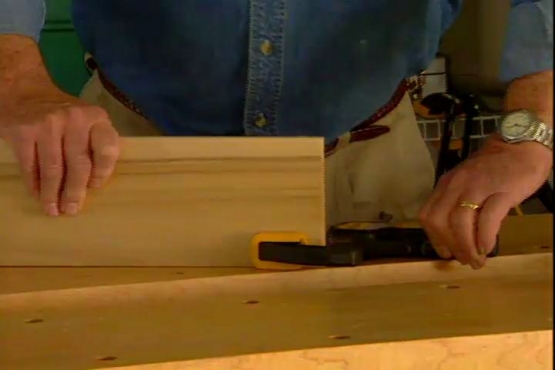
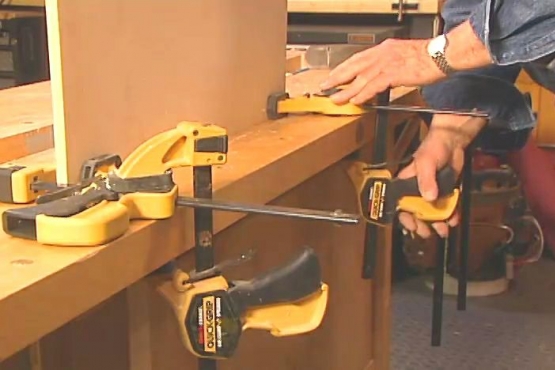
Next, we apply glue to the edge of a 1 x 3. Set the wood on the rear edge of the plywood, use a framing square to make sure it's perfectly perpendicular to the saw blade and clamp it in position.
So Steve, if you'd grab that piece of 1 x 3 over there.
STEVE LEDEW:
All right.
RON HAZELTON:
And let me just turn this up on edge.
Carefully, we turn the cradle over and secure the fence with finish nails. Finally, we place a second fence on the front of the cradle.
It's a good warm-up for the mailbox, huh?
STEVE LEDEW:
Yeah [LAUGHS].
RON HAZELTON:
It's going to be a piece of cake by the time we get to that. All right, so let's just try this out, Steve.
STEVE LEDEW:
Okay.
RON HAZELTON:
Lay the board up against this edge, step on the saw. Hold both sides — this gives us a very accurate cut and a lot of control, so we're going to use this a lot this afternoon.
STEVE LEDEW:
All right.
RON HAZELTON:
All right. This is something I made up to, to go with our saw cradle right here. This is called — I call it a stop block —
This attachment can be clamped anywhere along the rear edge of the fence and once in place, will enable us to duplicate pieces of lumber, cut to exactly the same length.
Ready to cut?
STEVE LEDEW:
Yes.
[MUSIC]
RON HAZELTON:
Now this is one of the sides to your mailbox. What we're going to do is we're going to cut this corner off right here, just a sort of a detail.
As we see, the rear fence of the table saw cradle can be used to make very accurate straight cuts. By temporarily attaching an auxiliary fence, the cradle can also be used to make very precise angle cuts.
That's good. [SAWING SOUNDS]
Now if we've done this right, these should be just about perfect matches, huh?
STEVE LEDEW:
Looks exact.
RON HAZELTON:
With all of our pieces cut, we can begin to assemble our mailbox, starting with the frame. The L-shaped top and bottom sections are made up of two pieces of wood. Steve brushes water-resistant glue along the edge of one board. I hold the second board in place as Steve attaches them with nails.
So here's our top, okay. Here's our bottom. And these are the sides that we cut earlier.
Next, we attach the ends to the top and bottom of the mailbox, and our frame assembly is complete.
Well, I've been sanding off our frame right here. Steve's been over, cutting out the —the last few remaining pieces actually and those are for the bin that's going to go inside this area right here.
STEVE LEDEW:
And here they are.
RON HAZELTON:
Good job. Very nice job, okay. So this is the bottom, this is the front of the bin right here and this is the back. This is where your mail's actually going to go right here. And this unit right here is going to fit inside that opening right here.
Again, we use glue and nails to attach the sections of the bin together.
My thought is, this is the bin that's going to hold your mail, that we hinge this on the bottom so it will, it will flip out this way.
We attach the bin to the frame with a piano hinge. While Steve holds the hinge in position, I install the screws. With the mailbox complete, I plane down the edge of the bin to insure a smooth opening and closing.
Well, here's our handle which we made out of just a scrap piece of that redwood.
STEVE LEDEW:
That looks nice.
RON HAZELTON:
Clamp the handle in place then drive in the screws from the inside of the bin. Since it's a tight fit for the drill, we use a drill bit extension to give us a better angle. Finally, we install an address frame and house numbers with a bit of clear silicone.
All right, we did it.
Steve has decided he wants the top of his mailbox right here and I've drawn a level line. So we're going to go ahead now and start to mount this. The first thing we want to do, Steve, is to drill some clearance holes. Now what we want to do is transfer the location of these holes up here in the wall.
I hold the mailbox on the level line and center it. Then Steve passes a small masonry bit through the mailbox holes and marks their location on the stucco. Next, we enlarge the holes with a bigger masonry bit and hammer in plastic anchors.
We put the mailbox up and install pan-head screws through the mailbox and into the anchors. Finally, Steve applies a coat of exterior house paint. All he has to do now is wait for those lucky sweepstakes forms to arrive.
Big difference from this to this.
STEVE LEDEW:
Very big difference. I love the way it looks and it, it will actually hold all of my mail. That's the best part about it too.
RON HAZELTON:
Whether Steve's new mailbox brings him good fortune or not, I'm sure he'll feel like a winner whenever he opens it, knowing that it didn't just come from a store, but from his own two hands.


