RON HAZELTON:
Today, I’m on my way to visit Phil and Arlene Safier in Albuquerque, New Mexico. They call themselves two old hippies and run an Internet business from their home. But it's not their home office that needs help, it's their guest bedroom — two rubber un attractive closet doors break up the wall, so the Safiers would like to replace them with doors that double as display cases and I'm going to help.
ARLENE:
It's so nice to meet you.
RON HAZELTON:
Oh, thank you.
ARLENE:
Come on into the house.
RON HAZELTON:
I've drawn up some plans for the project and go over them with Phil and Arlene.
This is what I had in mind here. This is essentially a case or box, if you want to think of it that way, with shelves that we'll put in here. And we can space those shelves any way you guys want them, depending on what you're going to put in there. Now this will be just about the same size as your door. We're going to take the door out and then we're going to place this in the opening, on hinges, so it will swing out.
And then to make it a little bit more decorative and also to hide this joint here, I want to put on some decorative moldings like these fluted moldings, put some corner blocks up here, alright? So what I want to do now is, is set up sort of a temporary shop in your garage because we're going to have to do some cutting here.
We're about to cut strips of plywood that will be used to make up the sides, top, bottom and the shelves of our units. Each piece will be five and one half inches wide.
Now this is the stuff we're going to make your bookcases or cabinets from. This is three-quarter-inch-thick birch veneer plywood. It's the best material for the sides and the shelves. We'll use something else for the back.
After measuring and marking the plywood, we attach a self-clamping straight edge. Running the base of the circular saw along the straight edge will guarantee a perfectly straight cut. After cutting several strips to width, we move on to the chop saw to cut them to length.
In almost any cabinet-making project, you end up having to cut a number of pieces of wood to the same length, and we're going to be working on the shelves right now. We need several of those at 21-and-a-half inches. Now we could measure and mark each one of those but you're always going to get some error when you do that.
So we're going to measure once and then we're going to cut a number of these, as many as we need, without measuring again.
To make these consistent cuts, we attach a wood block called a workstop, 21-and-a-half inches from the saw blade, the length of the shelves. When the wood contacts the workstop, Phil lowers the saw.
ARLENE:
Okay.
RON HAZELTON:
And he and Arlene take turns cutting the shelves. [SAWING SOUNDS] With all the shelves cut, we next cut the two side panels to length.
PHIL:
Right in, another side.
RON HAZELTON:
Now it's time for assembly.
And then over here, I've done something which will help us assemble the corners. I've just stacked up some blocks here, nailed them together so that when we get ready to attach it, which we'll be doing in just a second, this will kind of help us sort of orient everything in the right position.
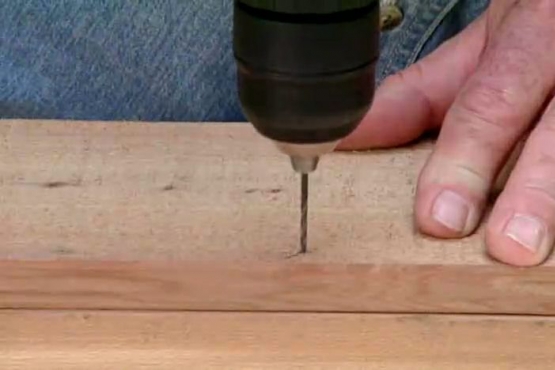
Arlene begins the assembly process by drilling pilot holes through the top panel of the display case. Next, Phil runs a bead of glue right over the pilot holes. We press the top panel to the side panels using our assembly blocks and then secure them with screws.
We repeat the process with the bottom panel and now we're ready to move onto the shelves.
I've asked you guys to bring down some of the typical things you're going to have on here 'cause now is the point where we have to decide what our shelf spacing is going to be. So what we can do is kind of temporarily lay a shelf in here. And Arlene, just see if some of that's going to fit. And if it doesn't, then just move that shelf down or up.
ARLENE:
All right, I'm going to move this down —
[BOTH SPEAK AT ONCE]
RON HAZELTON:
— more room in there, okay.
ARLENE:
And I think it should have some space above and below, okay?
PHIL:
Move that one down and see how that looks.
ARLENE:
All right. That feels about right, but I would like to see it with just four shelves if we can to see —
[BOTH SPEAK AT ONCE]
RON HAZELTON:
Okay.
PHIL:
I'm going to take this one out.
ARLENE:
Okay. I think I agree. I'll move these down.
PHIL:
Actually — I like that better actually.
ARLENE:
I think I do too.
RON HAZELTON:
Four shelves. Well, that will make it easy.
I use a combination square to mark the final position of the shelves. Then we run a bead of glue over the ends and attach them with screws.
Now we're going to put one more board in right down here. This is actually not a shelf, it's more like a false bottom. And what it's going to do is give us a surface to which we'll attach a piece of trim later on. So the same idea. Put some glue on the ends right here.
ARLENE:
Okay.
RON HAZELTON:
Put it in place and screw it in position. Now all of our shelves are in, so now it's time to put the back on. If you guys would lay a bead of glue all the way around the outside and across the back of the shelves —
ARLENE:
Okay. I like doing that.
PHIL:
Here we go.
RON HAZELTON:
I think Phil's got a future in cake decorating. I really do. Just drop that right on —
The back of the bookcase is put in place and secured with an air-powered stapler. We've transferred the shelf lines to the back panel so that we can see where to put the staples.
Now we're going to have some fun.
ARLENE:
Good. I'm looking forward —
[BOTH SPEAK AT ONCE]
RON HAZELTON:
We're going to decorate and embellish this basic case here, starting with this fluted molding here and then on the bottom of that, we're going to place what's called a plinth block. This is supposed to simulate a column and this would be the base of the column.
And then across the bottom, I want to add something like this. This is a baseboard. Remember when we put this extra shelf in earlier?
ARLENE:
Right.
RON HAZELTON:
That's so we can support both sides of this. So this will go on here. So let's start down here at the bottom and then work our way up to the top, okay?
We attach the plinth block and the rest of the molding with a combination of glue and nails. We've also decided to add wooden rosettes to the top corners. These decorative moldings are only attached to one side of the case. A matching set will be attached later, but not to the case. Rather to the bedroom wall and the hinged side of the door in order to allow the case to open and close without binding.
Now to create a lip for the shelves, we attach narrow strips of wood along each front edge. While Phil and Arlene assembly the second display case, I move up to the bedroom to remove the old closet doors. I use a utility knife to cut through the paint and caulk at the edge of the door casing, which also has to be removed.
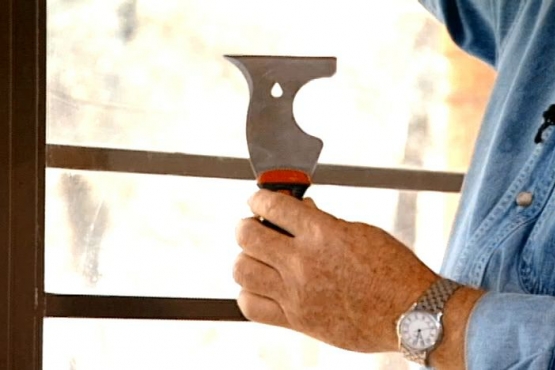
A putty knife slipped behind the casing, protects the wallboard while I use a flat bar to pry the casing off. I also use a pry bar to remove the old doorstop.
ARLENE:
Boy, you've been busy.
RON HAZELTON:
I have been busy up here. Well, here's the problem. Not a problem but it's just a situation. We took off the casing around the door because we had to have that flat. Now what we're left with is this kind of ugly joint here and this unfinished wallboard.
So, I want to put this flat molding on here, and you came just in time.
Arlene attaches the molding with a nail gun. After giving it a coat of paint, we're ready to install our first display case.
Right, let's stop — just a second here, Phil — done a couple of things. I have extended some lines around onto the casing here of this trim we put up earlier, showing the location of the old hinge mortise. And I've put a couple of pieces of plywood down here, thin to act as shims. I want to get this up off the carpet, okay.
So just bring it in, lift it up, tip it forward on top of the shims.
We rest the bookcase on the shims and I transfer the hinge marks from the door casing to the shelving unit. We lay the bookcase on the floor and Phil attaches the hinges. Then we hang the door. Once it's in place, Arlene completes the job by nailing the remaining decorative moldings, plinth blocks and rosettes to the wall.
Hey, guys it turned out really nice. You know, we started this morning with a couple of plain closet doors. And now you've got a closet gallery.
PHIL:
It looks great, Ron.
RON HAZELTON:
A swinging exhibit, I think we'll call it that.
The doors dress up the Safier's guest room without sacrificing space. They're practical and dramatic. Sort of like something out of an old movie where bookcases move to reveal secret chambers. Even if this chamber is just for clothes it's one guests will never forget.


